
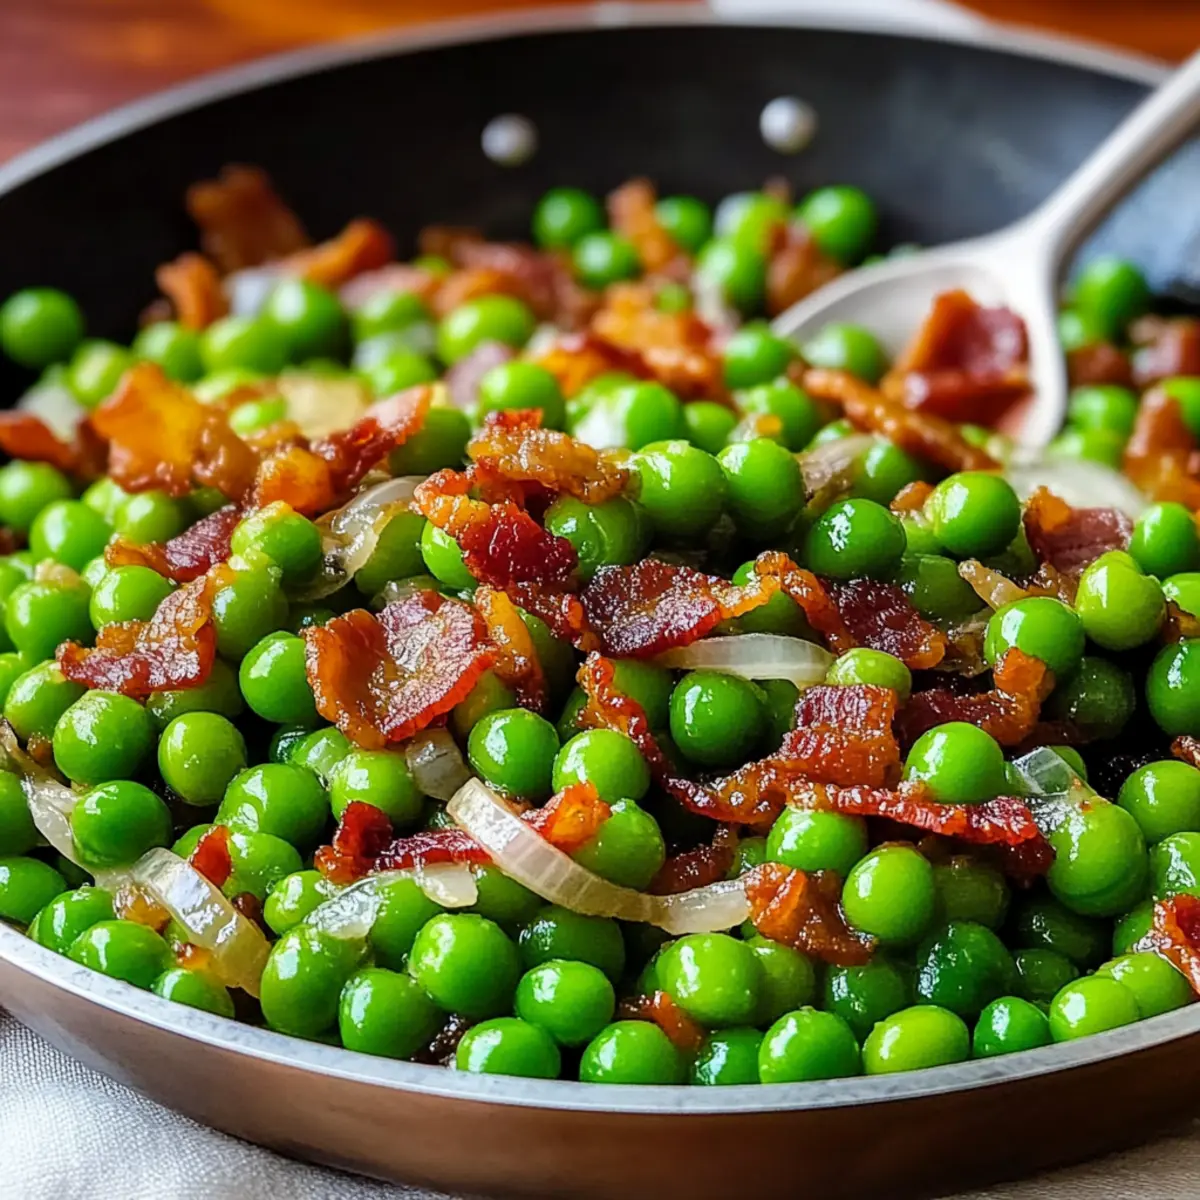
Amid the rush of everyday life, have you ever found yourself craving a side dish that strikes the perfect balance between quick and delicious? Enter my Crisp-Tender Garden Peas with Smoky Bacon & Caramelized Onions! This easy side dish celebrates the delightful contrast of earthy peas paired with crispy bacon and sweet, tender onions. In just under 20 minutes, you can elevate a simple vegetable into a gourmet experience right in your kitchen. It’s not only gluten-free, making it an ideal choice for various dietary needs, but it also transforms the dinner table into a colorful feast that even the pickiest eaters will adore. Ready to discover how to whip up this quick preparation that will steal the show at your next meal? Let’s dive in!
Why are garden peas so delicious?
Quickly prepared: In under 20 minutes, this dish transforms simple garden peas into a flavorful side that’s perfect for busy weeknights.
Flavor explosion: The combination of crispy bacon, sweet onions, and earthy peas creates an irresistible medley that pleases every palate.
Diet-friendly: Naturally gluten-free, it fits into a variety of dietary preferences, making it a versatile choice for family dinners.
Crowd-pleaser: Even the pickiest eaters will fall in love with these garden peas—it’s a guaranteed hit at your table! Pair it with Apple Cider Potatoes for a complete meal experience.
Garden Peas with Crispy Bacon & Onions Ingredients
For the Dish
- Bacon – Adds savory flavor and crispy texture; substitute turkey bacon for a lighter dish.
- Yellow Onion – Provides natural sweetness to enhance the flavor; shallots work well for a milder taste.
- Frozen Green Peas – The star ingredient for convenience and quality; fresh peas can be used but may require longer cooking time.
- Butter (optional) – Enriches the dish if bacon fat is insufficient; olive oil is a lighter alternative.
- Salt – Enhances the overall flavor; adjust according to the bacon’s saltiness.
- Black Pepper – Adds seasoning and heat; use freshly ground for the best flavor.
- Water or Vegetable Broth (optional) – For steaming the peas if they appear dry during cooking; helps maintain that bright color.
Now that you have everything ready, buckle up for a delightful cooking journey that showcases these vibrant Garden Peas with Crispy Bacon & Onions!
Step‑by‑Step Instructions for Garden Peas with Crispy Bacon & Onions
Step 1: Cook the Bacon
In a large skillet, place the chopped bacon and heat over medium heat for 8-10 minutes. Stir occasionally until the bacon pieces are a deep golden brown and crispy. Use a slotted spoon to transfer the bacon onto a paper towel-lined plate, allowing excess fat to drain while leaving some rendered fat in the skillet for added flavor.
Step 2: Sauté the Onions
With the skillet still on medium heat, add the diced yellow onion to the reserved bacon fat. Sauté for about 5-7 minutes, stirring frequently until the onions turn tender and develop a lovely golden caramelization. This step enhances the sweetness of the onions, complementing the crispy bacon in your Garden Peas with Crispy Bacon & Onions.
Step 3: Add the Peas
Increase the heat to medium-high, then stir in the frozen green peas, ensuring they mix well with the onions and bacon fat. Cook for 3-5 minutes, stirring occasionally until the peas become bright green and heated through. You’ll know they’re ready when they are plump and emit a lovely fresh aroma.
Step 4: Adjust the Moisture
If the mixture appears too dry, add a splash of water or vegetable broth to the skillet. Briefly cover the skillet to steam the peas for another minute or so, which helps retain their vibrant color. Uncover and let any excess moisture evaporate, ensuring a perfect balance for your dish.
Step 5: Finish & Serve
Stir the crispy bacon back into the skillet, and season with salt and freshly cracked black pepper to taste. Mix well to combine all the flavors of your Garden Peas with Crispy Bacon & Onions. Serve immediately for the best texture and flavor, allowing everyone to enjoy the crispy, smoky, and sweet harmony on their plates.
What to Serve with Crisp-Tender Garden Peas with Smoky Bacon & Caramelized Onions
Elevate your meal with the perfect pairings that enhance the vibrant flavors of this comforting side dish.
- Creamy Mashed Potatoes: The smooth texture of mashed potatoes wonderfully balances the crisp-tender peas, creating a satisfying contrast on the plate.
- Pan-Seared Salmon: The rich, buttery flavor of salmon complements the smoky bacon and sweet onions, making for a delightful seafood harmony.
- Grilled Chicken Thighs: Juicy, herb-marinated chicken pairs beautifully with the richness of the dish, creating an irresistible combination of flavors.
For a refreshing twist, consider serving this alongside a Simple Mixed Green Salad tossed with a tangy vinaigrette. The crisp greens and acidity will brighten the flavors of your peas, bacon, and onions!
- Crusty French Bread: Perfect for sopping up the savory juices, crusty bread provides a hearty element to your meal, encouraging endless enjoyment.
- Chardonnay or Pinot Grigio: A chilled glass of these wines enhances the flavors of the duck and bacon, making this side dish even more unforgettable.
- Apple Crumble: For dessert, a warm apple crumble offers a touch of sweetness to balance the richness of the previous courses, leaving diners feeling satisfied.
Garden Peas with Crispy Bacon & Onions Variations
Feel free to get creative and adapt this dish to suit your taste buds, as every twist makes it even more delightful!
-
Fresh Peas: Use fresh shelled peas instead of frozen; just lower the cooking time accordingly for a sweeter crunch.
-
Vegetarian Delight: Swap bacon for olive oil or plant-based butter and add smoked paprika for that essential smoky flavor without meat.
-
Carrot & Peas Medley: Toss in diced carrots or corn for extra color and sweetness, turning your dish into a veggie fiesta.
-
Herb Infusion: Sprinkle in fresh herbs like parsley or mint at the end for a burst of freshness that brightens every bite.
-
Creamy Version: For a richer twist, stir in a splash of cream or a dollop of crème fraîche, adding a luxurious texture.
-
Spicy Kick: Add a pinch of red pepper flakes or a diced jalapeño for a heat level that will elevate your taste experience with a zesty surprise.
-
Nutty Flavor: Mix in a handful of toasted nuts, like pine nuts or walnuts, for a delightful crunch that enhances the dish’s overall texture.
-
Citrus Zing: Finish with a squeeze of fresh lemon juice or a zesting of lemon peel to cut through the richness and add a refreshing brightness to the mix.
As you explore these variations, don’t forget to consider pairing your dish with something lovely, like Parmesan Potato Roses or a cool Cucumber Edamame Salad, to create a meal that’s truly memorable!
Storage Tips for Garden Peas with Crispy Bacon & Onions
Fridge: Store leftovers in an airtight container in the refrigerator for up to 3-4 days to maintain freshness and flavor.
Freezer: If you’d like to freeze, transfer the cooled dish into a freezer-safe container for up to 2 months. Thaw overnight in the fridge before reheating.
Reheating: Gently reheat on the stovetop over low heat, adding a splash of water or broth if needed. This will help restore the dish’s texture and flavor beautifully.
Room Temperature: Avoid leaving the Garden Peas with Crispy Bacon & Onions out at room temperature for more than 2 hours to ensure food safety.
Expert Tips for Garden Peas with Crispy Bacon & Onions
-
Timing is Key: Watch closely to avoid overcooking the peas; they should be vibrant green and slightly tender, providing that satisfying ‘pop’ when bitten.
-
Perfect Bacon Crispness: Ensure your bacon reaches a deep golden brown for maximum flavor. Undercooked bacon won’t achieve that delightful crunch.
-
Onion Sweetness: For caramelized onions, be patient! Cook them over medium heat to develop their natural sweetness without burning.
-
Adjusting Salt Levels: Taste as you go! Since the bacon is salty, start with less salt and adjust gradually to avoid overpowering the dish.
-
Moisture Management: If your peas seem dry, add a splash of water or broth for steaming. Cover briefly to help them cook evenly without becoming mushy.
-
Leftover Magic: If you have extras, store your Garden Peas with Crispy Bacon & Onions in an airtight container and gently reheat to preserve that crunchy texture.
Make Ahead Options
These Garden Peas with Crispy Bacon & Onions are perfect for busy home cooks who want to save time during the week! To prep in advance, you can cook the bacon and slice the onions up to 24 hours ahead of time. Store them separately in airtight containers in the refrigerator to maintain their crispness. When you’re ready to serve, simply reheat the bacon and onions in a skillet over medium heat until crispy and warmed through. Then, add the frozen peas and follow the remaining steps for finishing the dish. Prepping ahead not only saves you valuable time but ensures that your meal is just as delicious when it’s time to enjoy!
Garden Peas with Crispy Bacon & Onions Recipe FAQs
What is the best way to select and store garden peas?
Absolutely! When selecting fresh peas, look for pods that are bright green and firm, with a slight snap when you squeeze. Avoid pods with dark spots or wrinkled textures. If you’re using frozen peas, choose high-quality brands without added sugar or preservatives for the best taste. Store fresh peas in the refrigerator; they are best used within 1-3 days for optimal sweetness and freshness.
How should I store leftovers of Garden Peas with Crispy Bacon & Onions?
To keep your leftover garden peas with crispy bacon & onions fresh, transfer them to an airtight container and store in the refrigerator for up to 3-4 days. For the best results, reheat gently on the stovetop over low heat, adding a splash of water or broth to restore moisture and texture.
Can you freeze Garden Peas with Crispy Bacon & Onions?
Yes, you can freeze this dish! Allow the dish to cool completely, then transfer it to a freezer-safe container. It can be stored in the freezer for up to 2 months. When you’re ready to enjoy it again, thaw overnight in the refrigerator, then gently reheat on the stovetop to bring back its delightful texture.
What if my peas are overcooked?
Very! If your peas end up overcooked and mushy, you can try using them in another way—perhaps as a base for soups or blended into a creamy pea mash. To avoid this in the future, monitor them closely while cooking; they should maintain their vibrant green color and ‘pop’ when bitten.
Is this dish pet-friendly?
It’s essential to be cautious! While garden peas are generally safe for dogs and cats in small amounts, the added bacon and seasoning can be harmful. Always consult your vet regarding specific dietary restrictions for your pets before sharing any human food. If you want to share peas with your pet, consider cooking a portion without bacon or salt for them.
Savory Garden Peas with Crispy Bacon & Onions Bliss
Ingredients
Equipment
Method
- In a large skillet, place the chopped bacon and heat over medium heat for 8-10 minutes. Stir occasionally until the bacon pieces are a deep golden brown and crispy.
- Use a slotted spoon to transfer the bacon onto a paper towel-lined plate, allowing excess fat to drain while leaving some rendered fat in the skillet for added flavor.
- With the skillet still on medium heat, add the diced yellow onion to the reserved bacon fat. Sauté for about 5-7 minutes, stirring frequently until the onions turn tender and develop a lovely golden caramelization.
- Increase the heat to medium-high, then stir in the frozen green peas, ensuring they mix well with the onions and bacon fat. Cook for 3-5 minutes, stirring occasionally.
- If the mixture appears too dry, add a splash of water or vegetable broth to the skillet. Briefly cover the skillet to steam the peas for another minute.
- Stir the crispy bacon back into the skillet, and season with salt and freshly cracked black pepper to taste. Mix well to combine all the flavors.
- Serve immediately for the best texture and flavor.
Leave a Reply