
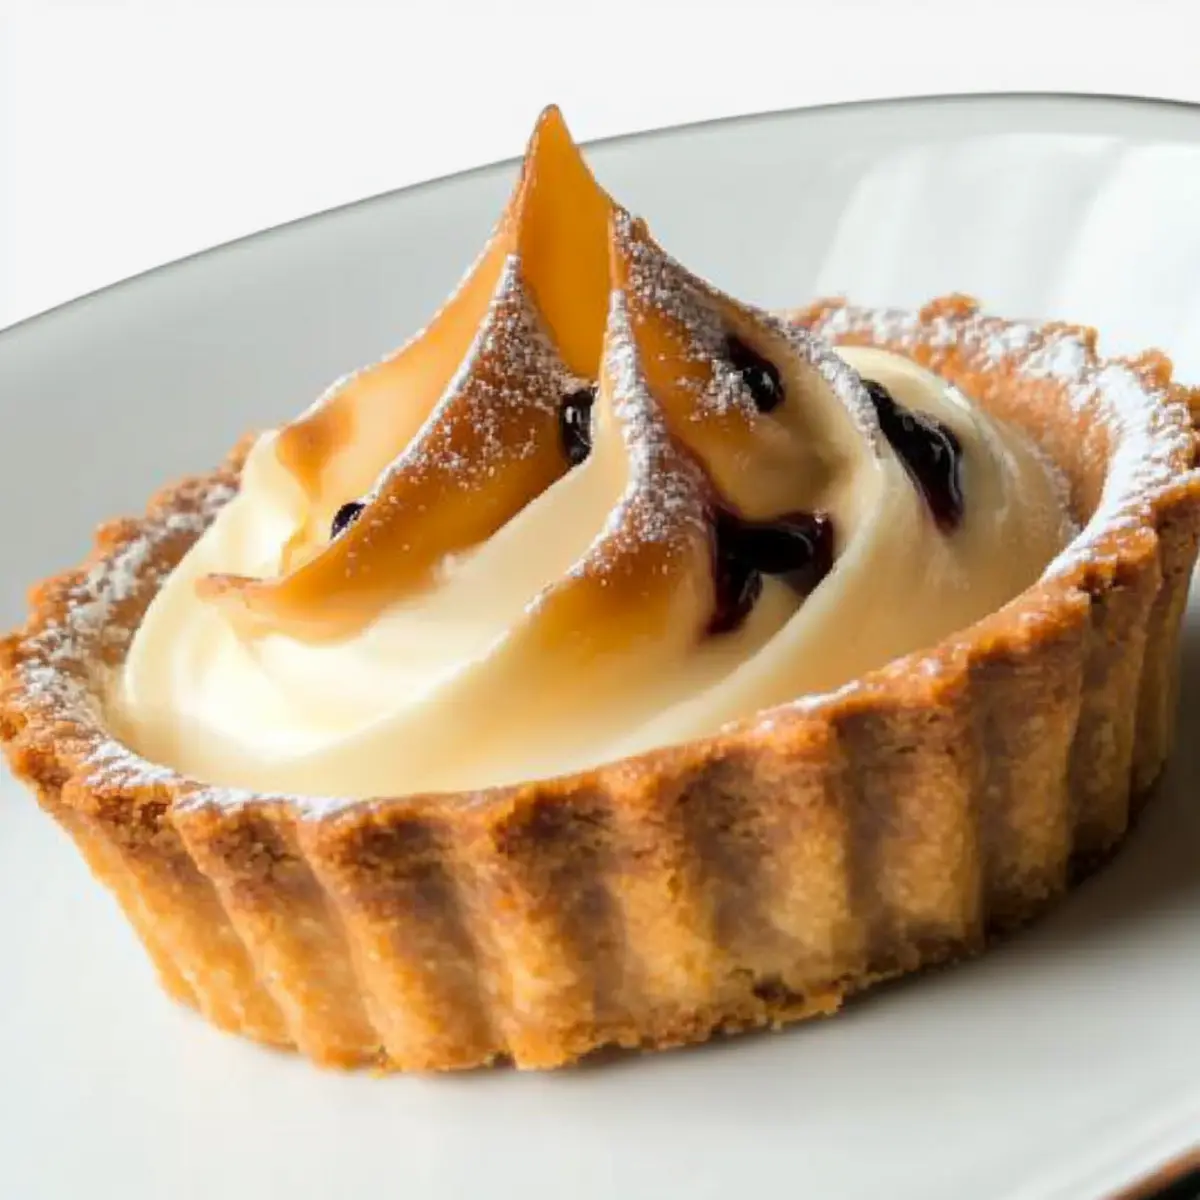
As I dusted off my favorite tart pan, the memory of that blissfully creamy pastry cream swirled with fragrant vanilla beans danced in my mind. There’s something undeniably special about a Decadent Tart with Silky Vanilla Bean Pastry Cream, isn’t there? This recipe is a celebration of simplicity—transforming humble ingredients into a show-stopping dessert that impresses at dinner parties or simply elevates your weekend treat. With quick prep and the option to make the pastry cream ahead of time, it’s perfect for anyone craving a homemade indulgence without the fuss. Each slice delivers that sublime contrast of crisp pastry and velvety filling, inviting you to savor each moment. Curious to discover how this classic French delight comes together? Let’s dive in!
Why is this tart so irresistible?
Luxurious Flavor: The combination of rich vanilla beans and creamy pastry elevates this tart to gourmet status. Crisp Texture: Enjoy the delightful contrast of a perfectly baked, golden crust that crumbles beautifully against the smooth filling. Easy Preparation: With straightforward steps, even novice bakers can create this stunning dessert. Impressive Presentation: Garnish with fresh berries and a dusting of powdered sugar for a visually striking centerpiece. Versatile Treat: Whether for a fancy dinner party or a cozy afternoon snack, this decadent tart is sure to please every palate.
Tart with Silky Vanilla Bean Ingredients
For the Pâte Sucrée
• All-purpose flour – Provides the base for a flaky crust; ensure you measure accurately for best results.
• Powdered sugar – Adds sweetness and a finer texture to the pastry; regular sugar can be used but may alter consistency.
• Cold unsalted butter – Creates a rich flavor and tender texture; the colder, the better for a flaky crust.
• Egg yolk – Adds richness and moisture; using fresh, high-quality eggs enhances the overall flavor.
For the Pastry Cream
• Milk – Acts as the creamy foundation; whole milk is key for that luscious finish, but you can use a dairy alternative if needed.
• Vanilla beans – Infuse an exceptional flavor; you can substitute with 1 tsp of pure vanilla extract for a quicker option.
• Large eggs – Essential for thickening and enriching the cream; always opt for fresh eggs.
• Granulated sugar – Balances the richness of the cream with sweetness; consider using a sugar substitute for a lighter version.
• Heavy cream – Ensures a luxuriously smooth texture; half-and-half can be a lighter alternative but might affect mouthfeel.
For Topping
• Fresh berries – Adds a burst of color and freshness; strawberries, raspberries, and blueberries work beautifully.
• Powdered sugar – For a sweet finishing touch; provides a delicate decorative sprinkle on top.
• Toasted almonds – Offers a delightful crunch and nutty flavor contrast; walnuts or pecans could also be used for a twist.
This tart with silky vanilla bean pastry cream is not just a dessert; it’s a heartfelt experience waiting to happen in your kitchen! Enjoy creating it!
Step‑by‑Step Instructions for Tart with Silky Vanilla Bean
Step 1: Prepare the Pâte Sucrée
In a large mixing bowl, combine all-purpose flour and powdered sugar, then cut in cold, unsalted butter until the mixture resembles coarse crumbs. Add an egg yolk and gently mix until it forms a soft dough. Wrap in plastic wrap and refrigerate for at least 30 minutes, allowing it to firm up and become easier to roll out.
Step 2: Blind Bake the Crust
Preheat your oven to 375°F (190°C). Roll out the chilled pâte sucrée on a lightly floured surface until about ¼ inch thick. Carefully fit the dough into a tart pan, trimming the excess. Prick the bottom with a fork and cover with parchment paper, adding pie weights. Bake for approximately 20 minutes, or until the crust is lightly golden, then remove and let cool.
Step 3: Make the Pastry Cream
In a saucepan, heat whole milk with the scraped seeds from the vanilla beans until just simmering. Meanwhile, whisk together eggs and granulated sugar in a separate bowl until pale and frothy. Slowly temper the egg mixture with the warm milk, whisking constantly to avoid curdling. Return the mixture to the saucepan and cook over medium heat, stirring until thickened, about 5-7 minutes.
Step 4: Cool the Pastry Cream
Once thickened, remove the pastry cream from the heat and transfer it to a clean bowl. Cover the surface with plastic wrap to prevent a film from forming and refrigerate for at least 2 hours, allowing the flavors to meld and the cream to set to a smooth, silky texture for your tart.
Step 5: Assemble the Tart
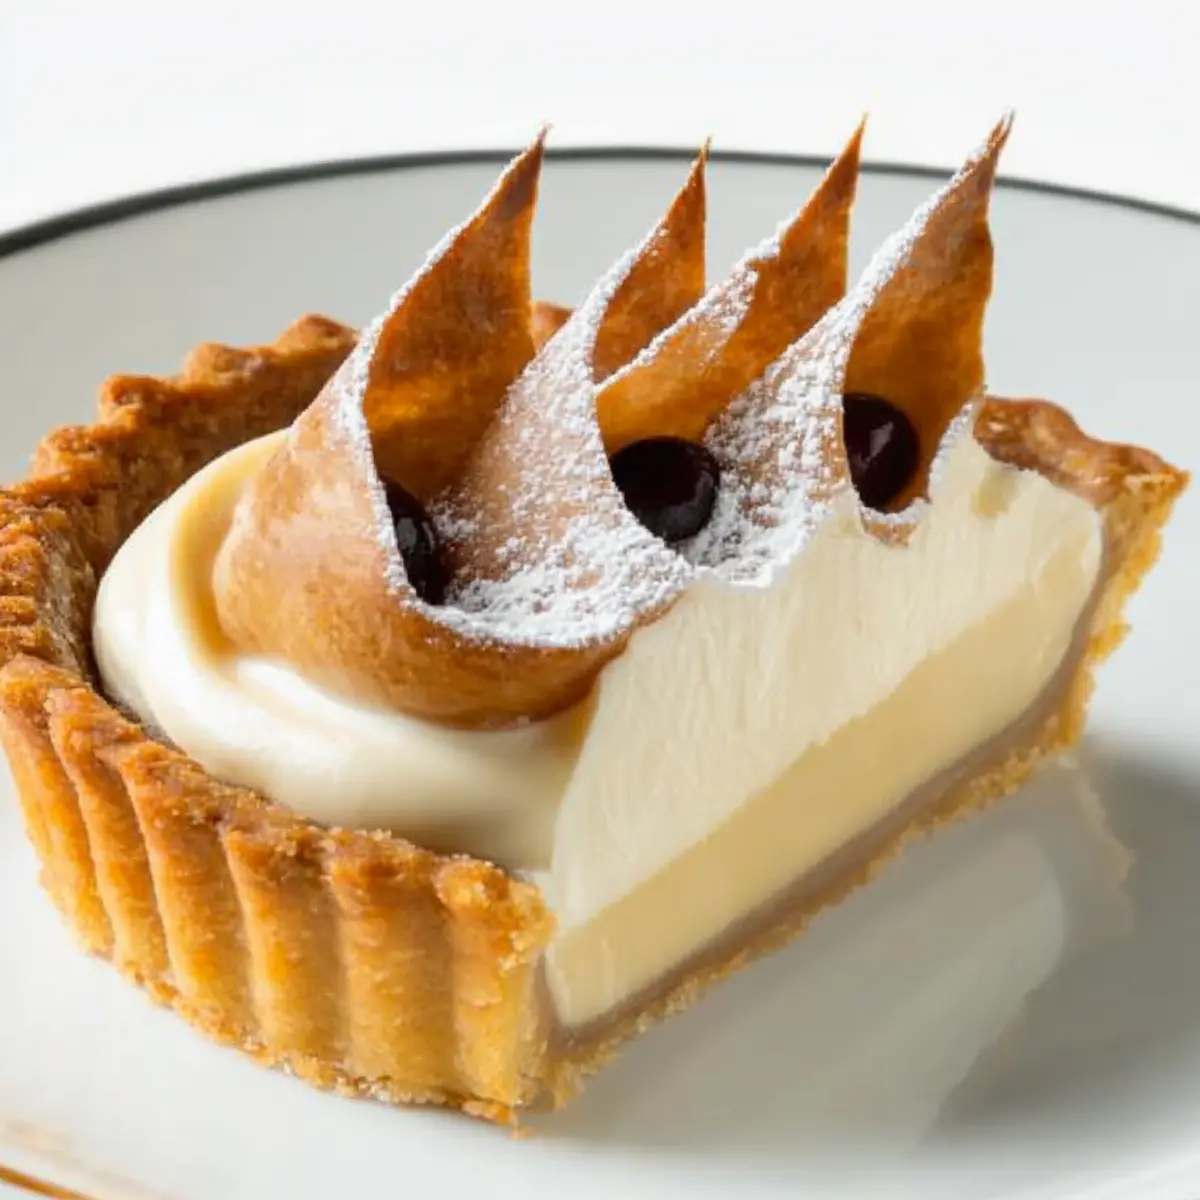
Once cooled, pour the silky vanilla bean pastry cream into the baked tart shell. Use a spatula to gently smooth the top, achieving an even surface that showcases the cream’s luxurious texture. Refrigerate the assembled tart for an additional 30 minutes to help everything meld together beautifully.
Step 6: Garnish and Serve
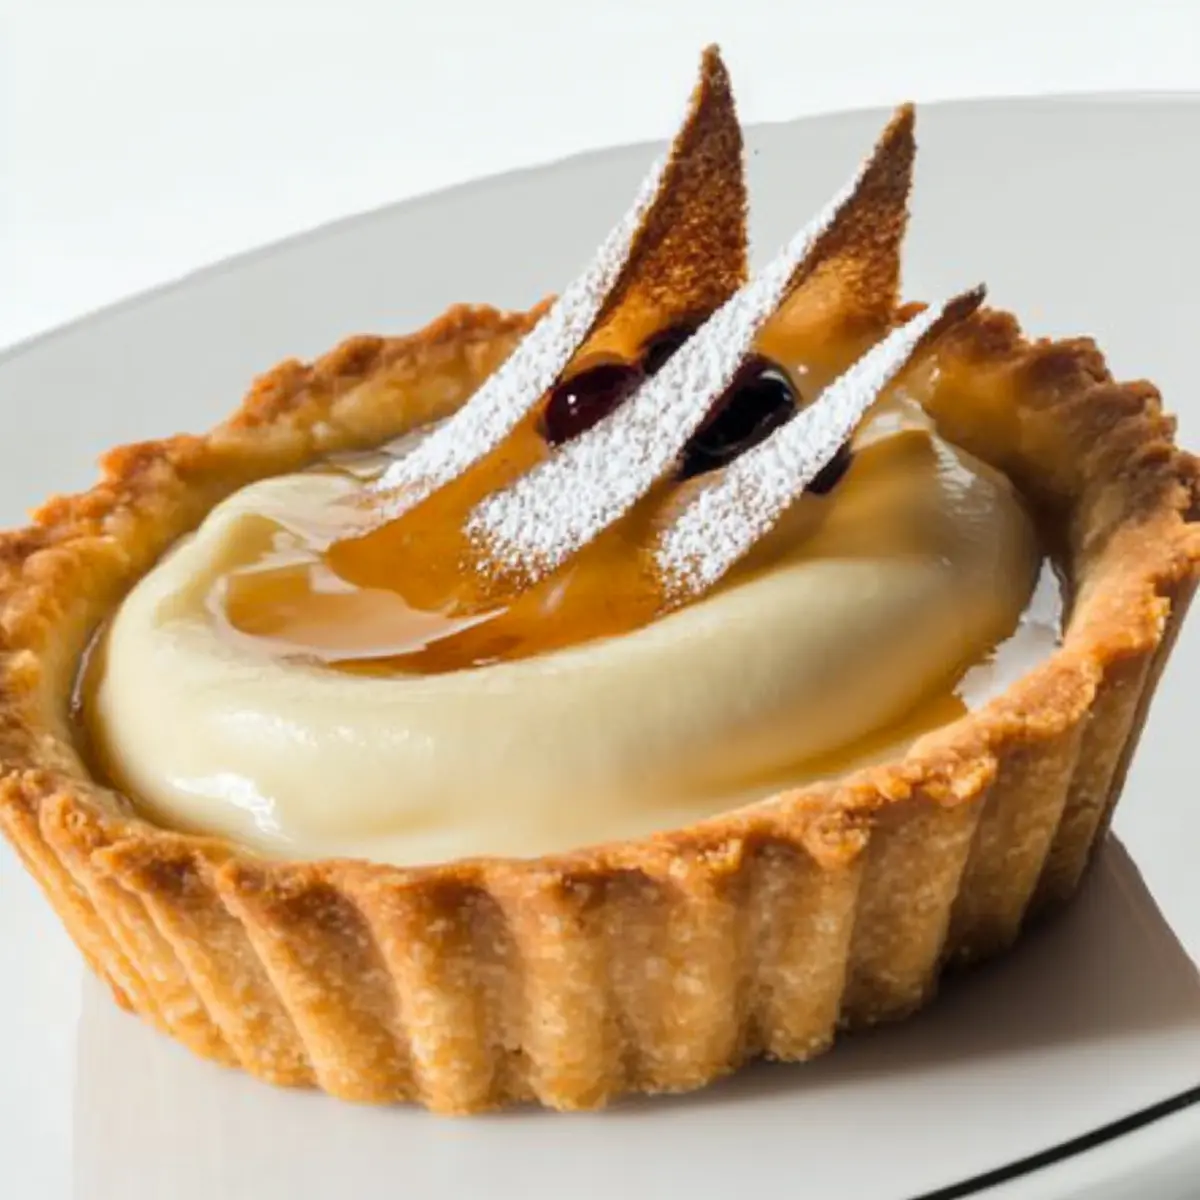
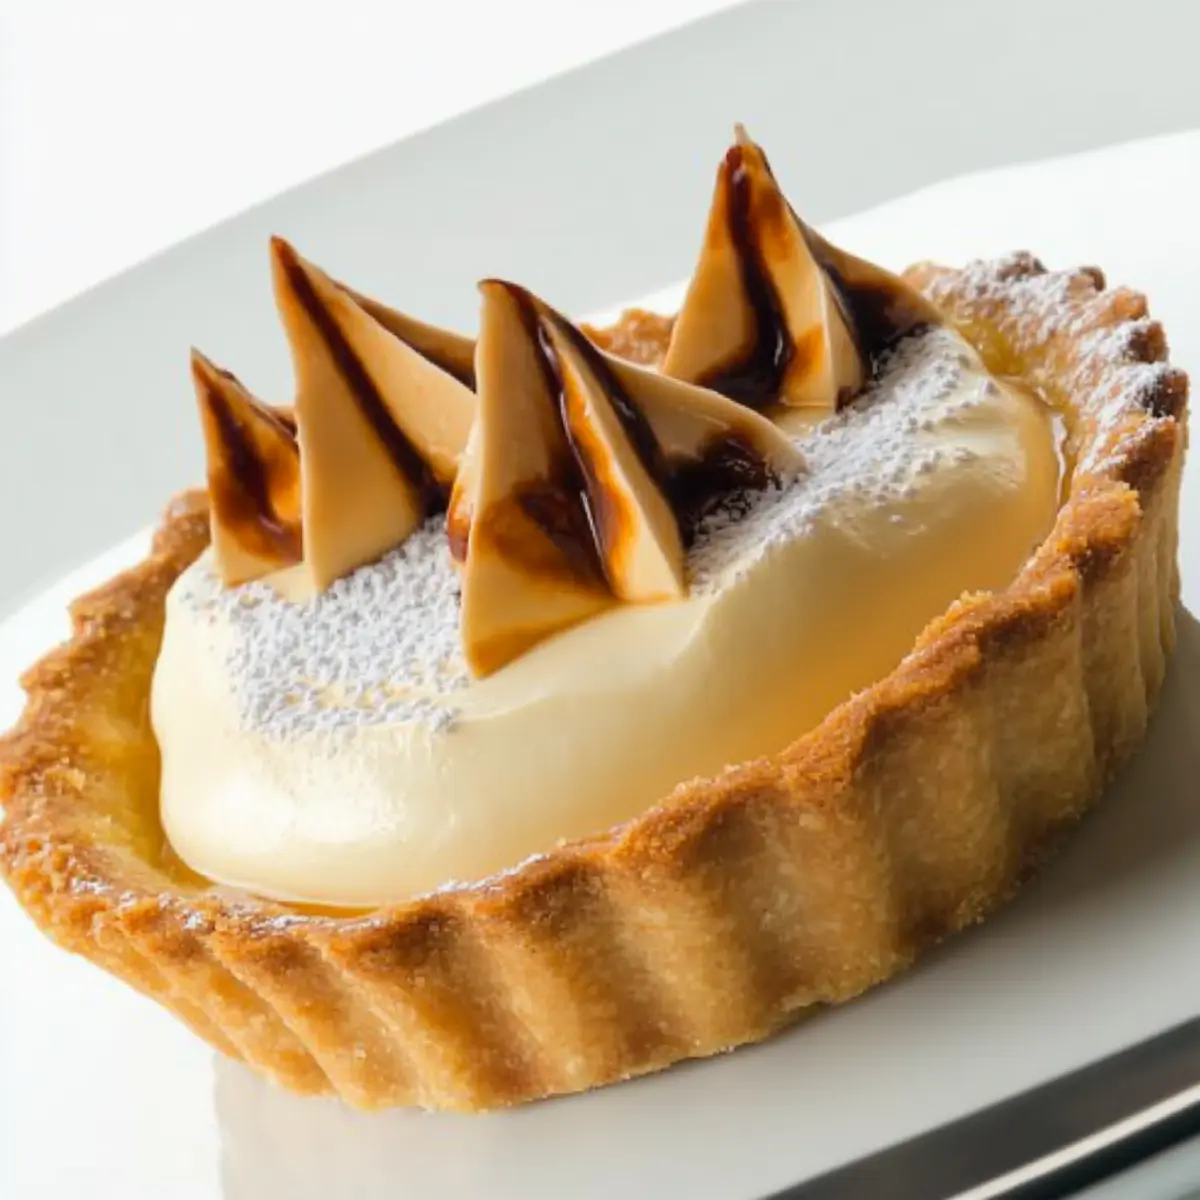
Before serving, adorn your tart with fresh berries for a burst of color and flavor. Dust the top lightly with powdered sugar for a touch of sweetness and sprinkle with toasted almonds for added crunch. Slice and serve, allowing each guest to enjoy the decadence of your Tart with Silky Vanilla Bean.
Tart with Silky Vanilla Bean Variations
Feel free to explore these delightful twists that can add your personal touch to the classic tart, elevating its charm even more!
- Citrus Zest: Incorporate orange or lemon zest into the pastry cream for a bright and refreshing flavor, enhancing the vanilla beautifully.
- Berry Infusion: Swirl in a fruit puree, like raspberry or passion fruit, into the pastry cream for a vibrant color and a tart contrast to the sweetness.
- Nutty Crunch: Add crushed nuts like pistachios or hazelnuts on top for a satisfying crunch that complements the velvety cream. It’s a lovely surprise!
- Chocolate Layer: For chocolate lovers, spread a thin layer of dark chocolate ganache below the pastry cream, introducing a rich depth of flavor.
- Almond Extract: Replace some vanilla with almond extract for an intriguing flavor twist that brings warmth and a hint of nostalgia to each bite.
- Spiced Variation: Add a pinch of cinnamon or nutmeg to the pastry cream for a comforting warmth, perfect for cozy gatherings and festive occasions.
- Caramel Drizzle: Top with homemade or store-bought caramel for an indulgent and sweet accent, enhancing the tart experience with luscious layers.
- Fruit Preserves: A layer of apricot or berry preserves between the crust and pastry cream adds a juicy burst of flavor and a dash of color.
Consider pairing your tart with a light and refreshing dish, like Candied Sweet Potatoes or sipping it with a warm cup of coffee for a moment of pure bliss. Enjoy the creative process!
Expert Tips for Tart with Silky Vanilla Bean
-
Perfect Dough Consistency: Ensure the butter is very cold and cut into the flour until crumbly. Overworking the dough can result in a tough crust.
-
Avoid Curdling: When tempering the eggs, gradually add the hot milk mixture while whisking continuously. This keeps the eggs from cooking too quickly and curdling.
-
Pastry Cream Temperature: Allow the pastry cream to cool completely in the fridge before using it. This helps it set up properly for a slice that holds its shape beautifully.
-
Quality Ingredients Matter: Use high-quality vanilla beans for the most aromatic and flavorful pastry cream. Freshness elevates your tart to a gourmet experience.
-
Storage Tips: After assembling, keep your tart in the refrigerator to maintain its freshness and texture. It’s best enjoyed within two days for optimal flavor and quality.
Make Ahead Options
These Decadent Tarts with Silky Vanilla Bean Pastry Cream are ideal for meal prep, saving you valuable time on busy days! You can prepare the Pâte Sucrée (sweet shortcrust pastry) up to 24 hours in advance; simply roll it out, fit it into the tart pan, and refrigerate. The pastry cream can be made up to 3 days ahead—just ensure it’s covered tightly with plastic wrap to prevent any skin from forming. When you’re ready to serve, pour the chilled pastry cream into the cooled tart shell and refrigerate for an additional 30 minutes to allow the flavors to harmonize. This way, you’ll have a deliciously luxurious dessert ready to impress with minimal effort!
What to Serve with Decadent Tart with Silky Vanilla Bean Pastry Cream
A delightful dessert experience awaits as you pair this creamy indulgence with complementary treats that elevate every bite.
-
Fresh Berries: The bright flavors of strawberries, blueberries, or raspberries add a refreshing burst, balancing the richness of the tart.
-
Whipped Cream: Light and airy, a dollop of fresh whipped cream enhances the silky pastry cream, creating a luxurious mouthfeel.
-
Toasted Almonds: A sprinkle of crunchy toasted almonds on top brings nutty flavor and texture that beautifully contrasts with the creaminess of the tart.
-
Vanilla Ice Cream: A scoop of vanilla ice cream echoes the vanilla bean notes in the tart and adds a rich creaminess to each spoonful.
-
Chocolate Sauce: Add a drizzle of warm chocolate sauce for a decadent twist that pairs wonderfully with the tart’s delicate flavors.
-
Espresso or Coffee: The bold notes of a freshly brewed espresso or coffee provide a perfect counterbalance to the sweetness of the tart, making each bite more enjoyable.
-
Sauternes or Sweet White Wine: A glass of lightly sweet Sauternes enhances the dessert experience, echoing the flavor notes and making it a truly special occasion.
-
Pistachio Crumble: A sprinkle of pistachio crumble adds an unexpected crunch and unique flavor that perfectly complements the tart’s creaminess.
-
Caramel Sauce: Drizzling caramel sauce over the tart introduces a sweet contrast that deepens the flavor profile of this classic French dessert.
Storage Tips for Tart with Silky Vanilla Bean
Fridge: Store your tart loosely covered in the refrigerator for up to 2 days to keep it fresh. This will help maintain the silky texture of the pastry cream.
Freezer: If you plan to freeze the tart, wrap it tightly in plastic wrap and then in aluminum foil. It can be frozen for up to 1 month, but note that the texture may slightly change upon thawing.
Reheating: For best results, serve chilled straight from the fridge, or let it sit at room temperature for about 15 minutes before slicing to enhance flavor. Enjoy the rich layers of your tart with silky vanilla bean pastry cream!
Tart with Silky Vanilla Bean Recipe FAQs
How do I choose the best vanilla beans for this tart?
Absolutely! When selecting vanilla beans, look for ones that are plump and shiny, with a rich aroma. Avoid those that appear dry or have dark spots; they may be past their prime. Freshness is key, as high-quality beans will elevate the flavor of your silky vanilla bean pastry cream.
How should I store the tart after baking?
Very simple! Store your tart loosely covered in the refrigerator for up to 2 days. This helps to keep the crust from getting soggy while maintaining the silky texture of the pastry cream. If you find yourself with leftovers after 2 days, it’s best to freeze the tart to preserve it, but remember, it may change texture upon thawing.
Can I freeze the tart with silky vanilla bean pastry cream?
Certainly! To freeze, wrap the tart tightly in plastic wrap and then in aluminum foil to prevent freezer burn. You can freeze it for up to 1 month. When you’re ready to enjoy it, thaw it in the refrigerator overnight, then let it sit at room temperature for about 15 minutes before slicing. This will help enhance the flavors and texture.
What if my pastry cream curdles while cooking?
Don’t worry; this can happen even to the best of us! If you notice that your pastry cream has curdled, the first step is to strain it through a fine mesh sieve to remove any lumps. If you haven’t thickened it yet, continue to cook at low heat while whisking vigorously, which can help salvage it. Ensure your milk is hot but not boiling when tempering the eggs to avoid this in the future.
Are there any dietary considerations I should be aware of?
Absolutely! This tart contains common allergens such as eggs, milk, and gluten. If you’re making it for someone with dietary restrictions, you might consider using dairy alternatives like almond or oat milk and gluten-free flour options. Always verify individual ingredient labels for allergies, especially with items such as vanilla extract, which can sometimes contain ingredients you’ll want to avoid.
What if I want to make the tart ahead of time?
Very smart planning! You can prepare the pastry cream up to a day in advance. Simply store it covered in the refrigerator to prevent a skin from forming. The pâte sucrée can also be made in advance; just keep it wrapped in plastic wrap and refrigerate it until you’re ready to roll it out. Plus, the assembled tart can sit in the fridge for a couple of hours before serving, allowing the flavors to meld nicely!
Tart with Silky Vanilla Bean: Your New Favorite Dessert
Ingredients
Equipment
Method
- In a large mixing bowl, combine all-purpose flour and powdered sugar, then cut in cold, unsalted butter until resembling coarse crumbs. Add an egg yolk and gently mix until it forms a soft dough. Wrap in plastic wrap and refrigerate for at least 30 minutes.
- Preheat your oven to 375°F (190°C). Roll out the chilled pâte sucrée on a lightly floured surface until about ¼ inch thick. Fit the dough into a tart pan, trim excess, prick the bottom, cover with parchment, and add pie weights. Bake for about 20 minutes, or until lightly golden; let cool.
- In a saucepan, heat whole milk with scraped seeds from vanilla beans until simmering. Whisk together eggs and granulated sugar in a separate bowl until pale. Slowly temper the egg mixture with the warm milk. Return to saucepan, cook over medium heat, stirring until thickened, about 5-7 minutes.
- Once thickened, remove pastry cream from heat and transfer to a clean bowl. Cover with plastic wrap and refrigerate for at least 2 hours to set.
- Pour the silky vanilla bean pastry cream into the baked tart shell, smoothing with a spatula. Refrigerate the assembled tart for an additional 30 minutes.
- Before serving, adorn your tart with fresh berries, dust with powdered sugar, and sprinkle with toasted almonds. Slice and serve.
Leave a Reply