
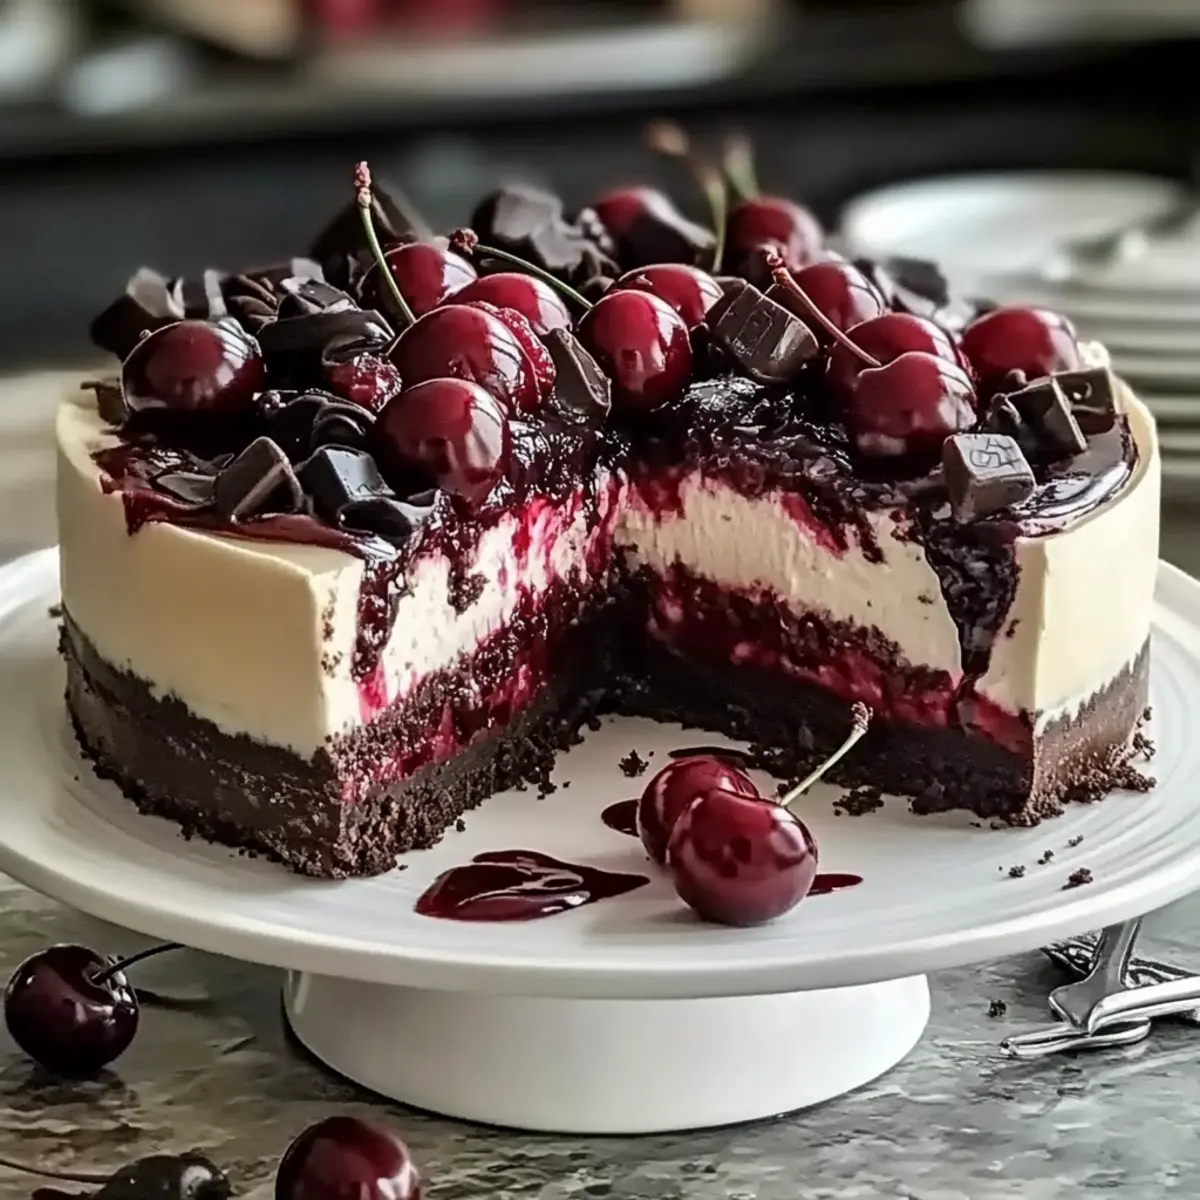
As I stood in my kitchen, the scent of melting chocolate enveloped me like a warm hug, promising a treat unlike any other. This is how I fell in love with my Black Forest Cheesecake—a dessert that effortlessly melds creamy indulgence with the delightful tartness of cherries. With its rich chocolate graham cracker crust and no-bake options, this cheesecake is perfect for those busy days when you crave something special without the fuss. Not only does it come together quickly, but it also makes for an impressive centerpiece on any celebratory table. Trust me when I say this dessert strikes the perfect balance between sweetness and fruitiness, leaving everyone longing for just one more slice. Are you ready to elevate your dessert game? Let’s dive into making this enchanting treat!
Why is this cheesecake a must-have?
Irresistible flavors await you in this Black Forest Cheesecake, where rich chocolate meets tart cherries in perfect harmony. Easy preparation means you spend less time in the kitchen and more time enjoying this delightful dessert. Versatile options allow you to customize your crust with chocolate graham crackers or crushed Oreos. Impressive presentation makes it a showstopper for any occasion, ensuring your guests are wowed. Best of all, you can whip it up as a no-bake option, making it ideal for busy days. If you love cheesecake as much as I do, you won’t want to miss exploring more decadent recipes like the Strawberry Crunch Cheesecake or the exquisite Basque Cheesecake Loaf!
Black Forest Cheesecake Ingredients
For the Crust
• Chocolate Graham Cracker Crumbs or Crushed Oreos – This base provides a rich chocolate flavor; feel free to use gluten-free cookies for a gluten-free version.
• Sugar – Sweetens the crust and cheesecake filling; adjust to taste if desired.
• Melted Butter – Binds the crust together, adding richness; can substitute with coconut oil for a dairy-free option.
For the Cheesecake Filling
• Cream Cheese – The main component for creaminess and structure; full-fat is best, but light cream cheese may alter consistency.
• Granulated Sugar – Sweetens the cheesecake filling; adjust if using sweeter chocolate chips.
• Eggs – Adds structure and moisture; ensure they are at room temperature for better incorporation.
• Vanilla Extract – Enhances flavor; use pure vanilla for best results, although artificial can substitute.
• Sour Cream – Adds smoothness and tanginess; Greek yogurt can work as a substitute.
• Semi-Sweet Chocolate Chips – Provides the primary chocolate flavor; consider dark chocolate for a richer taste, avoiding milk chocolate for balance with cherries.
For the Topping
• Cherry Pie Filling – Adds sweetness and classic Black Forest flavor; consider fresh or homemade filling for a fresher taste.
• Fresh Cherries and Chocolate Shavings – Optional garnishes for added visual appeal and decadence.
Elevate your dessert experience with this Black Forest Cheesecake recipe that brings together indulgence and elegance in every bite!
Step‑by‑Step Instructions for Black Forest Cheesecake
Step 1: Prepare Crust
Preheat your oven to 325°F (160°C). In a mixing bowl, combine 1 and 1/2 cups of chocolate graham cracker crumbs or crushed Oreos with 1/4 cup of sugar and 1/2 cup of melted butter. Stir until well-mixed, then press the mixture firmly into the bottom of a 9-inch springform pan. Bake the crust for 10 minutes until slightly firm, then allow it to cool completely.
Step 2: Make Cheesecake Filling
In a large mixing bowl, beat 16 ounces of softened cream cheese and 1 cup of granulated sugar together until smooth and creamy. Add in 3 large eggs one at a time, mixing thoroughly after each addition. Pour in 1 teaspoon of vanilla extract and 1/2 cup of sour cream, blending until fully incorporated. Gently fold in 1 cup of melted semi-sweet chocolate chips, ensuring a uniform mixture for your Black Forest Cheesecake.
Step 3: Bake Cheesecake
Carefully pour the cheesecake filling over the cooled crust in the springform pan. Bake in the preheated oven for 50-60 minutes, checking for doneness. The center should be set but may still jiggly slightly. Once done, turn off the oven and crack the door open, allowing the cheesecake to cool for 1 hour inside. This step helps prevent any cracks from forming.
Step 4: Chill the Cheesecake
After cooling, transfer the cheesecake to the refrigerator for at least 4 hours, or overnight if possible, to let it firm up and enhance the flavors. As it sets, the texture will become perfectly smooth and creamy, making your Black Forest Cheesecake a delightful indulgence for your taste buds.
Step 5: Add Topping
Once chilled, evenly spread your choice of cherry pie filling over the top of the cheesecake, using a spatula to create an even layer. For an elegant presentation, garnish with fresh cherries and chocolate shavings, adding a pop of color and flair. This finishing touch brings a classic Black Forest flair to your dessert.
Step 6: Serve
When ready to serve, carefully slice the cheesecake with a hot, dry knife for clean edges. Serve each slice chilled and enjoy the delightful combination of creamy chocolate and tart cherries. This Black Forest Cheesecake is sure to impress at any gathering, making it a memorable treat for everyone!
Make Ahead Options
Preparing your Black Forest Cheesecake ahead of time is a fantastic way to save precious minutes on busy days! You can make the crust and cheesecake filling up to 24 hours in advance. Simply prepare the crust and refrigerate it after cooling. After you bake the cheesecake, allow it to cool for one hour in the oven (to prevent cracks), then chill it in the refrigerator for at least 4 hours or overnight. This not only enhances the flavors but ensures that the cheesecake is just as delicious when you serve it. When you’re ready to enjoy, simply top with cherry pie filling and your choice of garnishes, and slice into this decadent treat with ease!
What to Serve with Black Forest Cheesecake
A delightful dessert like this is the perfect centerpiece for a memorable meal; consider these pairings to create a feast.
-
Whipped Cream: A dollop of fluffy whipped cream adds richness and a light touch, balancing the cheesecake’s chocolatey density. It’s like a soft cloud that makes each bite feel even more decadent.
-
Fresh Berries: Juicy, tart blueberries or raspberries add a refreshing contrast, offering a burst of flavor that complements the cheesecake wonderfully. Plus, the pop of color makes your dessert table truly inviting!
-
Chocolate Ganache: A drizzle of warm, velvety chocolate ganache enhances the dessert’s luxuriousness. This pairing amps up the chocolate experience and looks visually stunning when served.
-
Coffee or Espresso: A strong cup of coffee or a shot of espresso pairs beautifully with the sweet richness of the cheesecake, helping to cut through its creamy texture and leaving you refreshed.
-
Cherry Compote: An easy homemade cherry compote intensifies the fruit flavor and adds a sweeter touch. The fresh fruit notes beautifully elevate the overall Black Forest experience.
-
Ice Cream: Creamy vanilla or cherry ice cream is a delightful addition, providing a contrast in temperature and texture. As it melts slightly over the warm cheesecake, it creates a delightful mix that enhances every slice.
-
Dessert Wine: A glass of sweet dessert wine, like a late-harvest Riesling, rounds out the meal beautifully. Its sweetness echoes the cherries, reinforcing the dessert’s indulgent flavors.
-
Chocolate-Covered Almonds: These add a crunchy texture and a nutty note, enhancing the chocolate in the cheesecake while offering a fun, gourmet touch to your dessert spread.
Tips for the Best Black Forest Cheesecake
-
Cool Gradually: Let the cheesecake cool in the oven to prevent cracking, ensuring a smooth, flawless surface for your Black Forest Cheesecake.
-
Quality Ingredients: Use high-quality chocolate and cream cheese for a richer taste that elevates every bite of this delightful dessert.
-
Room Temperature Eggs: Always remember to bring eggs to room temperature before adding them to the filling; this aids in better incorporation and a creamier texture.
-
Chill Before Serving: Refrigerating the cheesecake for at least 4 hours (or overnight) improves its consistency and flavor, allowing the ingredients to meld beautifully.
-
Swirl in Cherries: For an intensified cherry flavor, consider swirling some cherry pie filling into the cheesecake mixture before baking, making each bite a delightful surprise.
How to Store and Freeze Black Forest Cheesecake
Fridge: Cover the cheesecake tightly with plastic wrap or store in an airtight container to keep it fresh. It can be kept in the refrigerator for up to 4-5 days.
Freezer: For longer storage, freeze slices individually, wrapped tightly in plastic wrap and then aluminum foil. It can last in the freezer for up to 2 months.
Thawing: To enjoy your cheesecake later, simply transfer desired slices to the fridge 5-6 hours before serving to allow it to thaw gradually and retain its creamy texture.
Reheating: While cheesecake is best served chilled, if you’d like to enjoy it slightly warmed, let it sit at room temperature for about 30 minutes before serving—this enhances the flavors of the Black Forest Cheesecake.
Black Forest Cheesecake Variations
Let your creativity shine through with these delightful twists that will take your Black Forest Cheesecake to new heights!
-
Gluten-Free Crust: Substitute chocolate graham cracker crumbs with gluten-free cookies for an equally delicious crust without the gluten.
-
Dairy-Free Option: Use coconut oil instead of melted butter and swap cream cheese for a dairy-free alternative like cashew cream. The result is just as creamy and rich!
-
Berry Burst: Mix fresh raspberries or blueberries into the cheesecake filling for an added tangy twist that pairs well with the dark chocolate.
-
Decadent Swirls: Before baking, swirl cherry pie filling into the cheesecake mixture for a stunning marbled effect and intensified cherry flavor. Each slice reveals a beautiful surprise!
-
Nutty Crust: Add finely chopped nuts like almonds or walnuts to your crust mixture for a crunchy texture that complements the cheesecake beautifully.
-
Kirsch Kick: For that authentic Black Forest experience, add a splash of kirsch (cherry liqueur) to both the filling and cherry topping—just enough to heighten the flavors without overwhelming them.
-
Double Chocolate Delight: Incorporate dark chocolate chips into the filling for a deeper chocolate experience that cheesecake lovers will adore.
-
Coconut Topping: Top your cheesecake with toasted coconut flakes for exotic flair, adding delicious flavor and a bit of crunch that works wonderfully with the chocolate and cherry.
Remember, each variation offers a unique twist, allowing you to create a personalized masterpiece. If you’re keen on another dessert adventure, don’t forget to check out my scrumptious Strawberry Crunch Cheesecake or the creamy goodness of a Basque Cheesecake Loaf. Happy baking!
Black Forest Cheesecake Recipe FAQs
How do I select ripe cherries for my Black Forest Cheesecake?
Absolutely! When choosing cherries, look for those that are plump, firm, and free of dark spots. A deep red color usually indicates ripeness. If you’re using fresh cherries, a slight sheen on their skin is a good sign as well.
What’s the best way to store leftover Black Forest Cheesecake?
Very good question! To keep your cheesecake fresh, cover it tightly with plastic wrap or place it in an airtight container. It can stay good in the refrigerator for 4-5 days, allowing you to enjoy its rich flavor over multiple days!
Can I freeze Black Forest Cheesecake and how?
Yes, you can! To freeze, wrap slices individually in plastic wrap, then wrap them again in aluminum foil for extra protection. This helps avoid freezer burn and keeps the flavor intact. Your cheesecake can be frozen for up to 2 months. Just remember to thaw slices in the fridge for about 5-6 hours before serving.
What should I do if my cheesecake cracks while baking?
No worries, it happens to the best of us! If you notice cracks forming, make sure to cool your cheesecake gradually in the oven once baking is done. Cracking often occurs due to sudden temperature changes, so keeping the oven door slightly ajar allows it to cool gradually. Also, using only room temperature ingredients can help maintain a smooth texture.
Are there any dietary considerations for this cheesecake?
Definitely! This Black Forest Cheesecake is vegetarian-friendly. If you have dietary restrictions, you can easily swap the crust for gluten-free options, such as gluten-free cookies, and use coconut oil instead of butter for a dairy-free version. Also, ensure the cherry filling you use does not contain allergens if you’re sensitive to certain ingredients.
What’s the ideal way to serve Black Forest Cheesecake?
The more, the merrier! For an enhanced experience, consider pairing your sliced cheesecake with a dollop of whipped cream or a side of fruit compote. This adds a delightful contrast to the rich flavors and makes every bite even more indulgent!
Irresistible Black Forest Cheesecake to Delight Your Taste Buds
Ingredients
Equipment
Method
- Preheat your oven to 325°F (160°C). In a mixing bowl, combine the crust ingredients and press into a 9-inch springform pan. Bake for 10 minutes and cool completely.
- In a large mixing bowl, beat cream cheese and sugar until smooth. Add eggs one at a time, then mix in vanilla and sour cream. Fold in melted chocolate.
- Pour the filling over the cooled crust and bake in the oven for 50-60 minutes until the center is set with a slight jiggle. Cool in the oven for 1 hour.
- Transfer cheesecake to the refrigerator for at least 4 hours or overnight.
- Evenly spread cherry pie filling over the cheesecake and garnish with fresh cherries and chocolate shavings.
- Slice the cheesecake with a hot, dry knife and serve chilled.
Leave a Reply