
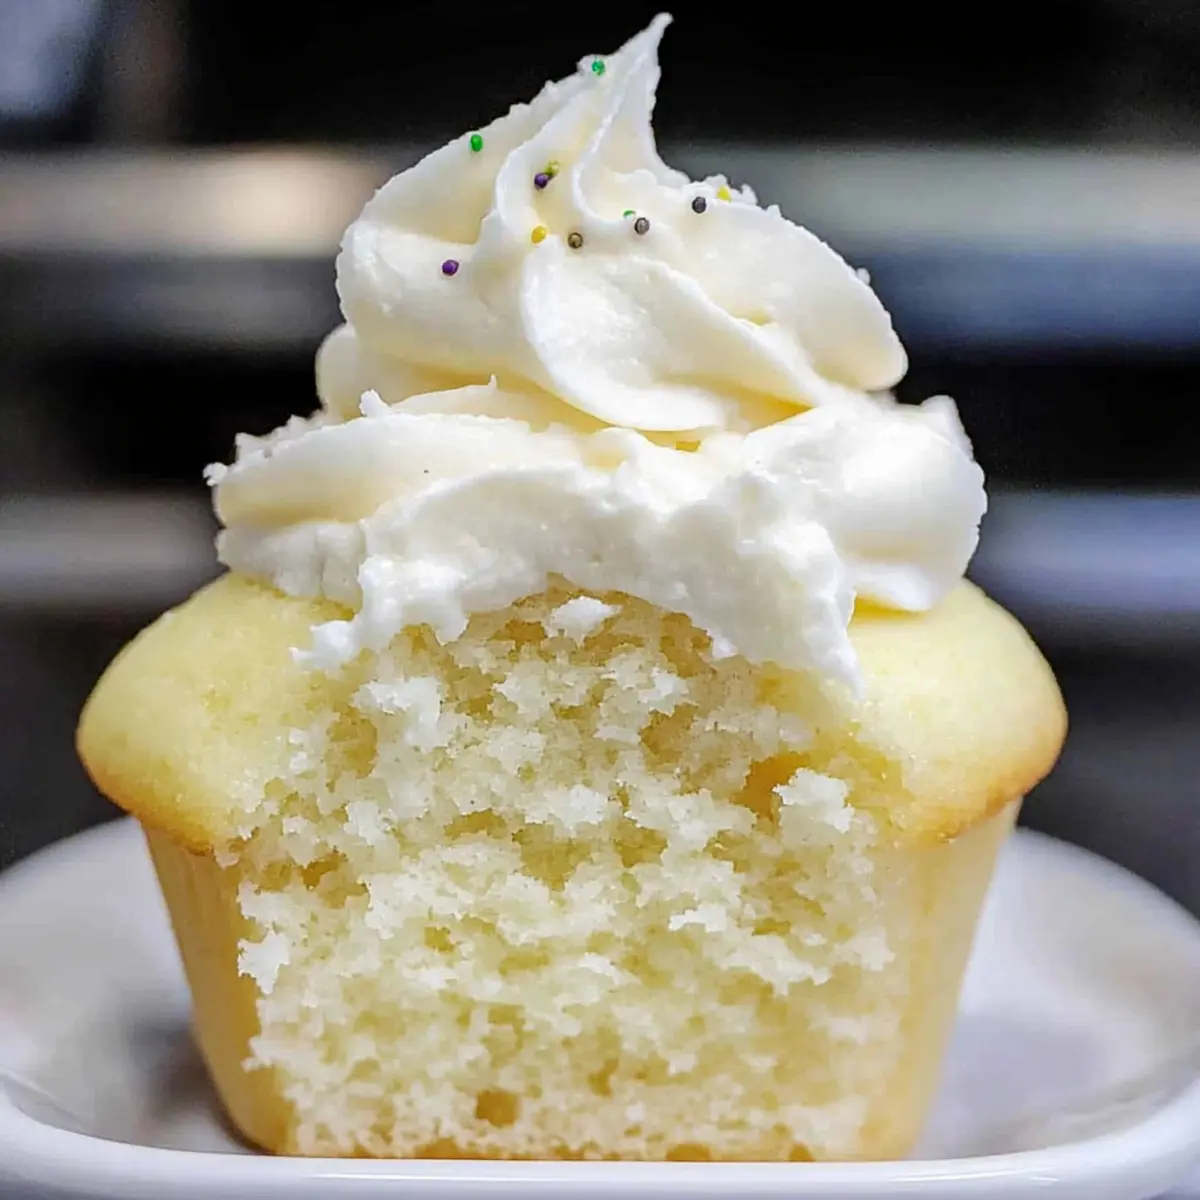
As I sifted through my pantry, the thought of hosting a gathering without dessert left me in a bit of a panic. Enter these Dairy-Free Vanilla Cupcakes, the perfect solution to my sweet conundrum! They’re light, fluffy, and entirely allergy-friendly, making them a delightful treat for everyone—even those with dietary restrictions. With only a handful of simple ingredients, whipping up these scrumptious cupcakes is a breeze, ensuring you spend less time in the kitchen and more time enjoying the company of friends. Plus, they can easily be made eggless and gluten-free, catering to all kinds of preferences. Isn’t it time for you to elevate your baking game and surprise your taste buds? Let’s dive into this mouthwatering recipe!
Why are these cupcakes a game changer?
Incredible Versatility: These Dairy-Free Cupcakes are not just delicious but also easily customizable to fit various dietary needs, such as eggless and gluten-free options.
Moist & Fluffy Texture: You’ll be amazed at how light and airy these treats turn out, making them indistinguishable from traditional cupcakes.
Simple Ingredients: With basics such as flour and alternative milk, you’ll whip these up in no time, perfect for a last-minute gathering!
Crowd-Pleasing Appeal: From kids to adults, everyone will adore these soft, tasty cupcakes—an exciting addition to any celebration! For a delightful twist, explore our recipe for Bake Blueberry Pie!
Make-Ahead Magic: Prepare the cupcakes in advance and store unfrosted; they taste just as delightful even after a few days!
Dairy-Free Cupcake Ingredients
These delightful Dairy-Free Cupcakes come together with simple, accessible ingredients!
For the Batter
• All-Purpose Flour – Provides the essential structure and texture; can be swapped with a gluten-free flour blend for a gluten-free variation.
• Granulated Sugar – Sweetens the cupcakes perfectly; feel free to experiment with alternatives like coconut sugar if desired.
• Baking Powder – This leavening agent is vital for achieving a lovely rise; make sure it’s fresh for the best results.
• Fine Salt – Balances the flavors; kosher or sea salt can be your go-to substitutes.
For the Liquid Mixture
• Alternative Milk (soy, almond, coconut, or oat) – Keeps the cupcakes moist; choose a flavored option for a twist!
• Alternative Yogurt (soy, almond, coconut, or oat) – Adds moisture and acts as a binder; unsweetened versions work best.
• Vegetable or Canola Oil – Ensures each bite remains soft and moist; coconut oil brings a lovely tropical flair.
• Large Egg – Adds richness and structure; for an eggless version, substitute with 1/4 cup unsweetened applesauce and increase baking powder by 1/4 tsp.
For Flavoring
• Vanilla Extract or Vanilla Bean Paste – Imparts a rich, aromatic flavor; vanilla bean paste intensifies the taste and adds visual charm.
With these simple yet essential ingredients, you’re on your way to creating incredible Dairy-Free Cupcakes that everyone will love!
Step‑by‑Step Instructions for Dairy-Free Cupcakes
Step 1: Preheat the Oven
Begin by preheating your oven to 350°F (175°C), ensuring an even bake for your Dairy-Free Cupcakes. While the oven heats, line a muffin tin with 12 cupcake liners to prepare for the batter. This setup will help you bake the cupcakes to fluffy perfection!
Step 2: Mix Dry Ingredients
In a large mixing bowl, sift or whisk together the all-purpose flour, granulated sugar, baking powder, and fine salt. This step ensures that the leavening agent is evenly distributed, which is crucial for achieving light and airy cupcakes. Set this bowl aside while you prepare the wet mixture.
Step 3: Combine Wet Ingredients
In a separate bowl, whisk together your choice of alternative milk, yogurt, vegetable oil, and egg (or applesauce for the eggless variation), along with the vanilla extract. Mix until smooth and well combined. This creamy blend provides moisture and richness, which is essential for your Dairy-Free Cupcakes.
Step 4: Combine Mixtures
Carefully pour the wet ingredients into the bowl with the dry mixture. Use a spatula or a wooden spoon to stir gently until the batter is just combined. Avoid over-mixing, as this can lead to dense cupcakes. You want a smooth batter with some small lumps remaining for the best texture.
Step 5: Fill Cupcake Liners
Using a spoon or an ice cream scoop, fill the prepared cupcake liners about two-thirds full with the batter. This allows ample room for the cupcakes to rise while baking without overflowing. Take care to distribute the batter evenly among the liners for uniform baking.
Step 6: Bake the Cupcakes
Place the muffin tin in the preheated oven and bake your Dairy-Free Cupcakes for 19-21 minutes. To check for doneness, insert a toothpick into the center of a cupcake; it should come out clean or with a few moist crumbs. Once done, they will have a golden hue and a soft feel.
Step 7: Cool the Cupcakes
After baking, remove the muffin tin from the oven and let it cool on a wire rack for about 5 minutes. This slight cooling period makes it easier to lift the cupcakes out of the tin without damaging their delicate tops. Then, carefully transfer the cupcakes to the wire rack to cool completely.
Step 8: Prepare the Frosting
While the cupcakes cool, make your Dairy-Free Buttercream. In a mixing bowl, beat the vegan butter until smooth, then mix in your choice of vanilla extract and a pinch of salt. Gradually add powdered sugar and alternative milk until the frosting reaches your desired spreadable consistency.
Step 9: Frost and Garnish
Once the cupcakes have completely cooled, it’s time to pipe or spread the frosting onto each cupcake. Feel free to get creative with your decorations—whether it’s sprinkles, fresh fruit, or a dusting of cocoa powder, let your imagination shine as you finish off your delightful Dairy-Free Cupcakes!
How to Store and Freeze Dairy-Free Cupcakes
Room Temperature: Store unfrosted Dairy-Free Cupcakes in an airtight container at room temperature for up to 2 days to preserve their moisture and texture.
Fridge: Keep frosted cupcakes in the refrigerator for up to 5 days. This helps maintain freshness, but let them sit at room temperature for a few minutes before serving for the best texture.
Freezer: Freeze unfrosted cupcakes for up to 3 months. Wrap each cupcake tightly in plastic wrap and then place them in a freezer bag. Thaw them overnight in the fridge when you’re ready to enjoy!
Reheating: If you desire a warm treat, you can briefly microwave a frozen cupcake for about 10-15 seconds. This will restore its softness and taste as though it’s fresh out of the oven!
What to Serve with Dairy-Free Cupcakes?
To complete your sweet gathering, here are some delightful pairings to elevate your dessert table.
- Fresh Berries: The natural sweetness and tartness of fresh berries, like strawberries and raspberries, beautifully complement the rich vanilla flavor of the cupcakes.
- Whipped Coconut Cream: This luscious, dairy-free alternative adds a velvety touch that balances the cupcakes’ sweetness. Serve it alongside for an extra indulgent experience.
- Fruit Salad: A refreshing medley of seasonal fruits provides a light and vibrant contrast, perfect for cutting through the cupcakes’ moistness and richness.
- Sparkling Lemonade: A bubbly, zesty drink like sparkling lemonade enhances the enjoyment of your cupcakes, making each bite feel refreshing and spirited.
- Chocolate Drizzle: Adding a simple chocolate drizzle not only elevates presentation but also brings a decadent flavor that pairs wonderfully with the vanilla cake base.
- Almond Milk Latte: For those who enjoy coffee, an almond milk latte creates a cozy pairing that harmonizes beautifully with the sweet flavors of the cupcakes.
- Coconut Macaroons: These chewy treats provide a delightful texture contrast, creating a delightful nibble alongside your Dairy-Free Cupcakes for a sweet duo.
- Ice Cream: A scoop of dairy-free vanilla or salted caramel ice cream creates a heavenly combination of textures and flavors, ideal for an unforgettable dessert experience.
- Lemon Zest Frosting: If you want to experiment, a zesty lemon frosting can provide a citrusy twist that elevates the flavors while complementing the vanilla base.
- Herbal Tea: A comforting cup of chamomile or mint tea serves as a soothing accompaniment, perfect for those winding down from a delightful gathering.
Expert Tips for Dairy-Free Cupcakes
- Measurement Matters: Use precise measurements for the flour and other ingredients to avoid dense cupcakes. A kitchen scale can be your best friend here!
- Milk Variety: Experiment with different alternative milks—almond, soy, or oat—to find the flavor that best suits your palate in these dairy-free cupcakes.
- Don’t Overmix: When combining the wet and dry ingredients, mix until just incorporated. Overmixing can lead to tough cupcakes, so treat the batter gently.
- Cooling Time: Allow the cupcakes to cool completely before frosting. Frosting warm cupcakes can lead to melting and sliding—nobody wants a cupcake disaster!
- Frosting Flexibility: Feel free to flavor the Dairy-Free Buttercream with cocoa powder, citrus zest, or a splash of espresso for an extra kick to complement your cupcakes!
Dairy-Free Cupcakes Variations & Substitutions
Feel free to explore these variations and make this recipe your own; your kitchen is your playground!
-
Gluten-Free: Swap all-purpose flour for a gluten-free flour blend to cater to gluten sensitivities without sacrificing flavor.
-
Eggless: Replace the egg with 1/4 cup unsweetened applesauce and add 1/4 tsp more baking powder for texture magic. This change doesn’t just accommodate allergies; it introduces a lovely natural sweetness!
-
Nut-Free: Use oat milk instead of almond or coconut milk and opt for soy yogurt to ensure a nut-free delight for gatherings—everyone can enjoy!
-
Chocolate Twist: For a rich chocolate flavor, replace 1/3 cup of flour with cocoa powder. They’ll transform into decadent chocolate cupcakes that don’t require any extra effort!
-
Citrus Burst: Add 1 tsp of lemon or orange zest in the batter for a refreshing twist, paired beautifully with a light or lemony frosting. The zesty aroma will fill your kitchen!
-
Add-Ins: Stir in 1/2 cup dairy-free chocolate chips or dried fruit into the batter. It adds texture and bursts of flavor that elevate each bite, perfect for a cozy dessert!
-
Spicy Kick: Incorporate a dash of cayenne or chili powder for those adventurous souls who appreciate a subtle bit of heat. It’s a surprising twist that will leave everyone guessing!
-
Different Frostings: Switch up your frosting to match your flavor profile—consider raspberry or matcha for a unique finish that tantalizes the taste buds. For a lovely pairing, check out how to Bake Blueberry Pie for an adventure on the dessert table!
Let your creativity shine as you adapt these Dairy-Free Cupcakes to suit every occasion, preference, and craving!
Make Ahead Options
These Dairy-Free Cupcakes are perfect for busy home cooks looking to save time! You can bake the cupcakes up to 3 days in advance and store them unfrosted in an airtight container at room temperature or in the refrigerator. For longer storage, consider freezing the unfrosted cupcakes for up to 3 months; just be sure to wrap them tightly in plastic wrap to maintain moisture. When you’re ready to enjoy, simply thaw the frozen cupcakes overnight in the refrigerator and frost them just before serving. This way, you’ll have delicious, homemade treats ready at your convenience without compromising on flavor or texture!
Dairy-Free Cupcakes Recipe FAQs
What is the best type of alternative milk to use for these cupcakes?
Absolutely! You can use any non-dairy milk like soy, almond, coconut, or oat. Choose one that you enjoy, as it can subtly influence the flavor of your cupcakes. For a creamier texture, I often recommend almond milk for its rich taste and consistency.
How should I store leftover Dairy-Free Cupcakes?
To keep your cupcakes fresh, store unfrosted Dairy-Free Cupcakes in an airtight container at room temperature for up to 2 days. If they’re frosted, place them in the refrigerator where they will stay good for up to 5 days. Just let them warm up a bit before enjoying for the best texture!
Can I freeze Dairy-Free Cupcakes?
Yes, you can freeze them! To do this, wrap each unfrosted cupcake tightly in plastic wrap and place them in a freezer bag. They’ll be good for up to 3 months. When you’re ready to enjoy them, simply thaw the cupcakes overnight in the refrigerator, then let them come to room temperature before serving.
What if my cupcakes turn out dense?
Very! If you find that your cupcakes are denser than expected, it often comes down to overmixing. When incorporating your wet and dry ingredients, mix until just combined. Another tip is to ensure your baking powder is fresh—as an expired leavening agent won’t give you that lovely rise.
Are these cupcakes suitable for people with nut allergies?
Yes, you can make these cupcakes nut-free by using alternatives like rice milk or oat milk instead of almond or soy. Additionally, ensure your alternative yogurt is made from a nut-free source. Always check labels to avoid cross-contamination!
Can I make these cupcakes chocolate-flavored?
Absolutely! You can easily transform your Dairy-Free Cupcakes into chocolate delights by replacing 1/3 cup of flour with cocoa powder in the batter. Just be sure to also add a touch more sugar to balance the bitterness of the cocoa. Enjoy this delicious twist!
Dairy Free Cupcakes That Everyone Will Love – Soft & Tasty
Ingredients
Equipment
Method
- Preheat your oven to 350°F (175°C) and line a muffin tin with 12 cupcake liners.
- In a large mixing bowl, sift or whisk together the all-purpose flour, granulated sugar, baking powder, and fine salt.
- In a separate bowl, whisk together the alternative milk, yogurt, vegetable oil, and egg (or applesauce), along with the vanilla extract until smooth.
- Pour the wet ingredients into the bowl with the dry mixture and stir gently until just combined.
- Fill the cupcake liners about two-thirds full with the batter.
- Bake for 19-21 minutes, checking with a toothpick for doneness.
- Let cool on a wire rack for about 5 minutes before transferring the cupcakes to cool completely.
- Prepare the Dairy-Free Buttercream by beating vegan butter, then mixing in vanilla extract and a pinch of salt, followed by powdered sugar and alternative milk until desired consistency.
- Frost cooled cupcakes and decorate as desired.
Leave a Reply