
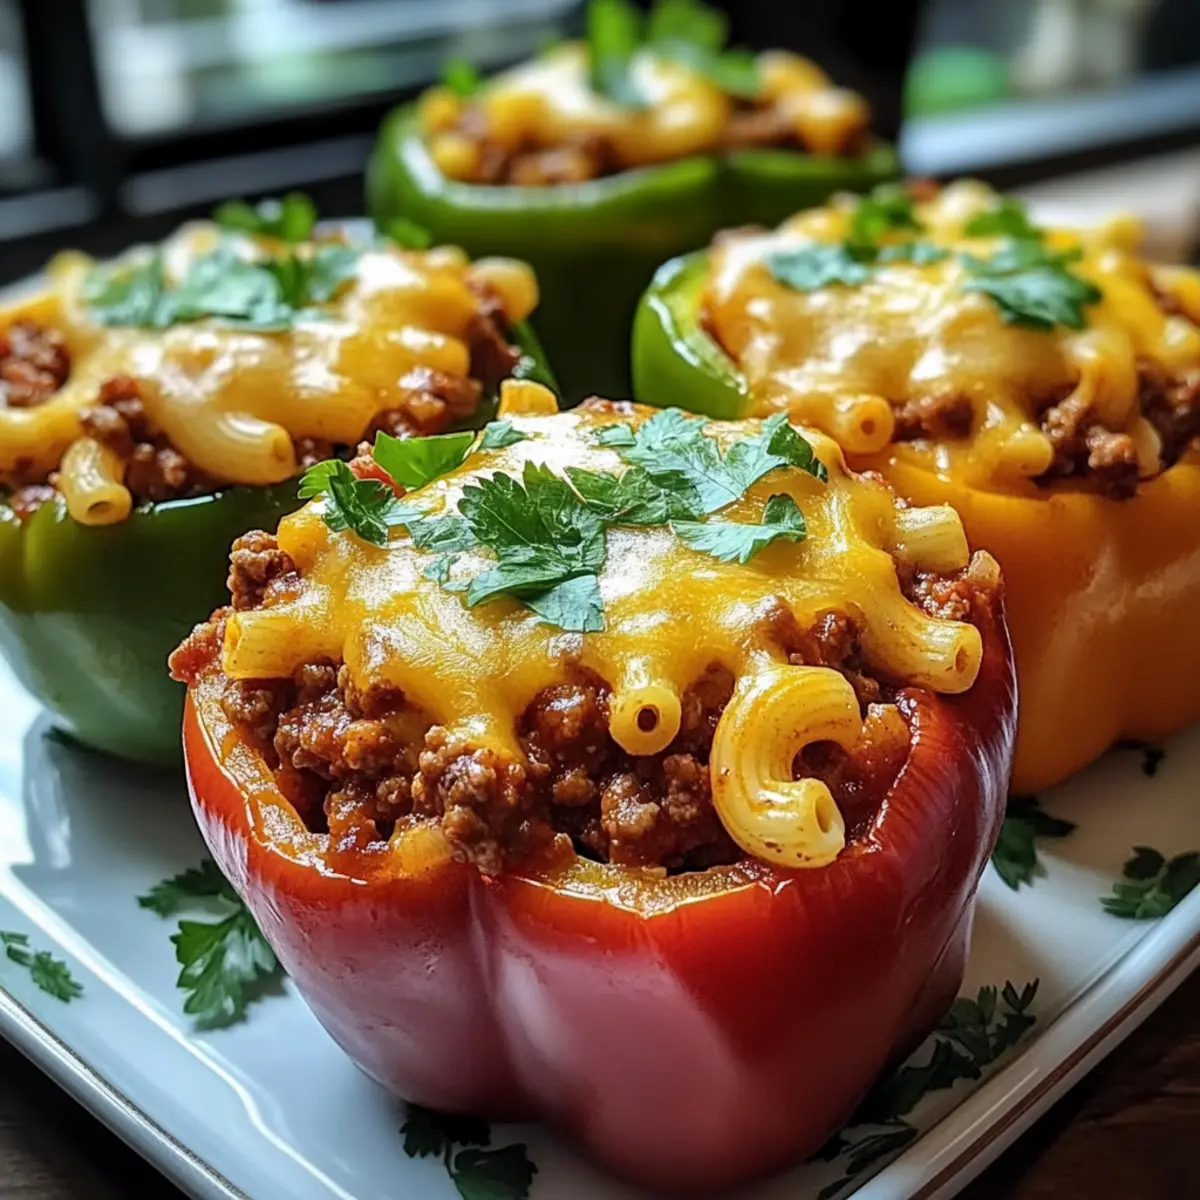
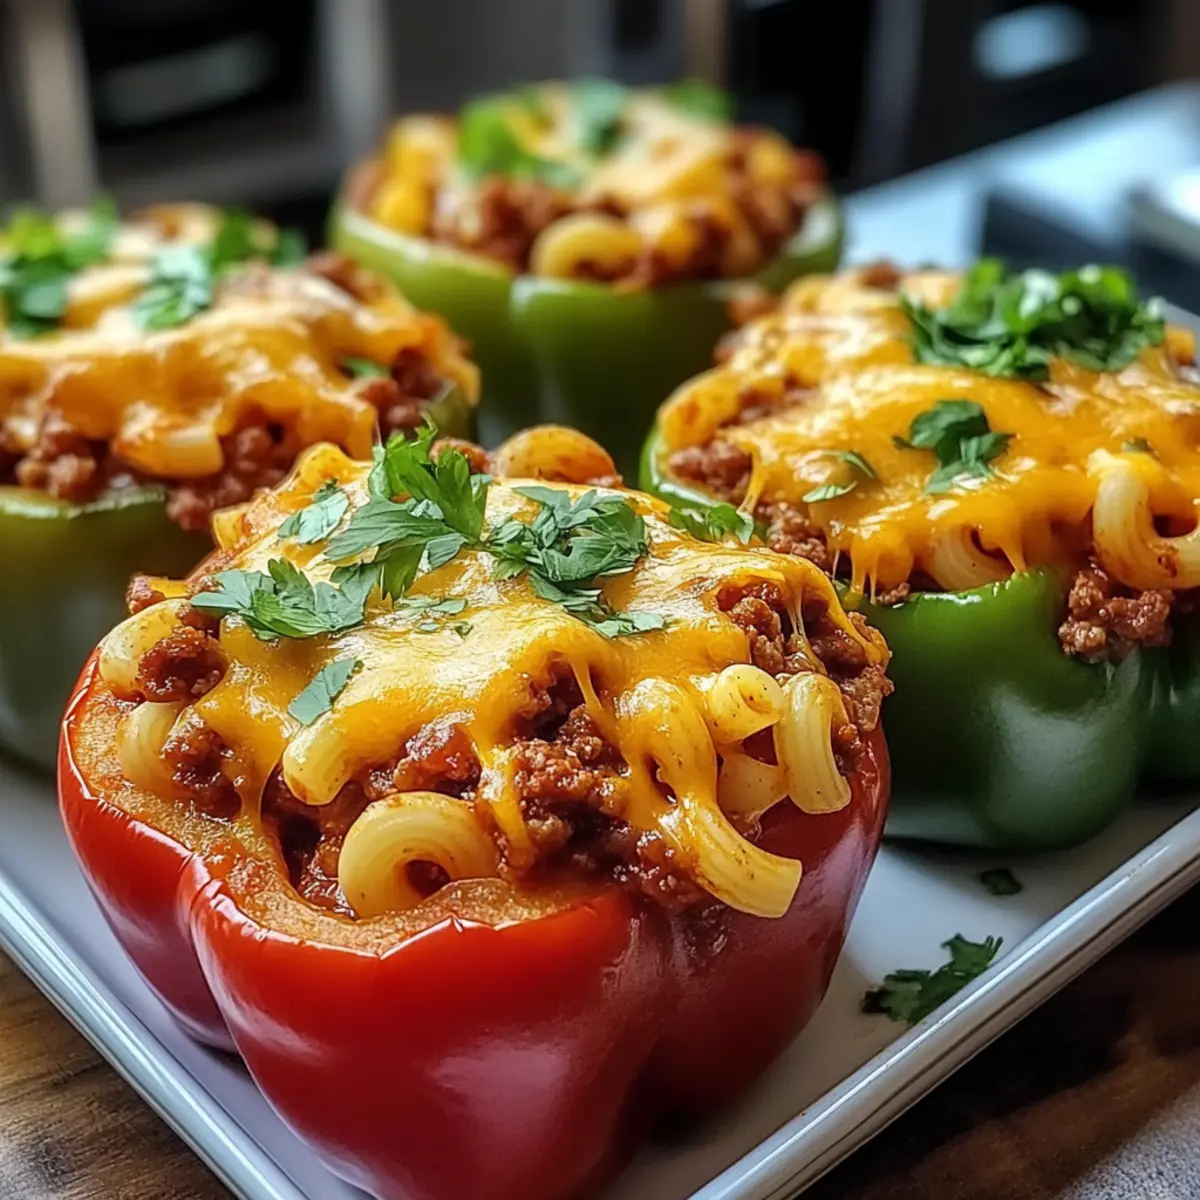
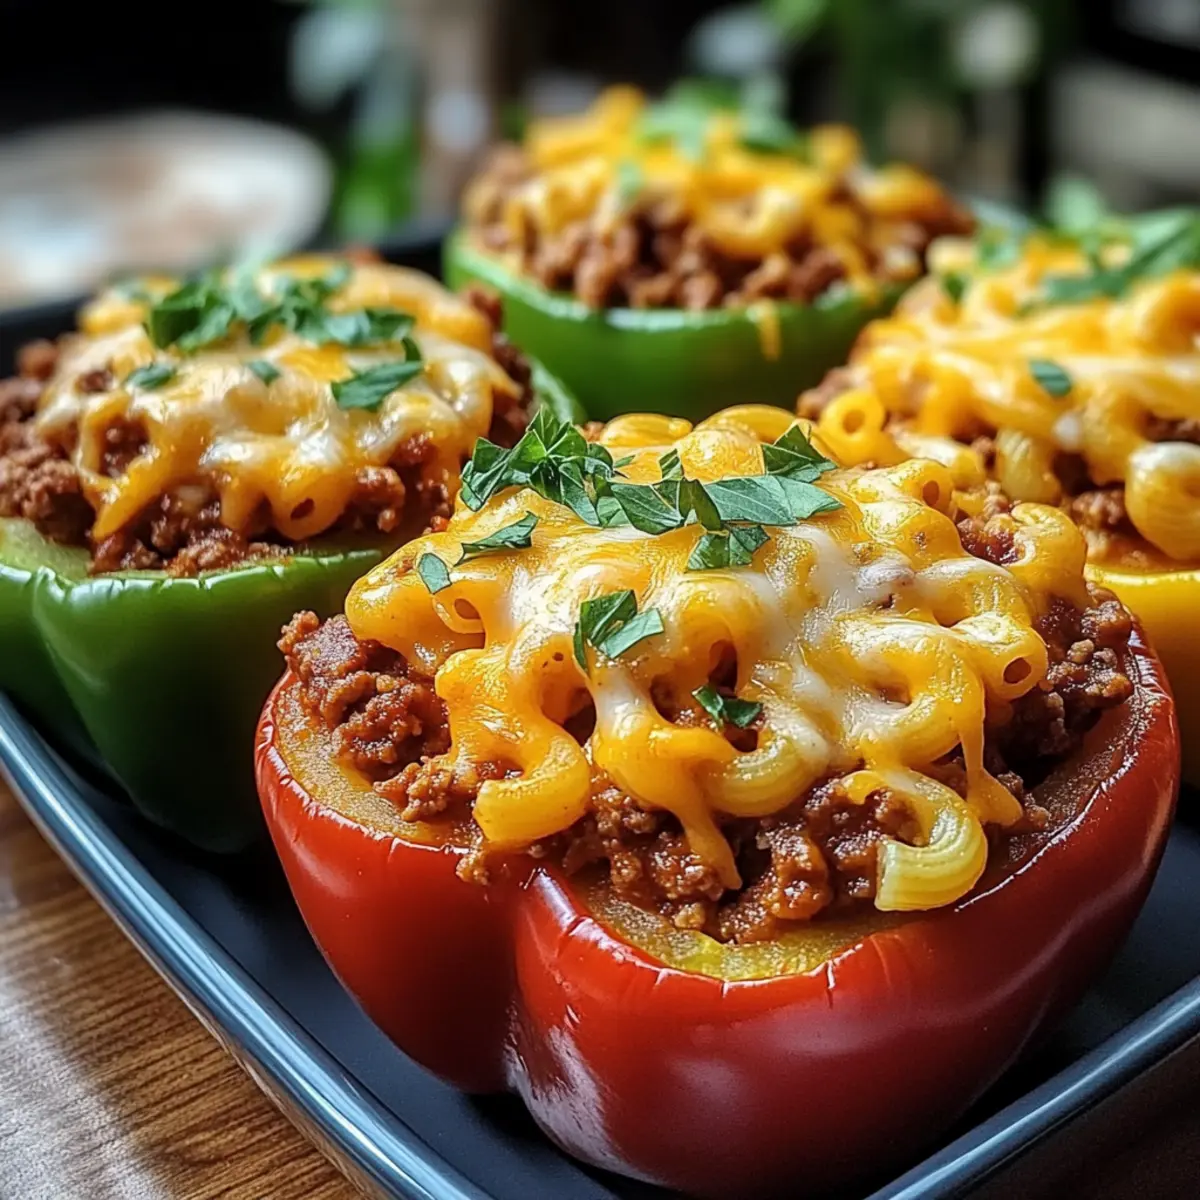
As I chopped through the vibrant bell peppers, an irresistible aroma filled my kitchen, instantly transporting me to cozy family dinners. Today, I’m sharing my recipe for Baked Chili Mac Stuffed Peppers, a dish that perfectly marries hearty comfort with speedy prep. These stuffed wonders are not just delicious; they are also family-friendly and can be ready in under an hour, making them an ideal choice for those busy weeknights when cooking feels daunting. With each bite, you’ll savor the combination of gooey cheese, zesty spices, and a savory chili mac filling that warms the heart and soul. Are you ready to transform your weeknight dinner routine with this colorful, satisfying meal?

Why Choose Baked Chili Mac Peppers?
Quick and Easy: This recipe is perfect for those bustling weeknights, taking less than an hour from start to finish.
Family-Friendly: Your loved ones will rave about this colorful meal, making dinner a delightful experience for everyone.
Savory Satisfaction: Each stuffed pepper bursts with flavor from gooey cheese, spices, and hearty chili mac filling, creating a comforting dish that feels like a warm hug.
Versatile Options: Feel free to swap meats or explore vegetarian substitutes for a customizable feast that caters to your family’s preferences.
Perfect Pairings: Serve these stuffed wonders with a side of cornbread or a fresh garden salad to elevate your meal. For a different flavor, try my delicious Baked Chicken Thighs on another busy night!
Embrace the ease and comfort of this recipe, and watch it become a family favorite!
Baked Chili Mac Stuffed Peppers Ingredients
For the Peppers
• Bell Peppers – Choose large, firm peppers for the best stuffed experience.
For the Filling
• Olive Oil – Sauté onions and garlic; vegetable oil can be used as an alternative.
• Onion – Adds sweetness; shallots or leeks make great substitutes.
• Garlic – Essential for flavor; feel free to use minced garlic or garlic powder.
• Lean Ground Beef or Turkey – Provides protein; you can also use chicken or plant-based meat.
• Chili Powder – Brings essential spice; adjust to your preferred heat level.
• Cumin – Adds warm, earthy notes; substitute with coriander if needed.
• Smoked Paprika – Enhances flavor with a smoky touch; regular paprika works too.
• Salt & Black Pepper – Essential for enhancing overall taste.
• Canned Diced Tomatoes – Adds moisture; fresh tomatoes can work if you de-seed them.
• Kidney Beans – Offers protein and texture; black beans are a fine alternative.
• Elbow Macaroni – Adds hearty texture; feel free to swap with another small pasta shape.
• Broth – Adds moisture for pasta; vegetable or chicken broth is ideal.
• Shredded Cheddar Cheese – Creates a creamy topping; mozzarella or dairy-free options are great swaps.
Embrace this comforting dish with Baked Chili Mac Stuffed Peppers, perfect for a quick weeknight dinner!
Step‑by‑Step Instructions for Baked Chili Mac Stuffed Peppers
Step 1: Preheat and Prepare
Begin by preheating your oven to 400°F (200°C). While the oven warms, prepare a baking dish by lightly greasing it with cooking spray or a drizzle of olive oil. This will prevent the stuffed peppers from sticking and make cleanup easier. Once ready, keep the dish nearby as you work on the peppers.
Step 2: Prepare the Peppers
Carefully slice the tops off the bell peppers, making sure to reserve the tops for later. Remove the seeds and white membranes inside the peppers, creating a hollow cavity for the filling. Place the cleaned peppers upright in your prepared baking dish, showcasing their vibrant colors.
Step 3: Sauté Aromatics
In a large skillet, heat 2 tablespoons of olive oil over medium heat. Once hot, add one chopped onion and sauté for about 2-3 minutes until it becomes translucent and fragrant. This base will add a delicious sweetness to your Baked Chili Mac Stuffed Peppers, creating an inviting aroma in your kitchen.
Step 4: Add Garlic
Next, stir in 3 cloves of minced garlic and cook for an additional minute, stirring frequently to prevent burning. You’ll know it’s ready when the garlic releases its rich, fragrant aroma. This delightful combination will enhance the overall flavor of your chili mac filling.
Step 5: Cook the Meat
Introduce 1 pound of lean ground beef or turkey to the skillet. Cook for about 4-5 minutes, breaking it up with a spatula, until it’s browned and no longer pink. If there’s excess fat in the pan, drain it carefully. This savory meat will serve as the hearty base for your stuffed peppers.
Step 6: Season the Mixture
Sprinkle in 2 tablespoons of chili powder, 1 teaspoon of cumin, 1 teaspoon of smoked paprika, and season with salt and black pepper to taste. Mix well to evenly distribute the spices, which will bring depth and warmth to your Baked Chili Mac Stuffed Peppers. Cook for an additional minute to toast the spices slightly.
Step 7: Add Vegetables
Pour in one can of diced tomatoes and one can of drained kidney beans, stirring to combine. Cook this mixture for 2 minutes, allowing the flavors to meld while infusing moisture into the filling. This step enhances the richness of the chili mac blend and complements the crunch of the peppers.
Step 8: Cook the Pasta
Next, add 1 cup of elbow macaroni along with 1 cup of broth to the skillet. Bring the mixture to a simmer, then lower the heat and cook uncovered for about 7-9 minutes until the pasta is al dente. This is crucial for ensuring your Baked Chili Mac Stuffed Peppers don’t turn mushy during baking.
Step 9: Fill the Peppers
Carefully pack the chili mac mixture into each hollowed bell pepper, pressing down gently to ensure they are well filled. Once all peppers are stuffed, top each one generously with shredded cheddar cheese. This gooey layer will melt beautifully as the peppers bake, adding rich flavor to each bite.
Step 10: Bake
Cover the baking dish with aluminum foil and place it in the preheated oven. Bake for 20 minutes, then remove the foil and continue baking for another 8-10 minutes until the cheese is golden and bubbling. This final touch will create a deliciously crispy topping for your Baked Chili Mac Stuffed Peppers, completing this hearty meal.
How to Store and Freeze Baked Chili Mac Stuffed Peppers
- Fridge: Store leftovers in an airtight container for up to 3 days. Make sure the peppers are fully cooled before sealing to preserve their texture and flavor.
- Freezer: To freeze, allow the stuffed peppers to cool completely, then wrap them tightly in plastic wrap or store them in freezer-safe containers for up to 2-3 months.
- Reheating: When ready to enjoy, thaw in the fridge overnight, then reheat in the oven at 350°F (175°C) for about 20 minutes, or until heated through. Enjoy your Baked Chili Mac Stuffed Peppers again!
- Note: To maintain freshness, avoid storing topped cheese separately; it will lose its quality once frozen.
Expert Tips for Baked Chili Mac Stuffed Peppers
-
Pasta Perfection: Ensure your elbow macaroni is al dente before stuffing to avoid a mushy texture after baking. This is crucial for the best Baked Chili Mac experience.
-
Prep Ahead: Consider pre-cooking the chili mac filling the night before. This will save you time on busy evenings, making dinner a breeze.
-
Pepper Selection: Choose bell peppers that are firm and large enough to hold a generous amount of filling. Smaller or softer peppers may not stand up well during baking.
-
Cheese Choices: For a different twist, swap cheddar cheese for Monterey Jack or Pepper Jack for a spicier kick, adding more complexity to your Baked Chili Mac Stuffed Peppers.
-
Serving Tip: Always serve the peppers warm, as the melted cheese adds to the delightful comfort of this dish, inviting everyone to dig in as soon as they hit the table.
Baked Chili Mac Stuffed Peppers Variations
Feel free to get creative with your Baked Chili Mac Stuffed Peppers and make them your own!
-
Vegetarian: Replace meat with lentils or black beans for a hearty, plant-based option that doesn’t skimp on flavor.
Elevate the dish with roasted veggies like zucchini or corn for added texture and sweetness. -
Cheesy Swap: Experiment with cheese varieties like Monterey Jack or Pepper Jack for a spice-loaded twist.
This variation adds a delightful creaminess that mingles beautifully with the zesty chili flavors! -
Spice It Up: If you crave heat, toss in some diced jalapeños or a pinch of cayenne pepper.
This will not only provide a kick but also intensify the overall flavor profile. -
Gluten-Free: Substitute elbow macaroni with gluten-free pasta to make this dish suitable for gluten-sensitive family members.
Just remember to keep an eye on the cooking time, as gluten-free pasta may vary. -
Extra Veggies: Toss in some spinach or kale for a nutritious boost that adds color and flavor to the filling.
It’s an easy way to sneak in more veggies while keeping the dish hearty and satisfying. -
BBQ Twist: Add a tablespoon of BBQ sauce to the meat mixture for a tangy and smoky flavor dynamo.
It lends a fun summertime vibe to your comfort food! -
Breakfast Style: For a fun breakfast twist, try using breakfast sausage instead of ground beef or turkey.
Top with a sunny-side-up egg for a memorable morning treat. -
Soupy Style: Serve the peppers in a bowl of homemade or store-bought chili for an added layer of warmth.
It’s like enjoying your favorite soup and a stuffed pepper all in one bite!
Don’t forget to check out my scrumptious Onion Soup Mac for another comforting twist on a classic!
What to Serve with Baked Chili Mac Stuffed Peppers
To round out your meal experience, consider these delightful and harmonious pairings that complement the vibrant flavors of your stuffed peppers.
-
Garden Salad: A refreshing mix of crisp greens and tomatoes brightens each bite, balancing the hearty chili mac’s richness.
-
Cornbread: The sweet and buttery texture offers a delightful contrast, making every mouthful a heavenly sensation.
-
Guacamole: This creamy dip adds a cool, zesty touch that works beautifully with the spices in your chili mac filling.
-
Roasted Vegetables: Colorful roasted veggies provide a crunchy texture and earthy flavors, enhancing the overall dining experience.
-
Sour Cream: A dollop of tangy sour cream on top adds creaminess and cuts through the savory spices, making each bite even more indulgent.
-
Lemonade: Pair with a chilled glass of homemade lemonade to refresh your palate and elevate the sweetness of your meal.
Make Ahead Options
These Baked Chili Mac Stuffed Peppers are a fantastic option for meal prep, saving you time on busy weeknights! You can prepare the chili mac filling up to 24 hours in advance; just cook it through step 8 and let it cool before refrigeration. To maintain quality, store the filling in an airtight container and stuff the peppers just before baking to prevent sogginess. Alternatively, you could fully assemble the stuffed peppers and refrigerate them for up to 3 days. When you’re ready to enjoy, simply bake the peppers directly from the fridge, adding an extra few minutes to the cooking time to ensure they’re heated through. This way, you’ll have a cozy, hearty meal ready with minimal effort!
Baked Chili Mac Stuffed Peppers Recipe FAQs
How do I choose the best bell peppers for this recipe?
Absolutely! Look for large, firm bell peppers with vibrant colors. Avoid any that have dark spots all over or seem soft, as they may not hold up well after baking. The best peppers should feel heavy for their size and have a glossy skin.
What is the best way to store leftover stuffed peppers?
Very! Store leftovers in an airtight container in the fridge for up to 3 days. Make sure the stuffed peppers are fully cooled before sealing them to preserve their texture and flavor. If you’d like, you can layer parchment paper between them to prevent sticking.
Can I freeze the Baked Chili Mac Stuffed Peppers?
Of course! To freeze, allow the stuffed peppers to cool completely. Then wrap them tightly in plastic wrap or place them in freezer-safe containers. They’ll stay fresh for about 2-3 months. When you’re ready to enjoy, simply thaw overnight in the fridge and reheat in a preheated oven at 350°F (175°C) for about 20 minutes until heated through.
What if my pasta gets mushy when baking?
This can happen if the pasta is overcooked before stuffing the peppers. I recommend cooking the elbow macaroni just until al dente (around 7-9 minutes) so it maintains a slight firmness when you bake the peppers. If it does turn out mushy, you can still salvage the meal! Just serve it as a chili mac casserole rather than individual peppers.
Are there any dietary considerations I should know about?
Absolutely! Make sure to check labels for any hidden allergens in store-bought items, like broth or canned tomatoes, if you have allergies. If you’re cooking for family members with dietary restrictions, consider using lean ground turkey or plant-based meat alternatives. You can easily customize this recipe to be gluten-free by using gluten-free pasta and alternatives for the broth.
Can I use a different type of cheese for the topping?
Yes! Feel free to swap shredded cheddar cheese for Monterey Jack or Pepper Jack cheese if you’re looking for a bolder flavor. This can add an exciting twist to your Baked Chili Mac Stuffed Peppers and allow for even more variety in your dinners.
Baked Chili Mac Stuffed Peppers for Cozy Family Dinners
Ingredients
Equipment
Method
- Preheat your oven to 400°F (200°C) and prepare a baking dish by lightly greasing it.
- Slice the tops off the bell peppers, remove the seeds and membranes, and place them in the baking dish.
- Heat 2 tablespoons of olive oil in a large skillet over medium heat and sauté the chopped onion.
- Stir in the minced garlic and cook for an additional minute.
- Add 1 pound of ground beef or turkey to the skillet and cook until browned.
- Season the mixture with chili powder, cumin, smoked paprika, salt, and black pepper.
- Add diced tomatoes and drained kidney beans, cooking for 2 minutes.
- Stir in the elbow macaroni and broth; simmer for 7-9 minutes until pasta is al dente.
- Stuff the hollowed bell peppers with the chili mac filling and top with shredded cheddar cheese.
- Cover with foil and bake for 20 minutes. Uncover and bake for an additional 8-10 minutes until the cheese is golden.
Leave a Reply