
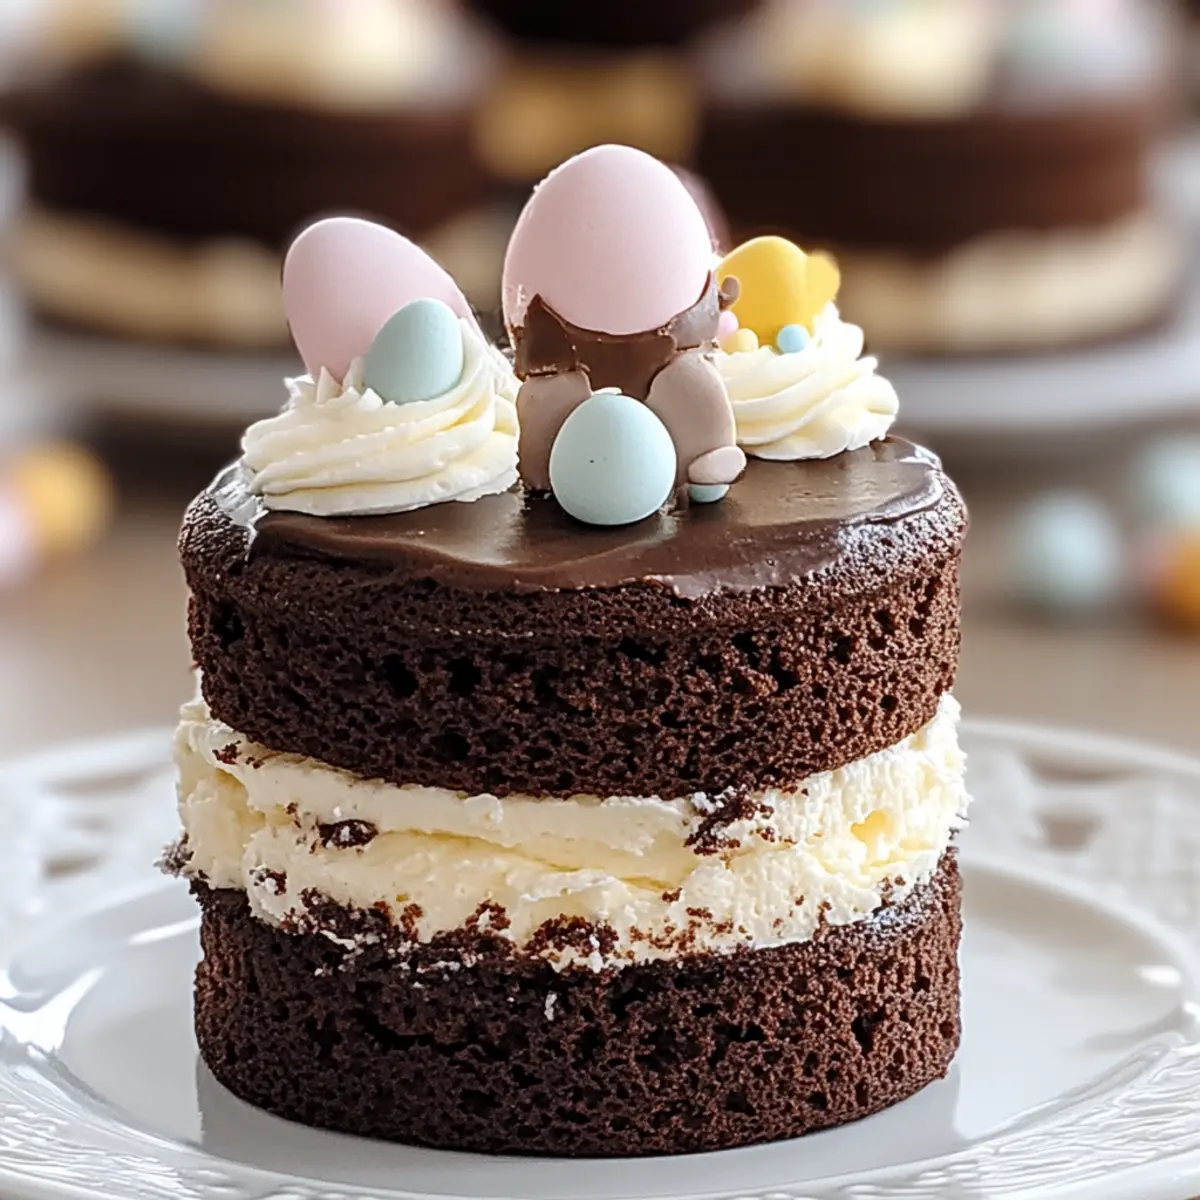
As I rummaged through my pantry one sunny afternoon, I stumbled upon a treasure trove of festive ingredients that screamed “Easter!” With a little creativity, I transformed these simple items into charming Mini Easter Layer Cakes that not only delight the eye but also bring joy to every bite. These mini masterpieces feature a rich chocolate base made from Ghirardelli Sweet Ground Chocolate and Cocoa, layered generously with velvety buttercream frosting. They’re the perfect size for indulging without the guilt, making them a crowd-pleaser for any spring celebration. Best of all, these cakes are incredibly customizable, allowing you to unleash your inner artist with vibrant decorations. Can you resist creating a little Easter magic in your kitchen?
Why are Mini Easter Layer Cakes special?
Irresistible Charm: These mini cakes bring festive flair to your Easter table, showcasing a stunning presentation that will impress your guests.
Rich Chocolate Delight: Crafted using Ghirardelli Sweet Ground Chocolate and Cocoa, they offer a decadent flavor profile that any chocolate lover will adore.
Customizable Fun: With the option to decorate with pastel colors or festive toppings, you can easily personalize each cake for a unique touch.
Perfect Portion Size: Designed for guilt-free indulgence, these miniatures are perfect for satisfying cravings without overwhelming your guests.
Make Ahead Magic: Prep them in advance for stress-free hosting, similar to our Mini Breakfast Omelets that also shine in any gathering.
Bringing together both joy and creativity, these Mini Easter Layer Cakes are truly a sweet treat for every spring celebration!
Mini Easter Layer Cakes Ingredients
For the Cake
- Ghirardelli Sweet Ground Chocolate and Cocoa – Adds a rich chocolate flavor; regular cocoa can be used with an extra 1/4 cup of sugar for similar taste.
- Flour – Provides necessary structure for the cake; no substitutions necessary.
- Granulated Sugar – Brings sweetness to the cake; can be replaced with a sugar alternative if desired.
- Baking Soda – Essential leavening agent for the rise; no substitutions recommended.
- Cream of Tartar – Stabilizes egg foams and adds volume; if omitted, use an extra 1/2 tsp of baking soda.
- Salt – Enhances overall flavor; can be omitted for dietary restrictions if needed.
- Buttermilk – Adds moisture and flavor; can substitute with milk plus a tablespoon of vinegar or lemon juice.
- Butter (softened) – Provides richness and moisture; margarine can be used for a dairy-free option.
- Eggs – Critical for structure and lift; no substitutes recommended.
- Vanilla Extract – Enhances flavor; using pure vanilla extract gives a deeper taste.
For the Buttercream Frosting
- Shortening – Provides stability to frosting; can replace with all butter, though it may lose some stability.
- Butter (softened) – Adds flavor to the frosting; margarine works for a dairy-free version.
- Vanilla Extract – Essential for that luscious flavor; no substitutes necessary.
- Confectioners’ Sugar – Sweetens and thickens frosting; alternative sweeteners may require testing for consistency.
- Milk – Adjusts the consistency of the frosting; any milk type or non-dairy alternative can work here.
Gather these ingredients to whip up your delightful Mini Easter Layer Cakes that are sure to bring festive cheer and sweet satisfaction to your celebration!
Step‑by‑Step Instructions for Mini Easter Layer Cakes
Step 1: Preheat the Oven
Preheat your oven to 350°F (175°C). While the oven heats, prepare two round cake pans by greasing them lightly and lining the bottoms with wax paper. This will help ensure your Mini Easter Layer Cakes come out smoothly without sticking.
Step 2: Mix the Dry Ingredients
In a large mixing bowl, whisk together 1 ½ cups of flour, ½ cup of Ghirardelli Sweet Ground Chocolate and Cocoa, 1 cup of granulated sugar, 1 teaspoon of baking soda, ½ teaspoon of cream of tartar, and a pinch of salt. Combine these dry ingredients thoroughly for a uniform chocolate flavor that will enhance your cakes.
Step 3: Add the Wet Ingredients
Now it’s time to bring your mixtures to life! Gradually beat in 1 cup of buttermilk and ½ cup of softened butter, mixing for about 2 minutes until smooth. Then, add the remaining buttermilk, 2 eggs, and 1 teaspoon of vanilla extract. The batter should be creamy and well-blended, showcasing a rich chocolate color.
Step 4: Divide the Batter
Carefully pour the cake batter evenly into the prepared pans. Use a spatula to smooth the tops for an even rise. This ensures that your Mini Easter Layer Cakes will have perfect layers once baked.
Step 5: Bake the Cakes
Place the pans in the preheated oven and bake for 30-45 minutes. You’ll know they’re done when a toothpick inserted in the center comes out clean. Once baked, let the cakes cool in the pans for 10-15 minutes before transferring them to a wire rack to cool completely.
Step 6: Prepare the Buttercream Frosting
While your cakes are cooling, whip up the buttercream frosting. In a mixing bowl, cream together ½ cup of softened butter, ½ cup of shortening, and 1 teaspoon of vanilla extract until fluffy. Gradually add 4 cups of confectioners’ sugar, mixing well after each addition, and adjust the consistency with milk until you achieve your desired thickness.
Step 7: Assemble the Mini Cakes
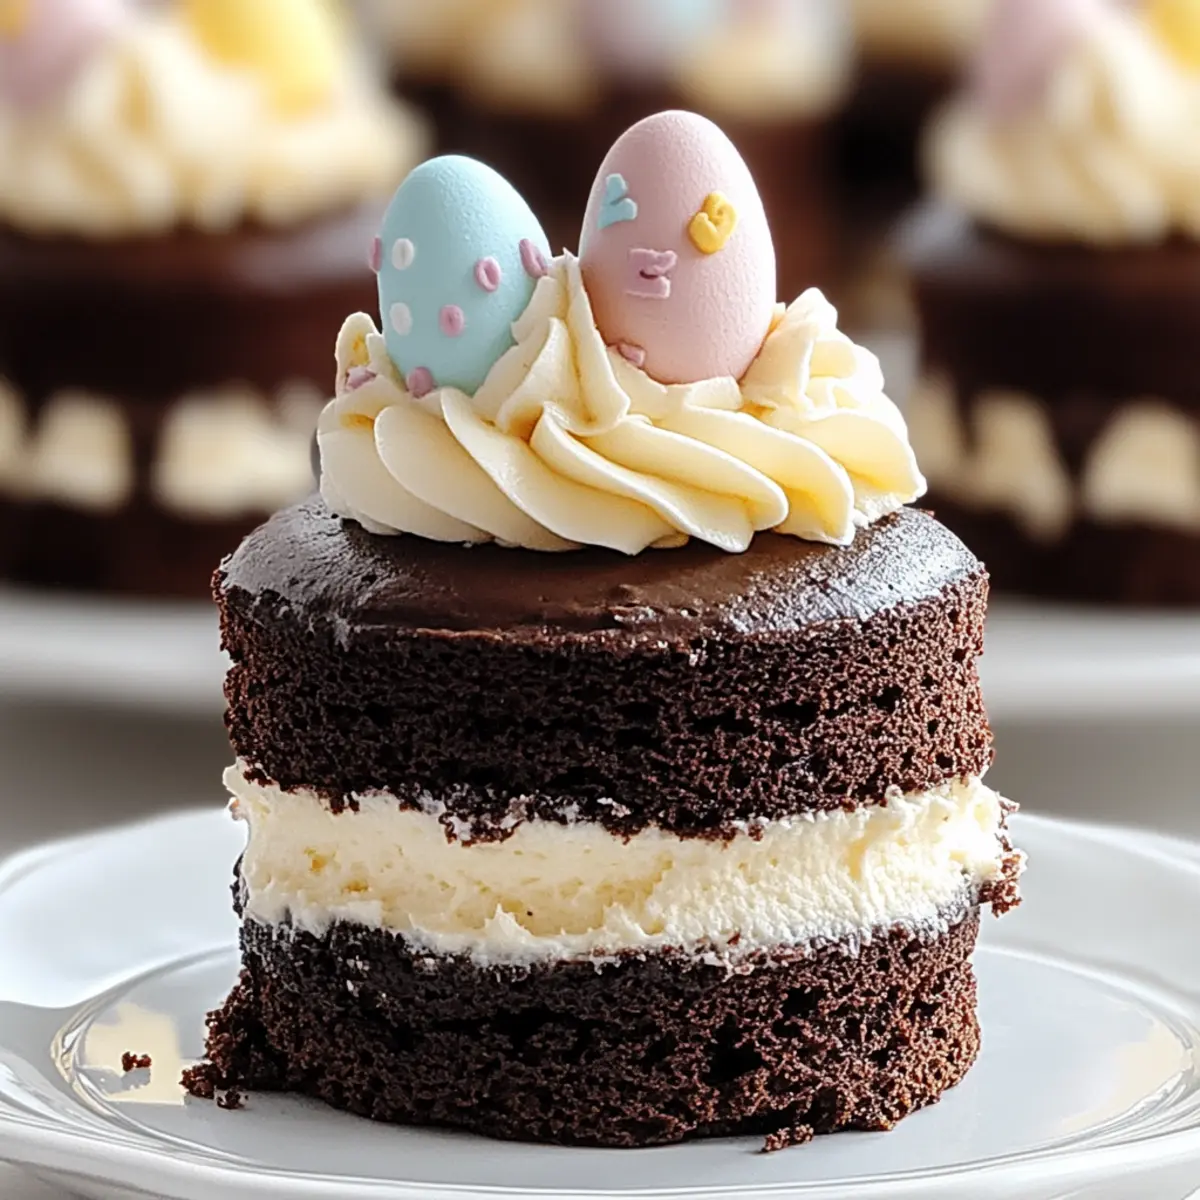
Once your cakes have fully cooled, use a round cookie cutter to cut mini layers from each cake. Stack the layers with a generous spread of the fluffy frosting in between. Frost the outside of each mini cake with more buttercream, and use an offset spatula for a smooth finish.
Step 8: Decorate Your Cakes
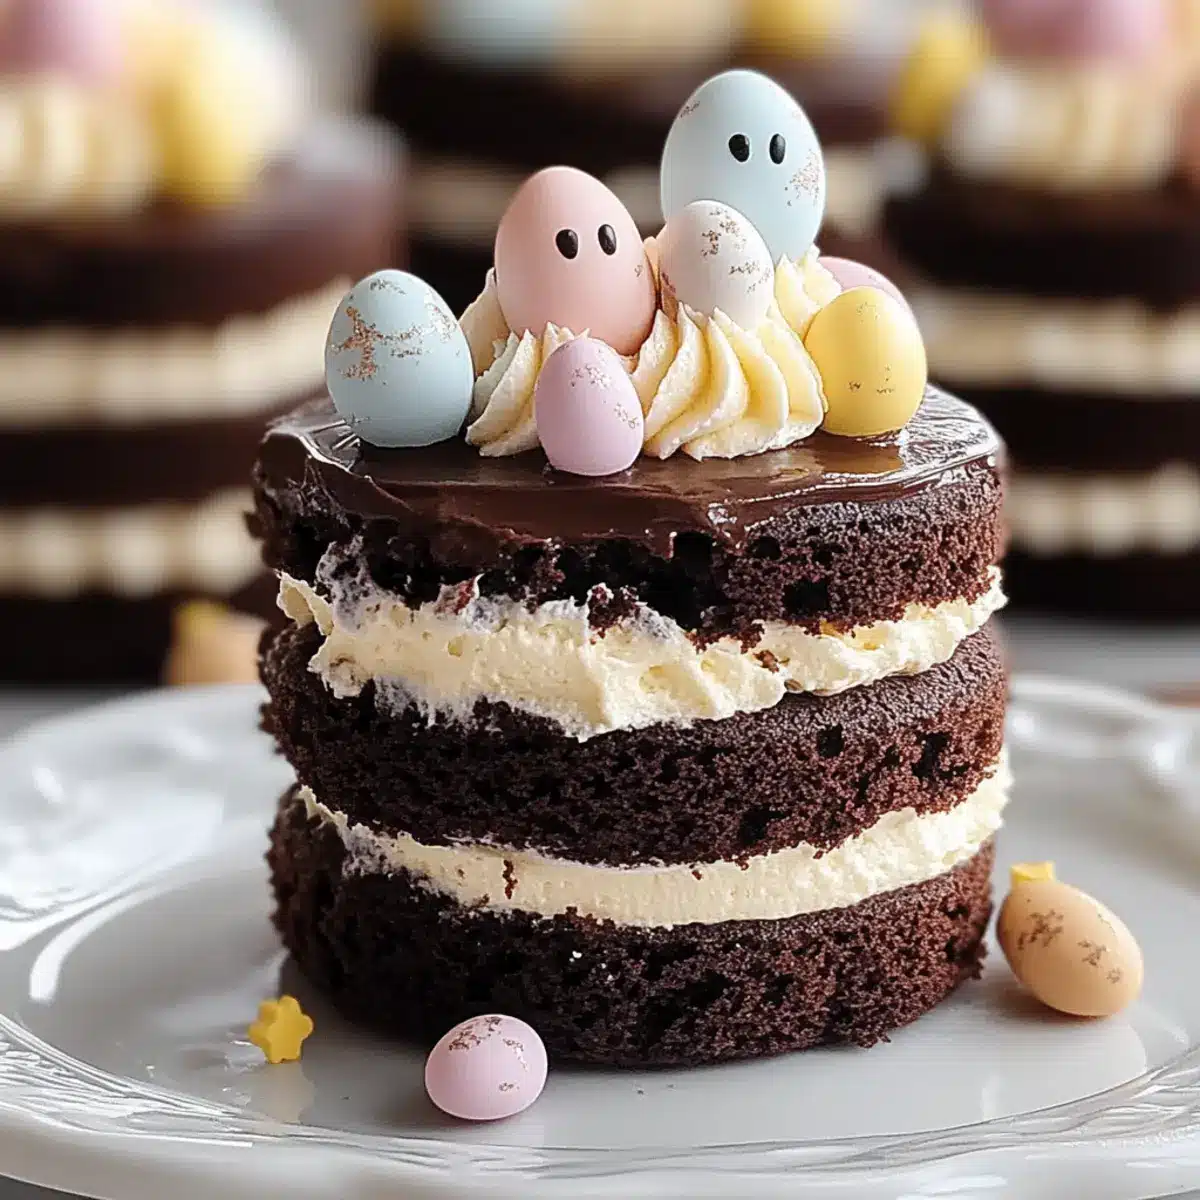
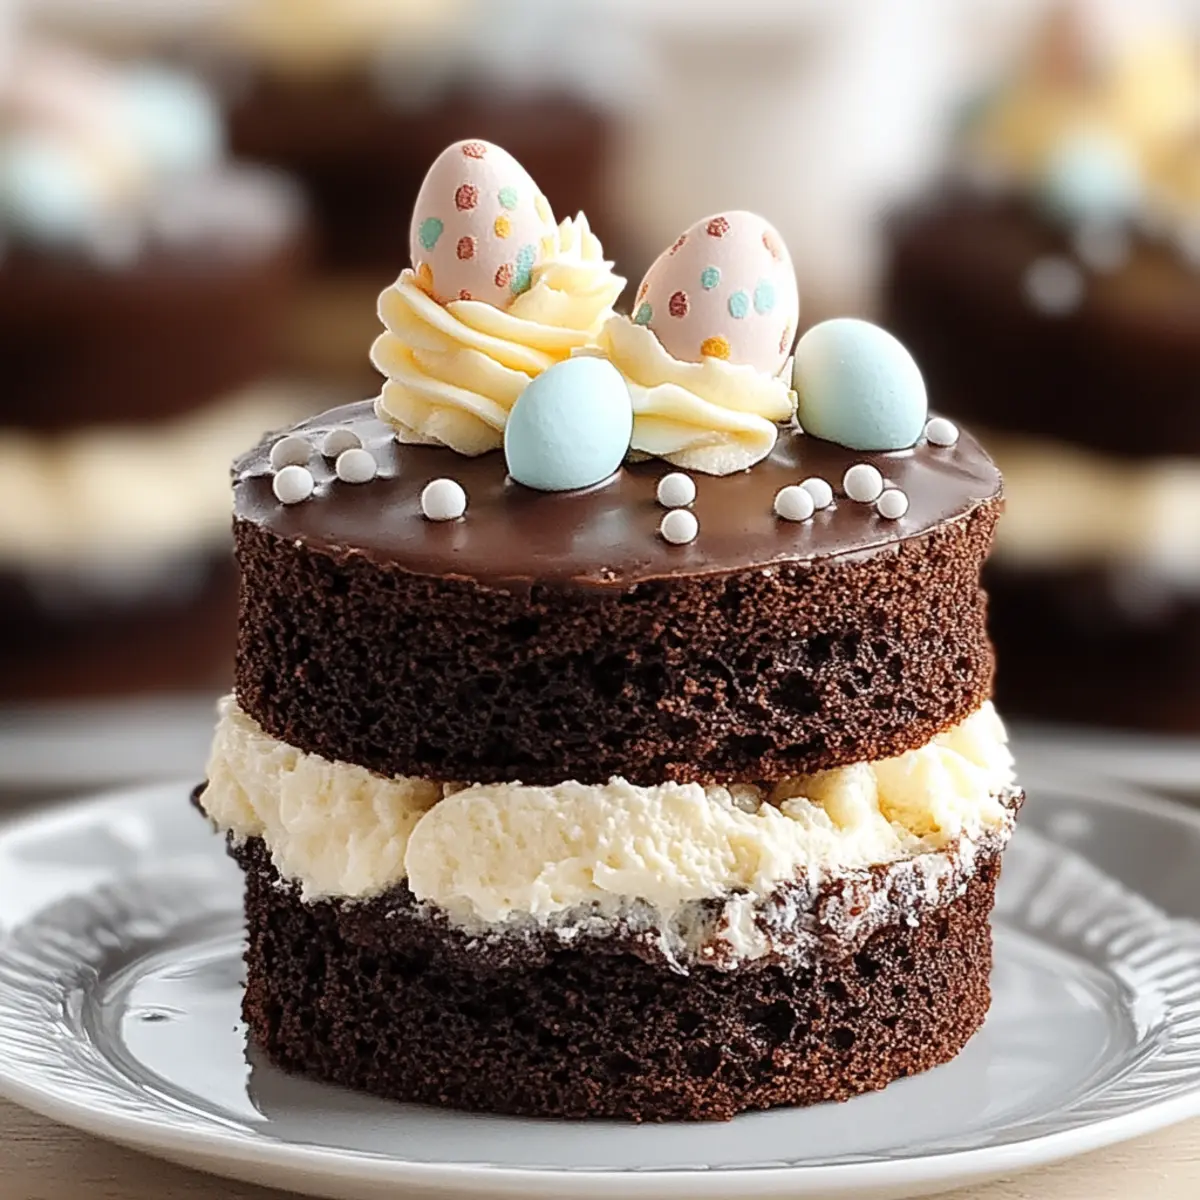
Get creative! Decorate the tops of your Mini Easter Layer Cakes with pastel-colored frosting, mini chocolate eggs, or seasonal edible decorations. This is your chance to showcase your artistic flair and make these treats festive for Easter!
How to Store and Freeze Mini Easter Layer Cakes
Airtight Container: Keep mini cakes in an airtight container at room temperature for up to 3 days to maintain softness and freshness.
Refrigeration: If the weather is warm or for longer storage, place the cakes in the fridge for up to a week. Bring them to room temperature before serving for optimal taste.
Freezer Friendly: To freeze, wrap each mini cake tightly in plastic wrap, and then place them in a freezer-safe bag. They can be stored for up to 3 months.
Thawing Instructions: When ready to enjoy, thaw the frozen mini Easter layer cakes in the fridge overnight, allowing their texture to return to perfection before serving.
What to Serve with Mini Easter Layer Cakes
Elevate your Easter celebration by creating a harmonious meal that beautifully balances flavors and textures.
- Fresh Fruit Salad: A mix of seasonal fruits adds a refreshing contrast and vibrant colors, enhancing the festive mood.
- Vanilla Ice Cream: Creamy and cool, this classic pairing complements the rich chocolate of the cakes and adds a delightful texture.
- Mini Quiches: Savory baked treats provide a nice balance to the sweetness, making for a well-rounded Easter brunch experience.
- Sparkling Lemonade: The citrusy fizz adds a zesty freshness that cuts through the richness of the cakes, making every bite more enjoyable.
- Chocolate-Covered Strawberries: Enhance the chocolate flavor while adding a fresh element, perfect for the chocolate lover in your life.
- Coconut Macaroons: Their chewy texture and sweet coconut flavor can rival the cakes in festive cheer while offering a delightful contrast.
With these complementary dishes, your Mini Easter Layer Cakes will shine as the centerpiece of a truly celebratory feast!
Mini Easter Layer Cakes Variations
Feel free to explore these delightful twists on your Mini Easter Layer Cakes for a personalized touch that awakens your creativity!
-
Cupcake Version: Transform into mini cupcakes by pouring the batter into a lined cupcake tray and baking for 20-25 minutes. These adorable bites are perfect for an Easter-themed gathering!
-
Gluten-Free: Swap regular flour with a gluten-free baking blend. This gluten-free option ensures everyone can enjoy these delightful treats without sacrificing flavor or texture.
-
Frosting Colors: Infuse life into your buttercream with pastel food coloring for a festive flair. Play with various shades to create breathtaking layers that capture the spirit of spring.
-
Nutty Surprise: Add chopped nuts, like pecans or walnuts, to the batter for a delightful crunch. This texture boost enhances both flavor and appearance, making every bite a delicious surprise.
-
Chocolate Ganache: Elevate the decadence by drizzling or spreading chocolate ganache over the frosted cakes, creating a rich and velvety coating that chocolate lovers will adore.
-
Fruit Fillings: Incorporate fruit preserves or curds as a filling between layers. Lemon or raspberry pairs beautifully with chocolate, adding zesty bursts of flavor that brighten each bite.
-
Easter Decor: Top with fun edible decorations like mini chocolate eggs or bunny candies. This simple touch will instantly make your cakes the centerpiece of any festive celebration.
-
Matcha Twist: For a unique flavor profile, replace some cocoa with matcha powder in the batter. This will give your cakes a subtly earthy taste that blends perfectly with frosting.
With these variations, your Mini Easter Layer Cakes will not only be a treat for the tastebuds but also a canvas for your creative spirit! Feel free to discover even more delightful recipes like our Mini Spaghetti Meatball Bites or Cinnamon Roll Pancakes to keep the sweet indulgence going!
Make Ahead Options
These Mini Easter Layer Cakes are ideal for busy home cooks looking to save time without sacrificing flavor! You can bake the cakes up to 2 days in advance; just allow them to cool completely, then wrap each layer tightly in plastic wrap and refrigerate to maintain moisture. The buttercream frosting can be prepared up to 5 days ahead; store it in an airtight container in the refrigerator. When you’re ready to serve, simply bring the frosting back to room temperature, rewhip it for fluffiness, and stack the mini cakes with the frosting in between. This thoughtful prep ensures your Mini Easter Layer Cakes are just as delightful when you’re ready to showcase them!
Expert Tips for Mini Easter Layer Cakes
Use Quality Ingredients: Start with high-quality Ghirardelli chocolate for richer, more flavorful cakes that your family will love.
Measure Precisely: Baking is about precision; ensure all your ingredients are measured correctly to avoid inconsistencies in texture and taste.
Bake Even Layers: Use a kitchen scale to distribute batter evenly between pans, which will help achieve uniform mini layers for a polished look.
Chill Before Frosting: If the cakes are warm or soft, refrigerate for 30 minutes to firm them up, making frosting easier and cleaner.
Get Creative: Don’t hesitate to have fun with decorations! Use pastel colors and seasonal motifs to personalize your Mini Easter Layer Cakes.
Mini Easter Layer Cakes Recipe FAQs
How do I choose the right chocolate for the cakes?
Absolutely! I recommend using Ghirardelli Sweet Ground Chocolate and Cocoa for the richest flavor. If you’re in a pinch, regular cocoa powder can substitute, but add an extra 1/4 cup of sugar to balance the sweetness.
What is the best way to store leftover mini cakes?
To keep your Mini Easter Layer Cakes at their freshest, store them in an airtight container at room temperature for up to 3 days. If it’s warm outside, or you want to keep them longer, refrigerate them for up to a week. Remember to bring them to room temperature before serving for the best taste!
Can I freeze the mini cakes, and how?
Yes, you can! To freeze your mini cakes, wrap each one tightly in plastic wrap and place them in a freezer-safe bag. They can be stored in the freezer for up to 3 months. When you’re ready to enjoy them, thaw the cakes in the fridge overnight, which helps retain their texture and taste.
What if my cake layers are uneven?
No worries! If your cake layers turn out uneven, use a serrated knife to carefully level the tops once they are fully cooled. This will create a more polished look when you stack your mini cakes. Additionally, using a kitchen scale to measure the batter for each layer can help achieve even distribution.
Are there any dietary considerations to keep in mind?
Yes! For those with dietary restrictions, you can make several adjustments. Use margarine instead of butter for a dairy-free option, or replace buttermilk with milk mixed with a tablespoon of vinegar or lemon juice. Also, confirm that all conversions and replacements align with specific allergies, such as eggs or gluten.
Can these cakes be made ahead of time?
Very! You can bake the mini cakes up to 2 days in advance. Store them in an airtight container until you’re ready to frost and decorate. The frosting can also be made ahead and kept in the fridge for up to 5 days. This method offers a stress-free way to ensure you’re ready for your spring gathering!
Mini Easter Layer Cakes: A Delightfully Sweet Spring Treat
Ingredients
Equipment
Method
- Preheat your oven to 350°F (175°C). Prepare two round cake pans by greasing them and lining with wax paper.
- In a large mixing bowl, whisk together the dry ingredients.
- Gradually beat in the wet ingredients until smooth.
- Pour the cake batter evenly into the prepared pans.
- Bake for 30-45 minutes until a toothpick comes out clean. Let cool for 10-15 minutes before transferring to a rack.
- While cooling, whip up the buttercream frosting.
- Cut mini layers from each cake and stack with frosting in between.
- Frost the outside of each mini cake and decorate as desired.
Leave a Reply