
As I prepared for this Easter, I stumbled upon a delightful idea that instantly brightened my day: Mini Easter Layer Cakes. These charming little wonders not only capture the festive spirit with their rich chocolate flavor but also come adorned with fluffy buttercream frosting that’s simply irresistible. What I love most about these cakes is their perfect size—ideal for indulging without the guilt! They make for a stunning centerpiece at any Easter brunch, adding a touch of elegance to your table. Plus, they’re a fun way to involve loved ones in the baking process, turning a simple dessert into a cherished memory. Are you ready to create some sweet Easter magic together? Let’s dive into this delicious recipe!
Why Will You Adore These Cakes?
Irresistible Flavor: These Mini Easter Layer Cakes feature a decadent chocolate taste, guaranteed to please any sweet tooth.
Festive Presentation: They’re beautifully layered and can be adorned with vibrant sprinkles or mini eggs, making them a centerpiece of your Easter celebration.
Perfectly Sized: Enjoy a guilt-free indulgence as each mini cake allows for portion control without sacrificing flavor.
Easy to Make: The straightforward steps make baking a breeze, even for novice chefs. Just like my Mini Breakfast Omelets, this recipe invites everyone to join in and delight in the process.
Versatile Base: Feel free to switch things up! These cakes can become cupcakes for a quick treat, just like my Mini Spaghetti Meatball Bites—perfect for any occasion.
Mini Easter Layer Cakes Ingredients
• Prepare to bake these delightful treats with fresh ingredients that celebrate the season!
For the Cake
- Ghirardelli Sweet Ground Chocolate and Cocoa – Provides a rich chocolate flavor. Substitution: Regular cocoa powder can be used, but add an extra 1/4 cup of sugar.
- All-Purpose Flour – Gives structure to the cake.
- Granulated Sugar – Adds the sweetness that balances the chocolate.
- Baking Soda – Acts as a leavening agent to help the cake rise.
- Cream of Tartar – Stabilizes the egg whites and enhances the cake’s rise.
- Salt (optional) – Enhances flavor for a well-rounded taste.
- Buttermilk – Adds moisture and tenderness to the cake, making each bite heavenly.
- Butter (softened) – Contributes to the overall richness and flavor profile of the cake.
- Eggs – Binds ingredients and provides structure, ensuring a fluffy texture.
- Vanilla Extract – Adds depth and complements the chocolate beautifully.
For the Buttercream Frosting
- Shortening – Helps to stabilize the frosting and adds creaminess for easy spreading.
- Butter (softened) – Brings flavor and smooth texture to the frosting.
- Vanilla Extract – Offers additional flavor that harmonizes with the cake.
- Confectioners’ Sugar – Provides the necessary sweetness and structure for a perfect frosting.
- Milk – Adjusts the consistency of the frosting for easy application.
With these ingredients, you’re ready to whip up a batch of luscious Mini Easter Layer Cakes that will leave everyone wanting more!
Step‑by‑Step Instructions for Mini Easter Layer Cakes
Step 1: Preheat the Oven
Begin by preheating your oven to 350°F (175°C). While the oven heats, grab two 8- or 9-inch round cake pans, grease them thoroughly, and line the bottoms with wax paper to prevent sticking. This preparation is essential for the Mini Easter Layer Cakes to bake evenly and release easily after cooling.
Step 2: Mix Dry Ingredients
In a large mixing bowl, whisk together the all-purpose flour, Ghirardelli sweet ground chocolate and cocoa, granulated sugar, baking soda, cream of tartar, and optional salt. Aim for a smooth, lump-free mixture for your dry ingredients, as this ensures a consistent texture in your cake. Set this bowl aside as you move on to the wet ingredients.
Step 3: Combine Wet Ingredients
Add 1 cup of buttermilk and softened butter to the dry mixture you just prepared. Beat this mixture on medium speed for about 2 minutes, until it’s well-combined and creamy. This step adds moisture and richness, creating the foundation for your delicious Mini Easter Layer Cakes.
Step 4: Add Remaining Ingredients
Now, carefully incorporate the remaining buttermilk, along with the eggs and vanilla extract. Mix on medium speed until everything is smooth and fully blended. The batter should be thick but pourable, indicating that you’re ready for the next step. This rich batter is what will make your cakes so wonderfully indulgent.
Step 5: Bake the Cakes
Divide the batter evenly between the prepared cake pans. Place them in the preheated oven and bake for 30-45 minutes. To check for doneness, insert a toothpick into the center; it should come out clean or with a few moist crumbs. Once done, the cakes will have a slight spring when gently pressed.
Step 6: Cool the Cakes
Allow the cakes to cool in their pans for 10-15 minutes. Then, carefully transfer them to a wire rack to cool completely. This cooling step is crucial for easy frosting later. As they cool, the cakes will stabilize, making them easier to handle and frost beautifully.
Step 7: Make Buttercream Frosting
In a separate bowl, cream together the shortening, softened butter, and vanilla extract until light and fluffy. Gradually add the confectioners’ sugar, mixing well, then add milk until your frosting reaches a spreadable consistency. You want it to be creamy and smooth for icing your Mini Easter Layer Cakes perfectly.
Step 8: Assemble the Cakes
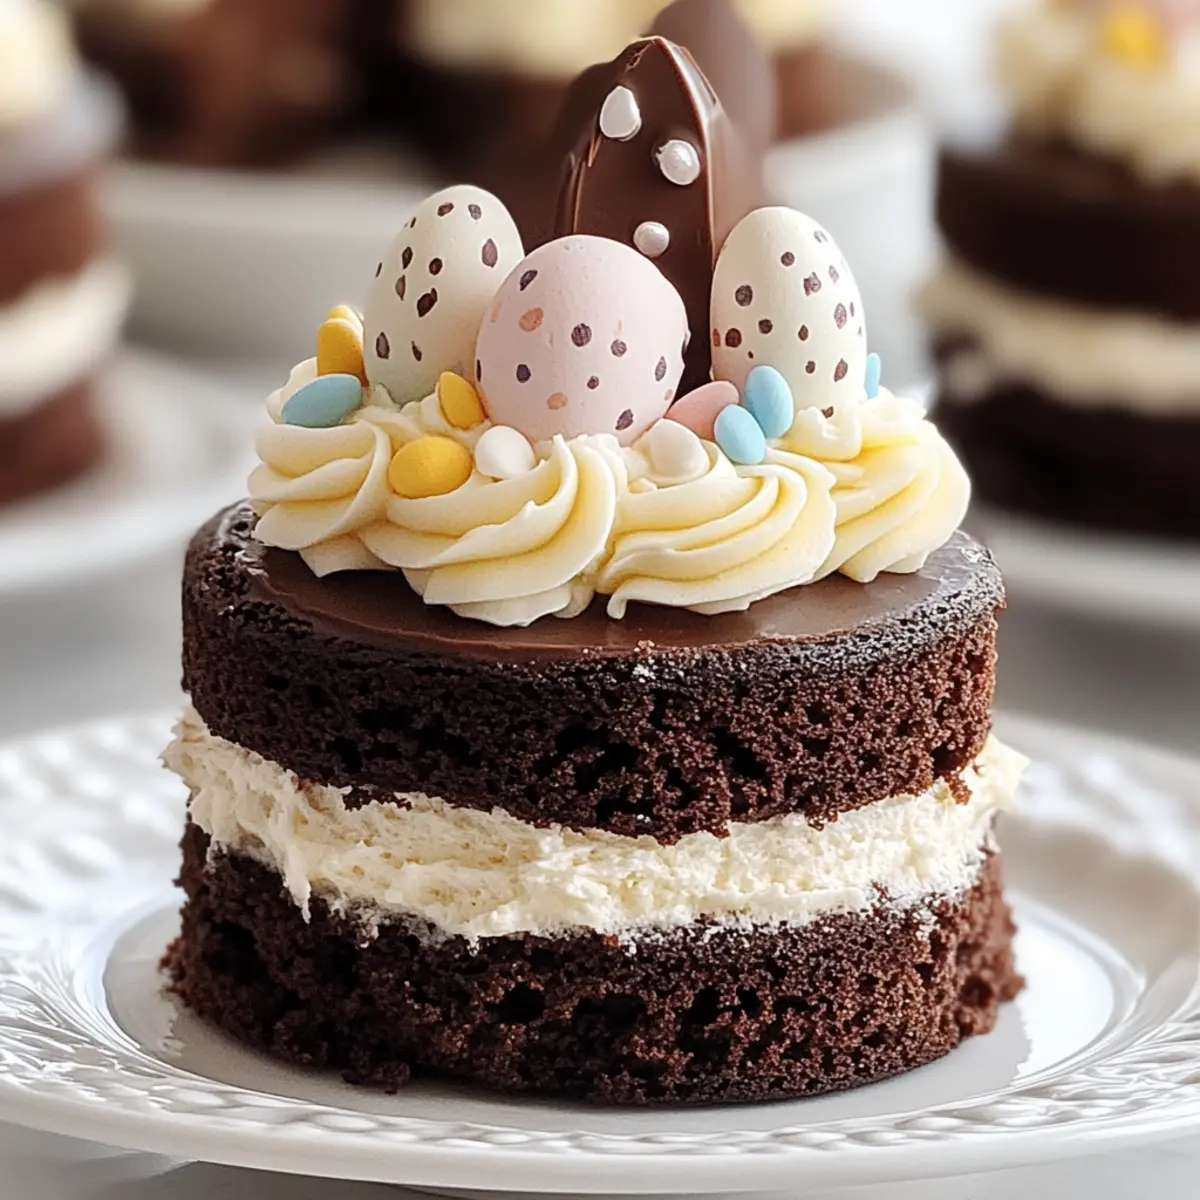
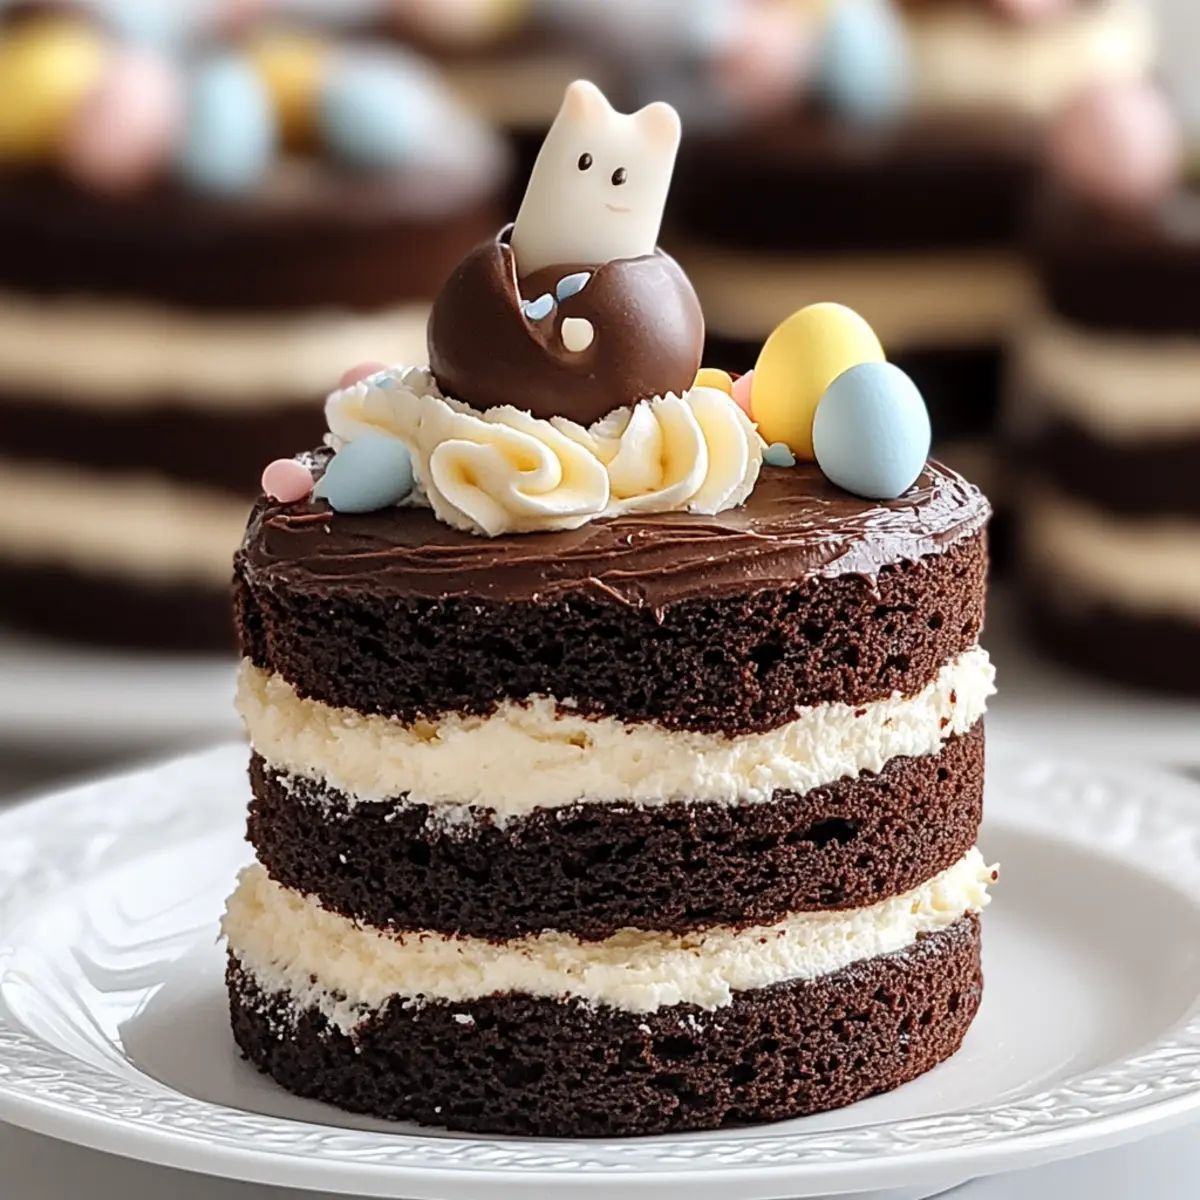
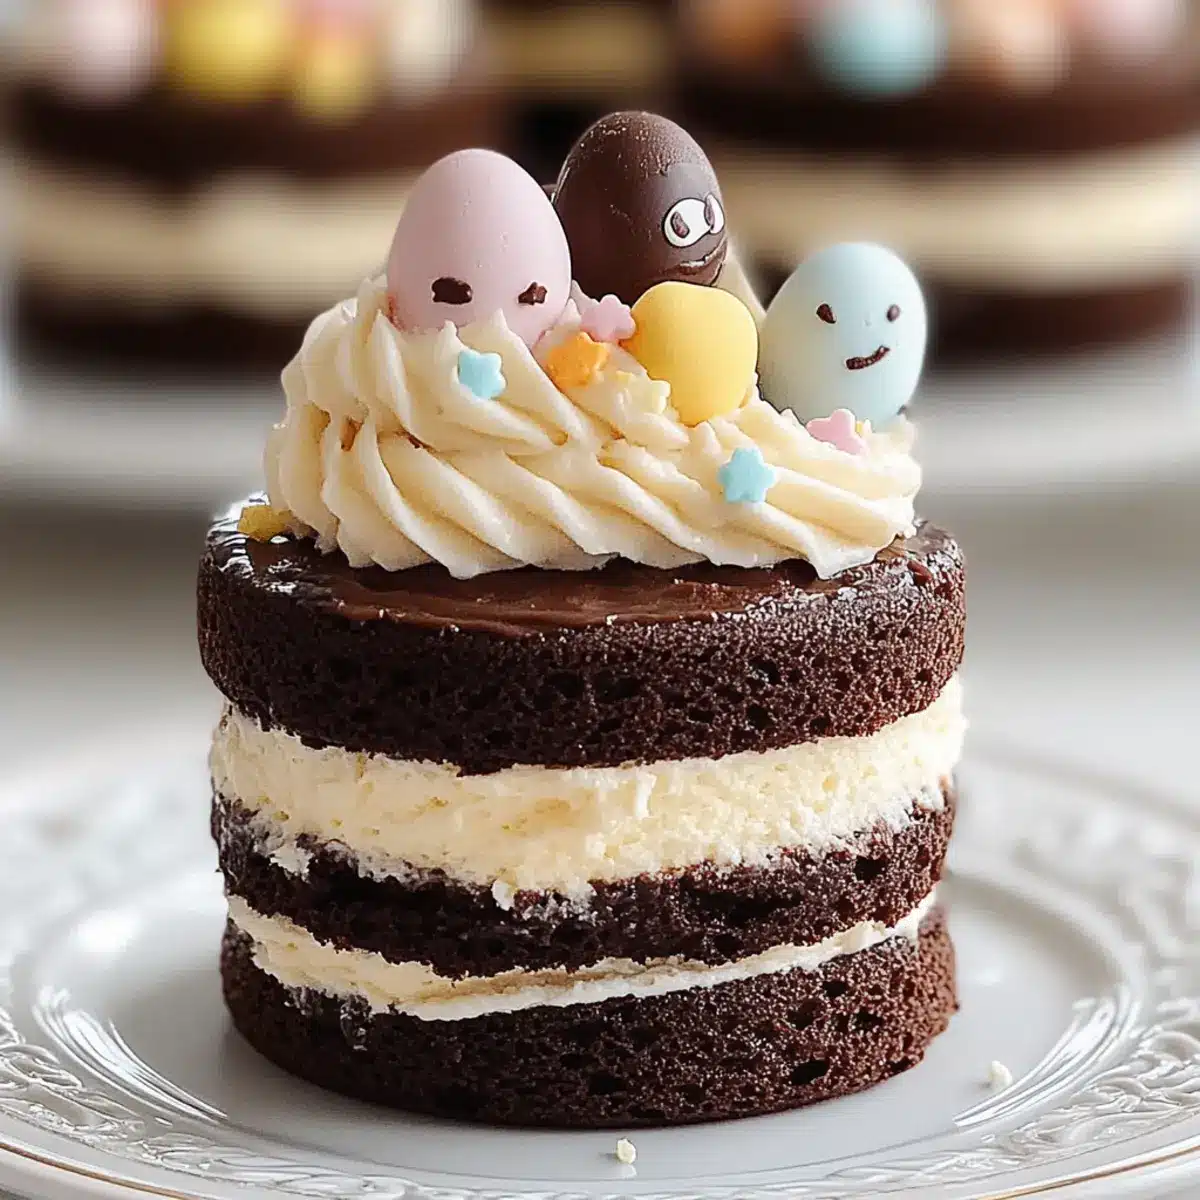
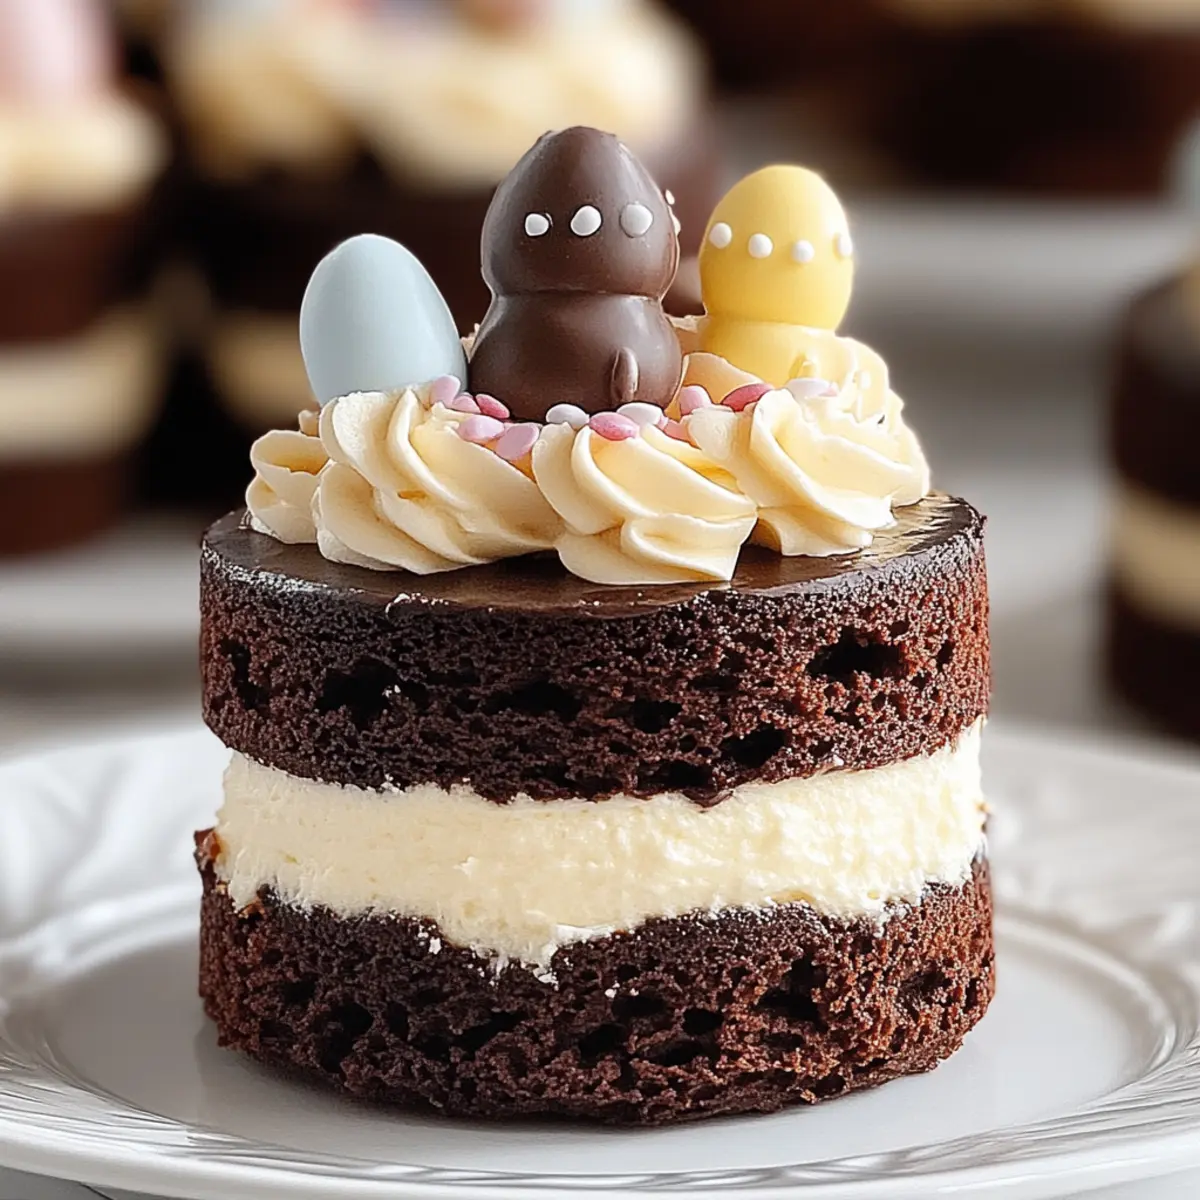
Once the cakes are completely cool, use a sharp metal cookie cutter to cut out mini layers from each cake. Stack these layers with a generous amount of buttercream frosting in between each layer. Frost the exterior of the stacked mini cakes to create a delightful, festive appearance that’ll impress your guests.
Step 9: Decorate
Finally, unleash your creativity by decorating the frosted Mini Easter Layer Cakes with festive sprinkles, mini chocolate eggs, or pastel-colored decorations. This final touch adds a pop of color and fun, making your cakes a beautiful centerpiece for your Easter celebration. Enjoy showcasing your delicious creations!
What to Serve with Mini Easter Layer Cakes
As you prepare to indulge in these delightful chocolate layers, consider vibrant side dishes that will complement your celebration perfectly.
-
Fresh Berries:
Bright and juicy strawberries, raspberries, or blueberries provide a refreshing contrast to the rich chocolate, adding a delightful burst of flavor. -
Whipped Cream:
A light dollop of whipped cream offers a creamy, airy texture that pairs beautifully with the decadent cakes, enhancing each bite. -
Vanilla Ice Cream:
The creamy, cold sweetness of vanilla ice cream creates a heavenly balance against the rich chocolate, making for a comforting treat. -
Minty Green Salad:
A crisp salad with fresh mint and citrus dressing brings a refreshing zing that contrasts well with the sweetness of the cakes. -
Chocolate-Covered Strawberries:
For a twist, serve chocolate-covered strawberries alongside the cakes for an extra indulgent chocolate fix that’s visually stunning. -
Sparkling Fruit Punch:
A bright and bubbly drink like sparkling fruit punch adds festive cheer to your table, perfectly tying together your Easter celebration with sweetness.
With these delightful pairings, you’ll elevate your dessert experience and create a memorable Easter gathering loved by all!
Mini Easter Layer Cakes Variations
Feel free to get creative with these Mini Easter Layer Cakes and customize them to your liking!
-
Cupcake Version: Transform the batter into cupcakes by dividing it into a lined cupcake tray, baking for 20-25 minutes. You’ll have adorable little cakes perfect for sharing!
-
Gluten-Free Delight: Substitute all-purpose flour with gluten-free flour for a delightful twist that everyone can enjoy. Your gluten-free friends will appreciate the thought!
-
Chocolate Mint: Add peppermint extract to the batter for a refreshing chocolate mint flavor. Top with crushed mint candies for added flair and flavor!
-
Fruit-Filled Layers: Incorporate layers of raspberry or strawberry jam between the cake and frosting for a fruity burst. It pairs beautifully with the rich chocolate!
-
Nutty Touch: Fold in chopped nuts like walnuts or pecans into the batter for an extra crunch and nutty flavor. This adds a delightful texture twist to your cakes.
-
Colorful Sprinkles: Mix colorful sprinkles into the cake batter for a festive surprise. The joyful pops of color will brighten any celebration!
-
White Chocolate Ganache: Drizzle a white chocolate ganache over the frosted cakes for a harmonious balance of rich and sweet. This creates a stunning visual and taste contrast!
If you’re ever looking for more ideas, you might enjoy trying my Mini Spaghetti Meatball Bites or even explore the deliciousness of Spanish Churro Pancakes for brunch! Each of these recipes brings a unique twist to celebration foods.
Make Ahead Options
These Mini Easter Layer Cakes are perfect for meal prep, allowing you to spread the joy of baking over a few days! You can bake the cakes up to 2 days in advance, storing them at room temperature wrapped in plastic wrap to keep them moist. The buttercream frosting can be prepared up to 5 days ahead and stored in the refrigerator; just give it a quick re-whip before applying it to the cakes. When you’re ready to serve, simply cut out the mini layers, stack with frosting, and adorn with festive decorations. This way, you’ll have delicious, celebratory treats with minimal last-minute fuss, making your Easter celebration truly special!
How to Store and Freeze Mini Easter Layer Cakes
Fridge: Store the mini cakes in an airtight container to keep them fresh for up to 3 days. Allow them to come to room temperature before enjoying for the best flavor.
Freezer: Wrap each mini cake individually in plastic wrap, then place in a freezer-safe bag. They can be frozen for up to 3 months and thawed in the fridge overnight before serving.
Reheating: For a warm treat, reheat individual cakes in the microwave for about 10-15 seconds. This brings back their moistness and enhances the rich chocolate flavor of the Mini Easter Layer Cakes.
Frosting Storage: Any leftover buttercream frosting can be stored in an airtight container in the refrigerator for up to 5 days. Just give it a good stir before using it again!
Expert Tips for Mini Easter Layer Cakes
-
Chill Before Frosting: Refrigerating the cakes for 30 minutes will stabilize them, making it easier to spread the frosting evenly without causing any mess.
-
Use a Sharp Cutter: For clean, even layers, opt for a sharp metal cookie cutter. A dull cutter can crush your layers, resulting in uneven mini cakes.
-
Don’t Overmix: When combining ingredients, mix just until blended. Overmixing can make your Mini Easter Layer Cakes dense instead of light and fluffy.
-
Test for Doneness: Always check the cakes with a toothpick in the center; if it comes out clean, they are ready. This ensures perfect texture every time.
-
Decorate Thoughtfully: Have fun with decorations, but don’t overcrowd your cakes. A sprinkle of festive colors or mini eggs enhances the visual appeal without overwhelming the flavors.
Mini Easter Layer Cakes Recipe FAQs
How do I select ripe ingredients for my Mini Easter Layer Cakes?
Absolutely! For the eggs, choose ones that are fresh—look for a clean, uncracked shell. For your butter, it should be softened but not melted; you want it creamy for mixing. When picking buttermilk, check the expiration date and make sure it’s within date; if you’re in a pinch, you can make a quick substitute by mixing one cup of milk with a tablespoon of vinegar or lemon juice and letting it sit for 10 minutes.
What’s the best way to store Mini Easter Layer Cakes and how long do they last?
Mini Easter Layer Cakes can be kept in an airtight container in the refrigerator for up to 3 days. If they’re frosted, just be sure to separate any layers with parchment paper to avoid sticking. Let them come to room temperature before serving—this helps restore their soft, luxurious texture.
Can I freeze Mini Easter Layer Cakes and how should I do it?
Very! To freeze your Mini Easter Layer Cakes, wrap each one individually in plastic wrap and place them into a freezer-safe bag or container. They can last for up to 3 months in the freezer. When you’re ready to enjoy them, simply thaw them in the refrigerator overnight and then let them sit at room temperature for a short time before serving. This helps revive their moisture and flavor beautifully!
What are some common problems when baking Mini Easter Layer Cakes?
If your cakes aren’t rising well, consider checking your baking soda’s freshness—it should bubble when mixed with an acid. And remember, overmixing the batter can lead to dense cakes. For those moments when you find your cakes not as moist as expected, make sure your measurements are accurate, especially the liquids like buttermilk, which add crucial moisture.
Are Mini Easter Layer Cakes safe for those with allergies?
When baking for someone with allergies, it’s essential to determine their specific requirements. The cakes contain gluten from all-purpose flour and dairy from buttermilk and butter. If you’re accommodating gluten sensitivity, you can try substituting with a gluten-free flour blend. Additionally, for dairy-free versions, use plant-based butter and a dairy-free milk in place of buttermilk—this keeps the spirit of the recipe while being safe for everyone to enjoy!
Mini Easter Layer Cakes: Rich Chocolate Bliss for Spring Celebrations
Ingredients
Equipment
Method
- Preheat the oven to 350°F (175°C). Grease two 8- or 9-inch round cake pans and line the bottoms with wax paper.
- In a large mixing bowl, whisk together the all-purpose flour, Ghirardelli sweet ground chocolate and cocoa, granulated sugar, baking soda, cream of tartar, and optional salt.
- Add 1 cup of buttermilk and softened butter to the dry mixture. Beat on medium speed for about 2 minutes until creamy.
- Incorporate remaining buttermilk, eggs, and vanilla extract. Mix on medium speed until smooth and fully blended.
- Divide the batter evenly between the prepared cake pans and bake for 30-45 minutes until a toothpick comes out clean.
- Allow cakes to cool in their pans for 10-15 minutes, then transfer to a wire rack to cool completely.
- For frosting, cream together shortening, softened butter, and vanilla extract until fluffy. Gradually add confectioners' sugar, mixing well, then add milk to reach a spreadable consistency.
- Cut out mini layers from each cake using a sharp metal cookie cutter. Stack layers with buttercream frosting in between.
- Decorate the frosted mini cakes with sprinkles, mini chocolate eggs, or pastel decorations to enhance their festive appearance.
Leave a Reply