
As I strolled through the vibrant farmer’s market, the unmistakable aroma of garlic mingled with fresh produce caught my attention. It lead me straight to a pile of artichokes, and I couldn’t resist the urge to create something special. That’s how I stumbled upon my new favorite recipe for Crispy Baked Artichoke Hearts with Garlic Aioli. Not only is this dish undeniably tasty, but it also delivers the perfect crunch while being gluten-free and keto-friendly. Whether you’re hosting a gathering or simply in need of a guilt-free snack, this easy-to-prepare appetizer will leave everyone wanting more. Who knew something so simple could bring such joy? Ready to elevate your snacking game? Let’s dive into this delightful recipe together!
Why Choose Crispy Baked Artichoke Hearts?
Easy Preparation: You’ll love how quick and simple it is to whip up these bites. With just a handful of ingredients, you can create a healthy appetizer in no time.
Crowd-Pleasing Flavor: The zesty garlic aioli combined with the crunchy artichoke hearts makes each bite a taste sensation, perfect for impressing guests!
Diet-Friendly Delight: This recipe caters to various dietary needs, being both gluten-free and keto-friendly, ensuring everyone can enjoy a guilt-free snack option.
Versatile Cooking Methods: Whether you prefer baking, air frying, or frying, these artichoke hearts adapt beautifully, allowing you to choose your favorite method.
Tempting Texture: Expect a satisfying crunch from the baked coating, while the tender artichoke hearts provide a delicious contrast, fulfilling all your cravings without the guilt.
For another scrumptious appetizer, check out these Garlic Chicken Bites that pair perfectly alongside your artichoke hearts!
Baked Artichoke Hearts Ingredients
For the Breading
• Canned Artichoke Hearts – Use high-quality artichoke hearts, drained and patted dry for optimal texture.
• Panko Breadcrumbs – Choose gluten-free ones if you’re going for a gluten-free version for those crispy bites.
• Parmesan Cheese – Optional but adds a nice flavor; swap with nutritional yeast for a vegan take.
• Garlic Powder – Enhances the garlicky taste; fresh garlic can elevate the flavor even more.
• Paprika – Provides a lovely depth; smoked paprika brings a unique twist to the dish.
• Salt and Black Pepper – Essential seasonings to taste that elevate overall flavor.
• Eggs – Act as the adhesive to ensure the breadcrumbs stick nicely to the artichoke hearts.
• All-Purpose Flour – For dredging; almond flour works perfectly for a keto-friendly version.
• Olive Oil Spray – A light spray helps achieve that coveted crispy finish while baking.
For the Garlic Aioli
• Mayonnaise – The base for this dip; use vegan mayo to make it plant-based friendly.
• Minced Garlic – Adds depth to your aioli; more garlic boosts flavor for garlic lovers!
• Lemon Juice – A splash provides brightness and acidity to cut the richness of the mayo.
• Salt and Pepper – Crucial for balancing the flavors of your aioli.
With these simple ingredients, you’ll create delectable Baked Artichoke Hearts that are sure to be a hit at any gathering!
Step‑by‑Step Instructions for Crispy Baked Artichoke Hearts
Step 1: Preheat the Oven
Start by preheating your oven to 375°F (190°C). While it heats up, line a baking sheet with parchment paper for easy cleanup. This step is crucial for achieving perfectly crispy baked artichoke hearts, as the right temperature will help them brown beautifully and develop that satisfying crunch.
Step 2: Prepare the Coating Mixture
In a medium-sized bowl, combine panko breadcrumbs, garlic powder, paprika, salt, and black pepper. Mix these ingredients well until evenly distributed. This flavor-packed coating will give your baked artichoke hearts a deliciously crunchy outer layer. Set the bowl aside and prepare for the next step.
Step 3: Set Up the Breading Station
Organize a breading station by placing one bowl with all-purpose flour and another with beaten eggs. This setup will streamline the process of coating your artichoke hearts. Ensure everything is within reach, as you’ll be coating each artichoke heart in flour, then egg, and finally the breadcrumb mixture for that perfect crunch.
Step 4: Dredge the Artichokes
Take each drained and dried artichoke heart and dredge it in the flour bowl, ensuring it’s completely covered. Next, dip the floured artichoke heart into the beaten eggs, allowing any excess to drip off. Follow up by coating it thoroughly in the breadcrumb mixture, pressing gently to ensure the crumbs stick well. Repeat for all artichoke hearts.
Step 5: Arrange on the Baking Sheet
Place the coated artichoke hearts evenly on the prepared baking sheet, making sure they don’t overlap. This allows for consistent baking and crisping. Once arranged, lightly spray the tops with olive oil to further enhance the crunch during baking. This step is essential for achieving golden, crispy baked artichoke hearts that everyone will love.
Step 6: Bake and Flip
Slide the baking sheet into the preheated oven and bake the artichoke hearts for 20-25 minutes. Halfway through, carefully flip them to ensure even cooking and a uniform golden color. Keep an eye on them during the last few minutes; you want them to be crispy and golden brown, creating a delightful visual appeal.
Step 7: Prepare the Garlic Aioli
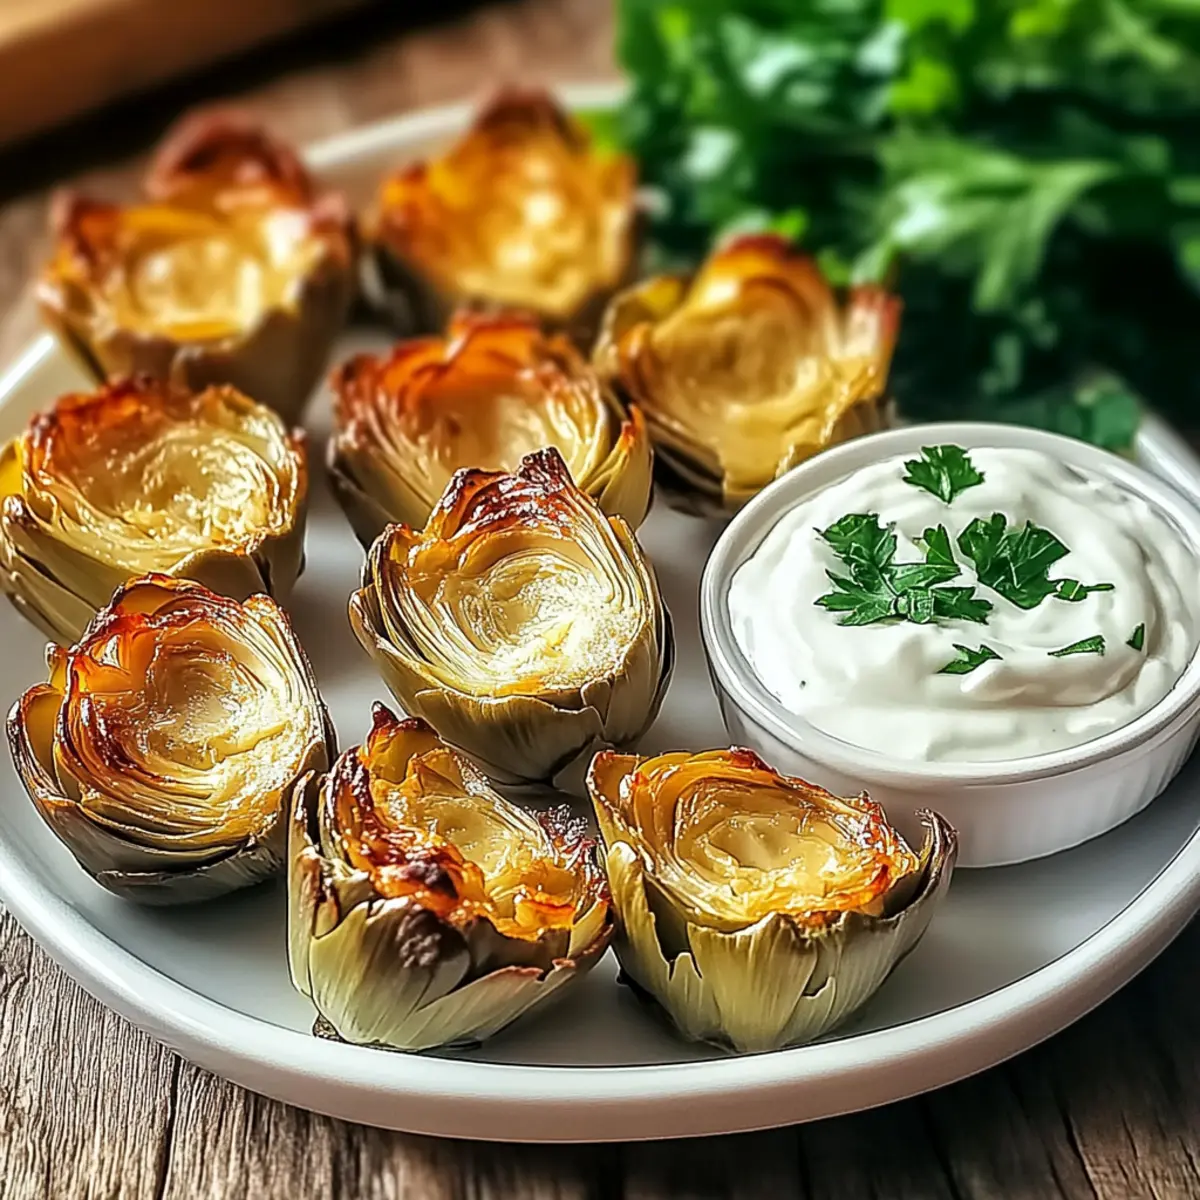
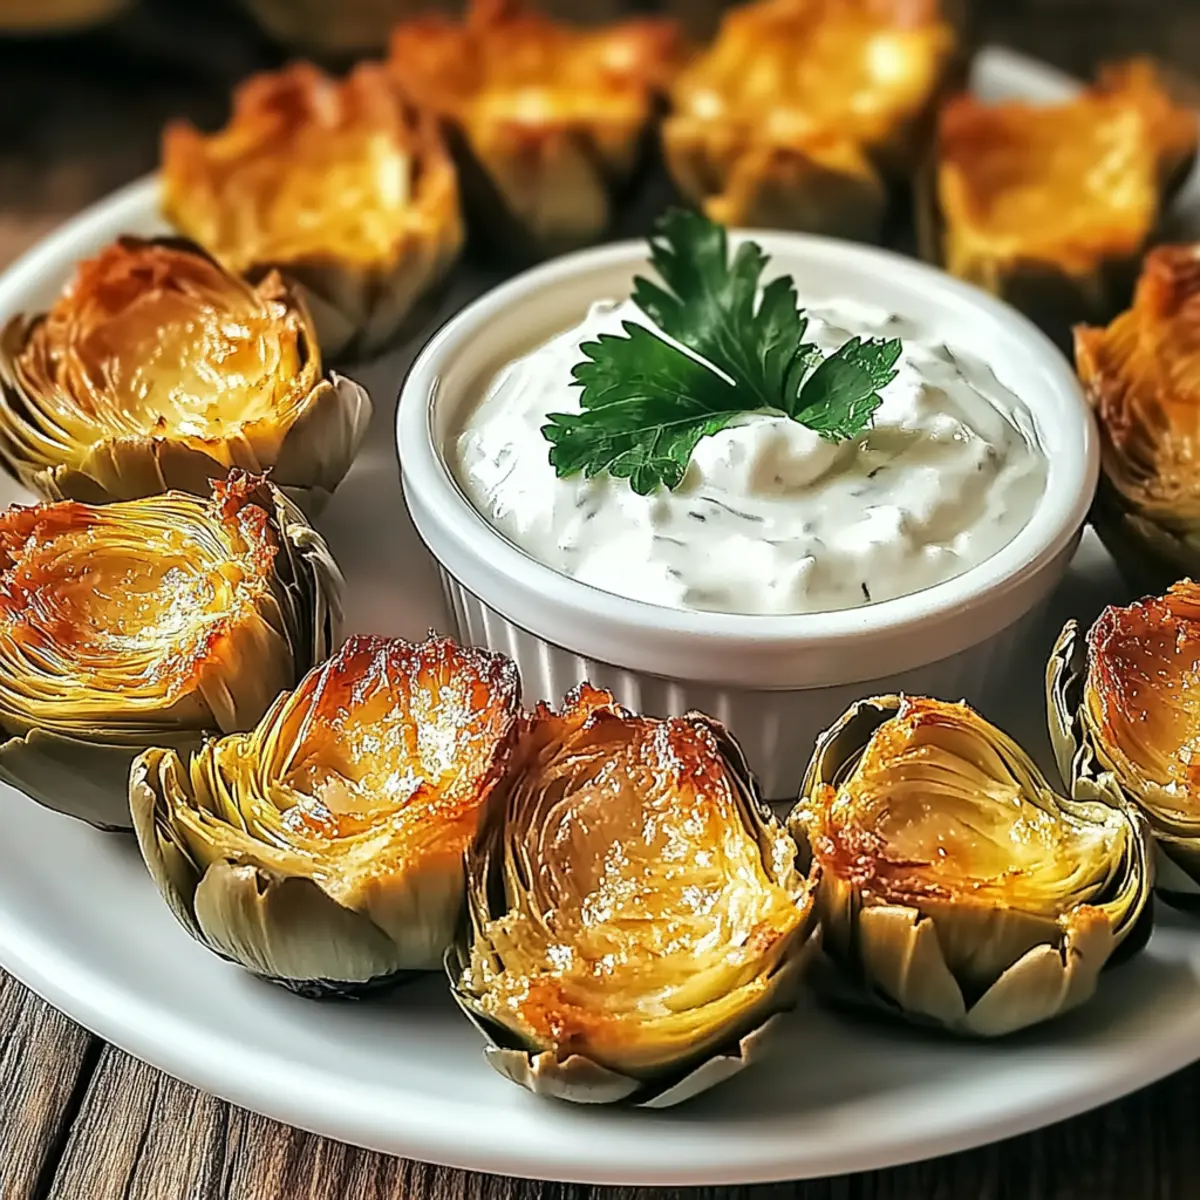
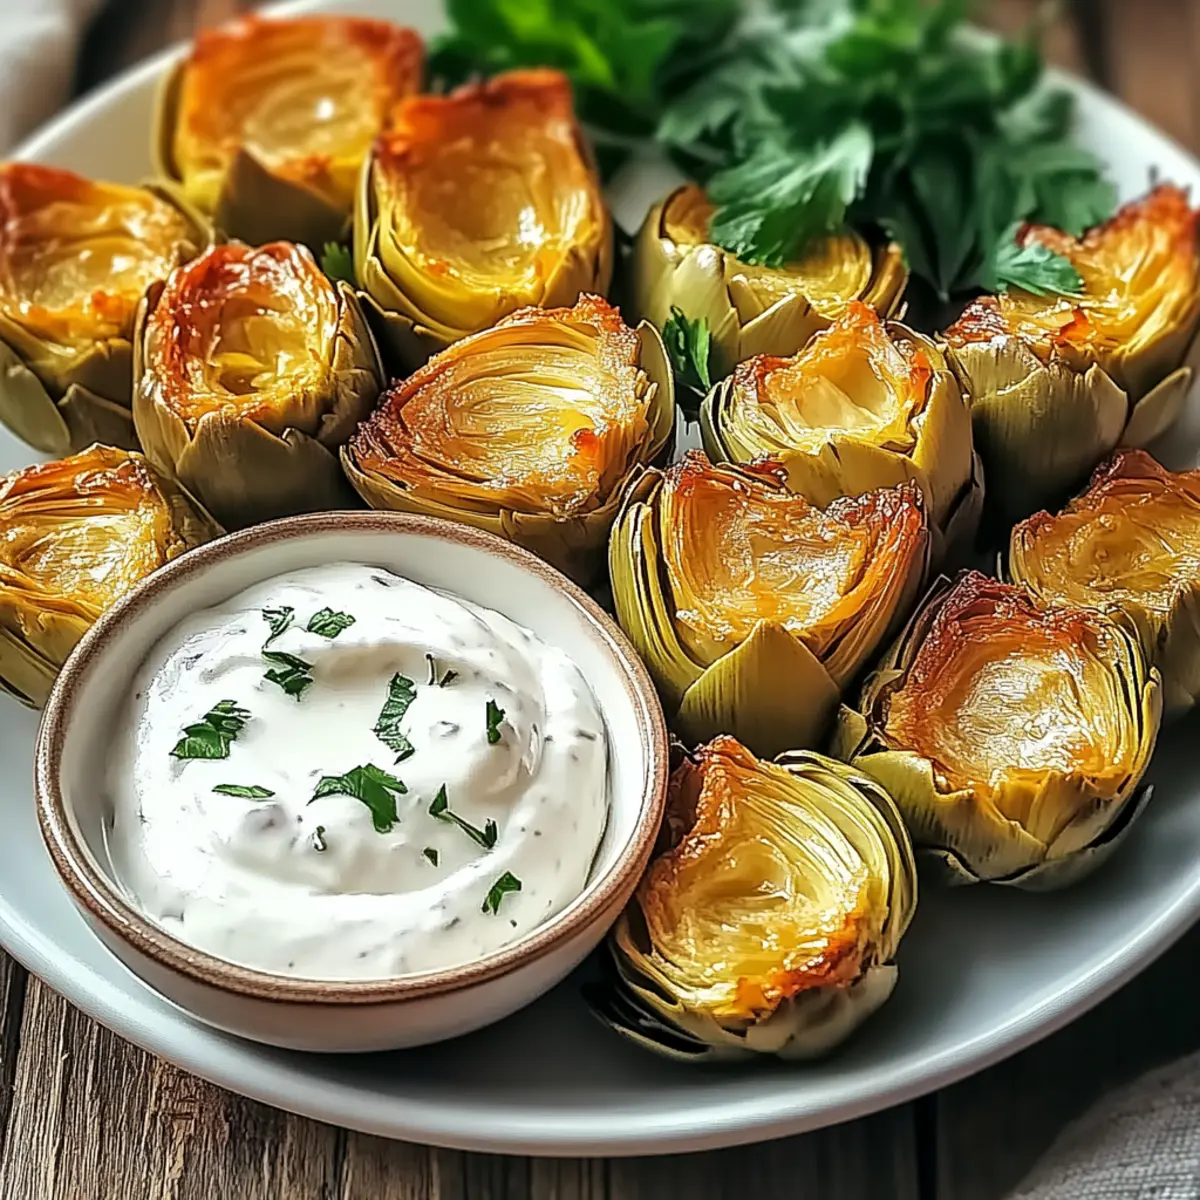
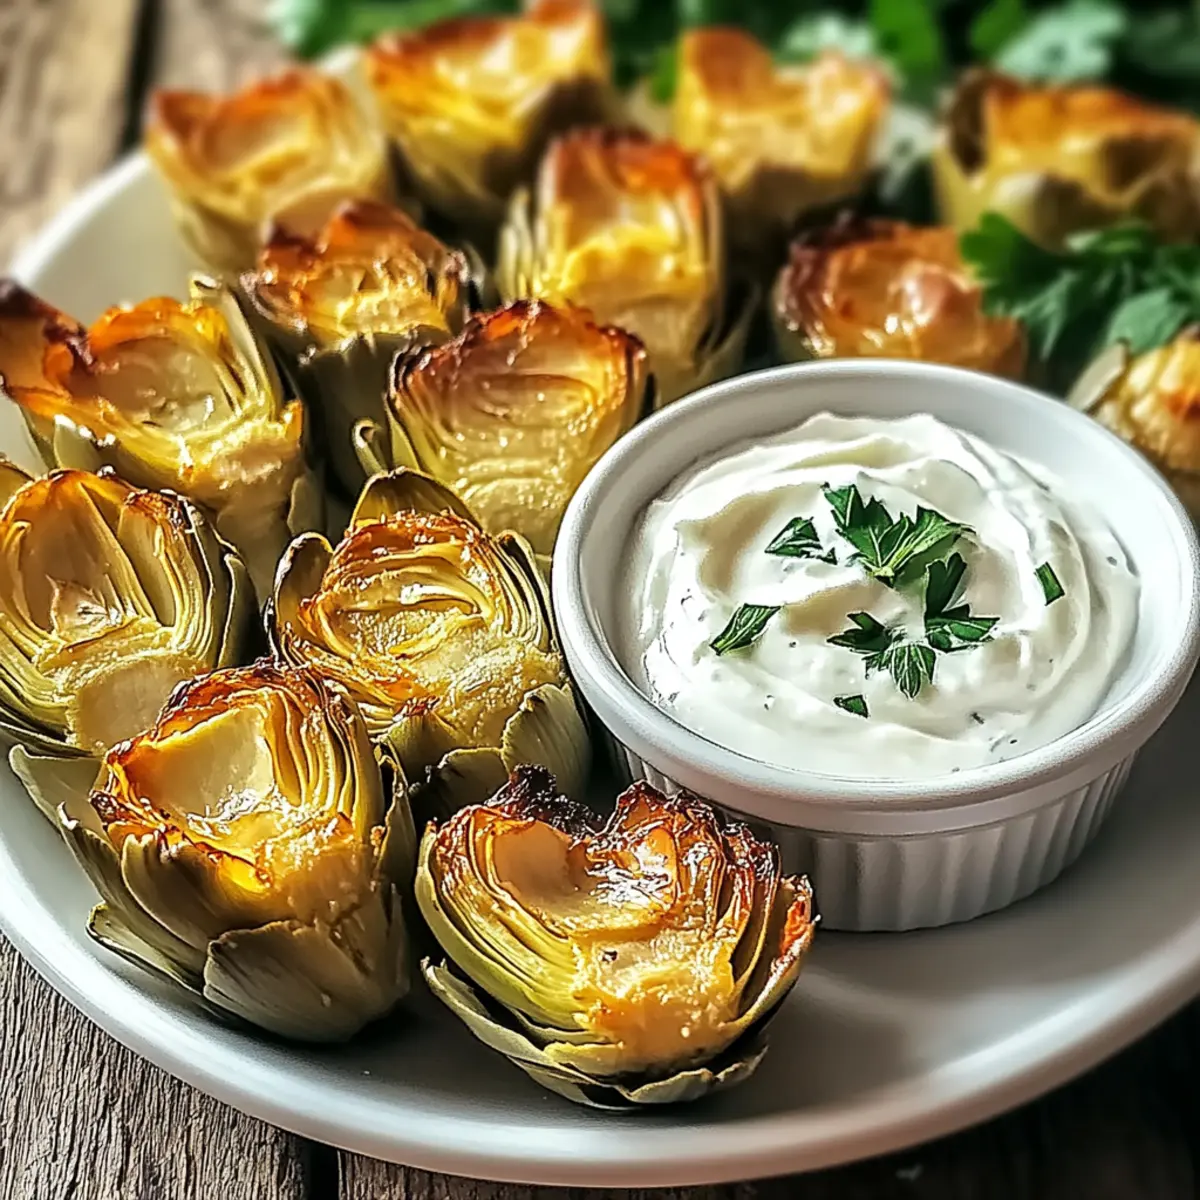
While the artichoke hearts bake, prepare the garlic aioli. In a small bowl, combine mayonnaise, minced garlic, lemon juice, salt, and pepper. Whisk until smooth and creamy, adjusting the seasoning to your taste. This zesty garlic aioli will be a delicious dipping sauce for your crispy baked artichoke hearts, complementing their flavors beautifully.
Step 8: Serve and Enjoy
Once the artichoke hearts are golden and crispy, remove them from the oven and let them cool slightly. Serve them warm alongside the garlicky aioli for dipping. These crispy baked artichoke hearts provide a delightful texture and flavor contrast, making them the perfect healthy appetizer that everyone will enjoy!
How to Store and Freeze Baked Artichoke Hearts
Refrigerate: Leftover Baked Artichoke Hearts can be stored in an airtight container for up to 3 days. Allow them to cool completely before sealing to maintain crispiness.
Freeze: For longer storage, place the baked artichoke hearts in a single layer on a baking sheet and freeze until solid. Then transfer them to a freezer-safe bag for up to 2 months.
Reheating: When ready to enjoy, reheat in an oven or air fryer at 375°F (190°C) for about 10-15 minutes until crispy again. This method brings back their delightful crunch!
Make Ahead Options
These Crispy Baked Artichoke Hearts are perfect for meal prep, allowing you to enjoy a delicious appetizer with minimal last-minute effort! You can bread the artichoke hearts up to 24 hours in advance; simply coat them and refrigerate them in a single layer on the baking sheet. This not only saves time but also allows the flavors to meld beautifully. To maintain their crispiness when you’re ready to bake, ensure they’re well-coated with breadcrumbs and are only refrigerated and not frozen. When it’s time to serve, just pop them in the oven as directed and enjoy these delightful baked artichoke hearts fresh and crispy!
What to Serve with Crispy Baked Artichoke Hearts
Enhancing your gathering or casual snack time becomes effortless when you pair these crunchy bites with exciting accompaniments.
-
Garlic Chicken Bites: These flavorful bites complement the artichokes beautifully, creating a well-rounded appetizer platter that your guests will adore. Perfect as a main event!
-
Creamy Mashed Potatoes: Rich and buttery, the velvety texture of mashed potatoes balances the crispy artichoke hearts, providing a satisfying contrast that’s comforting and delicious.
-
Seasonal Salad: A fresh salad with mixed greens, cherry tomatoes, and a light vinaigrette offers a refreshing counterpoint to the rich garlic aioli, making for a vibrant meal.
-
Roasted Vegetables: Seasonal roasted veggies add a sweet and savory element while keeping things light and healthy, enhancing the meal’s wholesome appeal.
-
Sparkling Water with Lemon: A fizzy, refreshing drink with a hint of citrus cleanses the palate between bites, perfectly complementing the flavors of this appetizer.
-
Chocolate Mousse: For a delightful dessert, rich chocolate mousse rounds out the meal beautifully, ending with a touch of sweetness that’s sure to impress.
By combining these elements, you’ll create a feast that’s both satisfying and memorable!
Tips for the Best Baked Artichoke Hearts
-
Thorough Drying: Always ensure the artichoke hearts are completely dried after rinsing. This helps maintain their crispiness while baking, avoiding soggy bites.
-
Even Coating: For an exceptional crunch, apply the breadcrumb mixture evenly. Press down firmly to make sure they adhere well to the artichoke hearts.
-
Monitor Baking Time: Keep an eye on them during the last few minutes of baking. Overcooking can lead to dryness; you want them golden brown for that perfect texture.
-
Customize Your Spice: Feel free to tweak the seasoning in your breadcrumb mixture! Adding cayenne for heat or Italian herbs for earthiness can elevate your baked artichoke hearts.
-
Make Ahead Tip: You can bread the artichoke hearts in advance and refrigerate them before baking. This not only saves time but allows the flavors to meld beautifully!
Variations & Substitutions for Baked Artichoke Hearts
Feel free to get creative with your Baked Artichoke Hearts; there’s plenty of room for customization!
-
Dairy-Free: Substitute Parmesan cheese with nutritional yeast for a cheesy flavor without the dairy. It adds a lovely umami taste to your dish.
-
Gluten-Free: Use gluten-free panko breadcrumbs and almond flour instead of all-purpose flour for those following a gluten-free diet. It will still give you that desired crunch without compromise.
-
Keto-Friendly: Replace regular breadcrumbs with crushed pork rinds to keep things low-carb. Going keto has never been this delicious!
-
Spicy Twist: Add cayenne pepper or red pepper flakes into the breadcrumb mixture for a nice kick. Spice lovers will appreciate that extra heat in every bite.
-
Mediterranean Flair: Mix in dried oregano or thyme for a herbaceous burst of flavor. These spices will transport you to a sun-kissed Mediterranean coast with every crunchy bite.
-
Flavor Boost: Try adding a tablespoon of lemon zest to your garlic aioli for a zesty flavor upgrade! It’s as refreshing as a summer breeze.
-
Variety of Dips: Pair your artichoke hearts with different sauces like tzatziki or sriracha mayo to keep things interesting. Each dip can bring out a unique flavor profile!
-
Vegetable Medley: Experiment with different vegetables alongside artichokes, like zucchini or bell peppers. They can all be coated in the same mix for a colorful, crunchy platter.
For a complementary dish, consider serving these Baked Artichoke Hearts with some Garlic Chicken Bites to round out your meal!
Baked Artichoke Hearts Recipe FAQs
What type of artichoke hearts should I use?
Absolutely! I recommend using high-quality canned artichoke hearts, drained and patted dry. Look for those packed in water rather than oil, as they provide the best texture for baking. If you find fresh artichokes, you can use those as well, but they require additional preparation!
How long can I store leftover Baked Artichoke Hearts?
You can store leftover Baked Artichoke Hearts in an airtight container for up to 3 days in the refrigerator. Be sure they cool completely before sealing to keep them crispy.
Can I freeze Baked Artichoke Hearts?
Very! To freeze Baked Artichoke Hearts, first place them in a single layer on a baking sheet and freeze until solid. Then transfer them to a freezer-safe bag or container for up to 2 months. This method prevents them from sticking together!
What should I do if my breadcrumbs aren’t sticking?
No worries! If you find that the breadcrumbs aren’t sticking well, ensure your artichoke hearts are completely dried. Additionally, try pressing the breadcrumbs firmly onto each heart during coating. Another tip is to let the coated hearts sit for about 10 minutes before baking, allowing the coating to set.
Are these Baked Artichoke Hearts safe for a gluten-free diet?
Absolutely! To make these Baked Artichoke Hearts gluten-free, simply use gluten-free panko breadcrumbs and all-purpose flour. They remain a delicious, safe option for those with gluten sensitivities!
Can I make the garlic aioli in advance?
Yes! You can prepare the garlic aioli in advance. Just mix all ingredients together and store it in an airtight container in the refrigerator. It stays fresh for about 3 days and tastes better as it sits and the flavors meld.
Baked Artichoke Hearts: Crispy, Healthy Bliss in Every Bite
Ingredients
Equipment
Method
- Preheat the oven to 375°F (190°C) and line a baking sheet with parchment paper.
- In a bowl, combine panko breadcrumbs, garlic powder, paprika, salt, and black pepper.
- Set up the breading station with bowls for all-purpose flour and beaten eggs.
- Dredge artichoke hearts in flour, dip in beaten eggs, then coat thoroughly in breadcrumb mixture.
- Place coated artichoke hearts on the baking sheet, spray lightly with olive oil.
- Bake for 20-25 minutes, flipping halfway for even cooking.
- While baking, prepare garlic aioli by mixing mayonnaise, minced garlic, lemon juice, salt, and pepper.
- Once golden and crispy, let artichoke hearts cool slightly and serve warm with garlic aioli.
Leave a Reply