
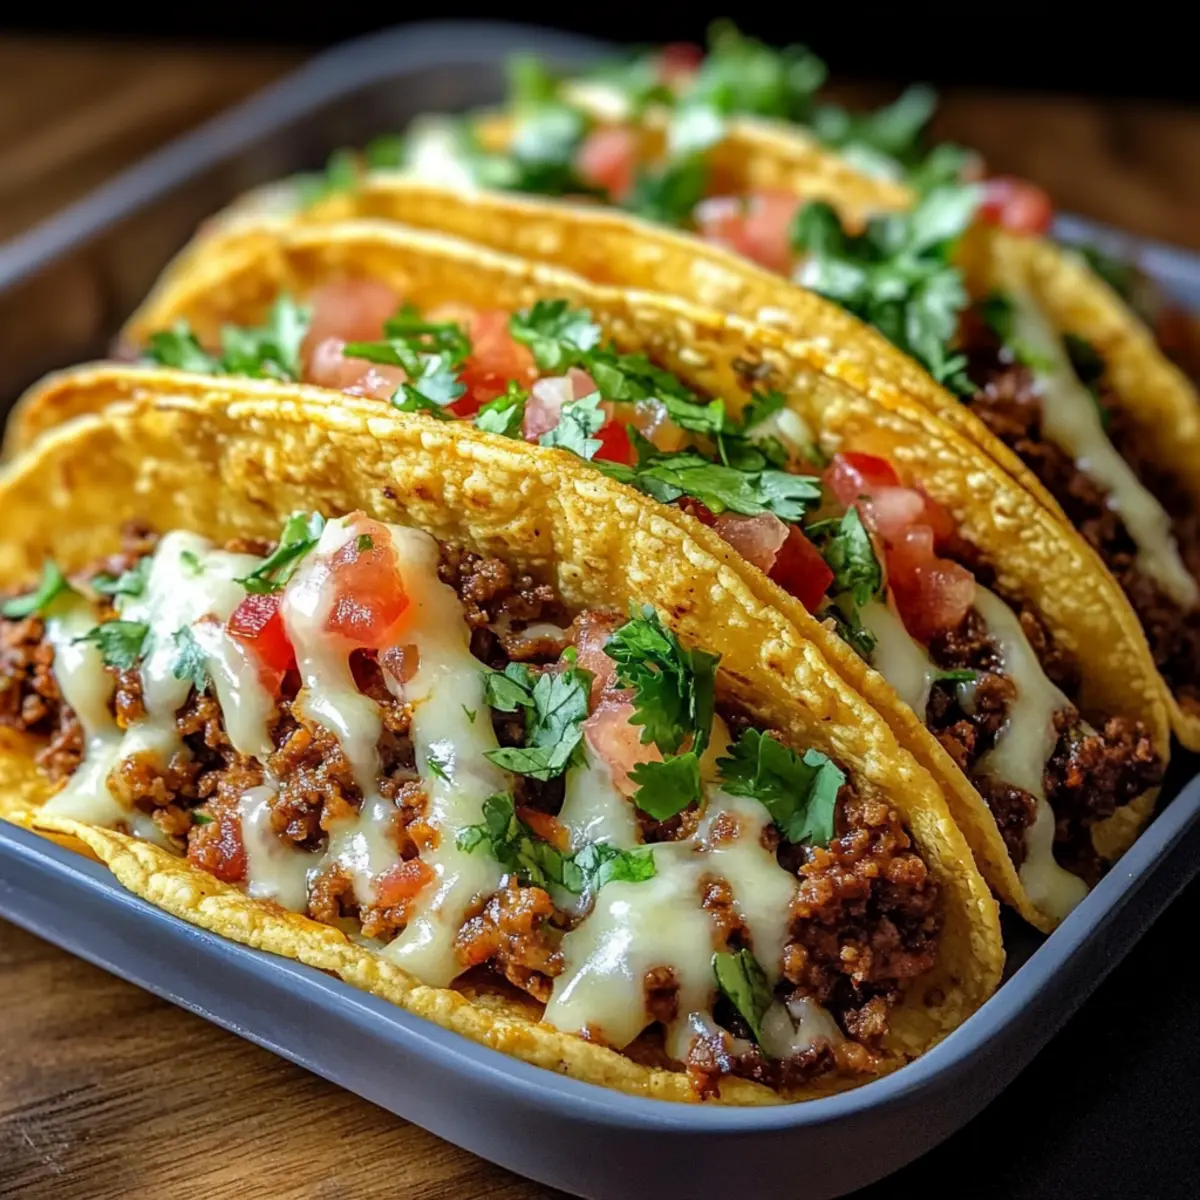
There’s nothing quite like the tempting aroma of tacos wafting through the air, inviting everyone to gather around the table. My Oven-Baked Cheesy Tacos bring together crispy shells and savory, seasoned beef, delivering that familiar comfort from taco night but with the simplicity of a quick bake. In just 30 minutes, you can whip up this crowd-pleasing dish that’s not only easy to customize—feel free to switch out proteins or cheese—but also gluten-free for those with dietary needs. Best of all? You’ll enjoy the satisfaction of making a hearty meal from scratch, leaving those fast-food outings behind. Are you ready to elevate your taco game? Let’s dive into this cheesy goodness together!
Why Are Oven-Baked Cheesy Tacos So Appealing?
Quick & Simple: This recipe offers a no-fuss way to enjoy tacos; just fill, bake, and serve in under 30 minutes.
Endless Customization: Feel free to switch proteins, use different cheeses, or tailor toppings to suit your family’s tastes. Try pairing with Spicy Tuna Tacos for a fun taco night twist!
Gluten-Free Delight: Adapting to dietary needs is a breeze—simply use gluten-free taco shells and enjoy guilt-free indulgence.
Crowd-Pleasing Flavor: With gooey cheese and savory beef, these tacos are sure to impress everyone, whether it’s a family dinner or a gathering with friends.
Comfort Food Redefined: Forget the fast-food chains and savor that homemade touch, giving you the comfort of a traditional taco night with minimal effort.
Oven-Baked Cheesy Tacos Ingredients
For the Beef Filling
• Ground Beef – The main protein source providing flavor; feel free to swap with ground turkey, chicken, or plant-based options like lentils or black beans for a healthy alternative.
• Onion – Adds sweetness and depth to the beef mixture; use finely diced onion for better integration into the filling.
• Garlic – Enhances flavor; opt for fresh minced garlic for the best taste.
• Taco Seasoning – Provides a seasoned flavor profile; homemade or your favorite store-bought version works wonderfully.
• Tomato Sauce/Salsa – Adds moisture and extra flavor; choose your favorite salsa for a delightful kick.
For the Tacos
• Hard Taco Shells – Essential for holding the fillings; use gluten-free shells to cater to dietary restrictions and maintain the delightful crunch.
• Shredded Cheese – Melts beautifully, creating a gooey texture; cheddar or Monterey Jack works perfectly, but you could also use vegan cheese for a plant-based option.
For the Toppings
• Lettuce – Provides a fresh, crisp texture; shred finely to fit perfectly into your tacos.
• Tomatoes – Adds vibrant color and juicy flavor; diced cherry tomatoes can add a sweet touch.
• Red Onion – Brings a bit of sharpness; using thinly sliced will provide just the right amount of crunch.
• Cilantro – Offers herbal freshness; if you’re not a fan, feel free to swap it out with parsley for a milder flavor.
With these Oven-Baked Cheesy Tacos ingredients in hand, you’re just steps away from creating a sensational meal that delights the taste buds and warms the heart!
Step‑by‑Step Instructions for Oven-Baked Cheesy Tacos
Step 1: Preheat the Oven
Start by preheating your oven to 400°F (200°C). This ensures that your Oven-Baked Cheesy Tacos will bake evenly and get that delightful crispness. While the oven heats, you can prepare the taco shells and fillings, making the process efficient and smooth.
Step 2: Arrange Taco Shells
Next, take a baking dish and position the hard taco shells upright in it. Make sure they are spaced evenly to prevent tipping over. This setup will allow the fillings to stay in place and, once baked, create perfectly crispy and delicious shells ready for your savory mixture.
Step 3: Cook the Beef Mixture
In a skillet over medium heat, brown the ground beef along with the finely diced onion. Cook for about 5-7 minutes until the meat is no longer pink and the onions are translucent. Drain any excess fat to avoid greasy tacos, ensuring a delicious flavor in your beef mixture.
Step 4: Add Flavoring Ingredients
Once the beef and onion are cooked, add chopped garlic and your taco seasoning to the skillet. Stir and cook for an additional minute, allowing the garlic to become fragrant and the spices to coat the meat evenly. This step is crucial for enhancing the flavor of your Oven-Baked Cheesy Tacos.
Step 5: Incorporate Tomato Sauce/Salsa
Pour in some tomato sauce or your choice of salsa, stirring to combine. Allow this mixture to simmer on low heat for about 5 minutes. This not only adds moisture but also deepens the flavor profile, making your beef filling rich and savory for the tacos.
Step 6: Fill Taco Shells
Now it’s time to generously fill each taco shell with the tasty beef mixture. Don’t overfill; leave a little room at the top to allow for the melting cheese. An even distribution will help every taco be packed with flavor while keeping them manageable to eat.
Step 7: Add Shredded Cheese
Sprinkle a good amount of shredded cheese over the filled taco shells. Opt for cheddar or Monterey Jack for a delightful melty experience. The cheese will bind the flavors together and create that gooey topping everyone loves in an Oven-Baked Cheesy Taco.
Step 8: Bake to Perfection
Place the baking dish in the preheated oven and bake for 10-15 minutes. Watch for the cheese to melt and bubble, and the taco shells to turn a lovely golden brown. This visual cue indicates that your Oven-Baked Cheesy Tacos are ready to be taken out and enjoyed.
Step 9: Add Fresh Toppings
After removing the tacos from the oven, let them cool for a minute. Then, top with your choice of fresh toppings like shredded lettuce, diced tomatoes, red onions, and cilantro. This finishing touch will add color and a fresh crunch, making your meal even more delightful!
How to Store and Freeze Oven-Baked Cheesy Tacos
Fridge: Store leftover Oven-Baked Cheesy Tacos in an airtight container for up to 3 days. Separate fillings from shells before storing to maintain crispiness.
Freezer: For longer storage, freeze unbaked taco shells filled with beef mixture (without cheese) in a freezer-safe bag. Enjoy within 2-3 months for best flavor.
Reheating: To reheat, bake thawed tacos in a preheated oven at 350°F (175°C) for 15-20 minutes, adding cheese during the last 5 minutes for a melty finish.
Make Ahead Options
These Oven-Baked Cheesy Tacos are perfect for busy weeknights when you want a homemade meal without the hassle! You can prepare the beef filling and fill the taco shells up to 24 hours in advance. Just cook the ground beef, onion, garlic, and seasoning mixture, then refrigerate it in an airtight container. To maintain quality, keep the taco shells separate until ready to bake to prevent them from getting soggy. When it’s time to serve, simply sprinkle with cheese and bake in a preheated oven for about 10-15 minutes. This way, you’ll have a delicious taco night ready with minimal effort, making your evening stress-free!
Expert Tips for Oven-Baked Cheesy Tacos
Preheat Perfectly: Ensure your oven reaches the right temperature before baking. This guarantees that the cheese melts while the shells stay crispy.
Mind the Fillings: Avoid overstuffing your taco shells; it leads to spills and uneven baking. Keep enough room for cheese topping without compromising flavor.
Lean Meat Choice: Opt for lean ground beef or swaps like turkey or beans. Drain excess fat after browning to prevent greasy Oven-Baked Cheesy Tacos that might detract from great flavor.
Crispy Shell Hack: To maximize crispiness, arrange taco shells without them touching and bake until golden brown. This allows hot air to circulate and crisp up each shell.
Homemade Seasoning: If you have extra time, consider mixing your own taco seasoning. It can be tailored with spices you love, giving your Oven-Baked Cheesy Tacos a personal touch!
Oven-Baked Cheesy Taco Variations
Feel free to customize your Oven-Baked Cheesy Tacos to fit your personal taste and dietary needs.
- Lean Meat: Substitute ground beef with ground turkey or chicken for a lighter option. Each provides a similar hearty experience without the extra calories.
- Vegan Twist: Replace shredded cheese with dairy-free cheese or nutritional yeast to make a scrumptious vegan version. The cheesy flavor remains without any animal products!
- Spicy Kick: Add diced jalapeños or a sprinkle of cayenne pepper to the beef mixture for a spicy flavor explosion. Turn up the heat to delight those who love a fiery bite!
- Fresh Herbs: Enhance flavor by mixing fresh cilantro or parsley into the beef before filling the taco shells. Herbs will add a bright note that lifts the overall taste profile.
- Flavorful Salsa: Use a zesty salsa verde instead of regular salsa to elevate the taste and freshness of your filling. Roasted tomatillos offer a unique twist that your family will adore!
- Gluten-Free Option: Use corn tortillas instead of hard taco shells for a delicious gluten-free version. Embrace the authentic Mexican flavors in each bite!
- Crunchy Texture: Bake additional toppings like crushed tortilla chips or panko breadcrumbs on top of the cheese for an unexpected crunchy element. Everyone will love this delightful texture!
- Fusion Flavor: Make it more adventurous by filling with a mixture of seasoned chicken and Asian flavors inspired by my Spicy Tuna Tacos. Asian spices provide a delicious and unique taco experience!
With these variations, your Oven-Baked Cheesy Tacos will never be boring and you’ll always have something new to delight your taste buds!
What to Serve with Oven-Baked Cheesy Tacos
Create a delightful taco night experience with these complementary dishes that elevate your cheesy creation.
-
Creamy Guacamole:
Smooth and rich, guacamole adds a delectable creaminess that balances the crunchy tacos. -
Zesty Mexican Street Corn:
This warm, buttery side brings a burst of flavor that pairs perfectly with each cheesy bite. -
Cilantro Lime Rice:
Light and refreshing, this rice enhances the meal, providing a cooling contrast to the spiced meat. -
Pico de Gallo:
Freshness at its finest! Tangy tomatoes, onions, and cilantro bring brightness and a pop of color to your table. -
Spicy Black Bean Soup:
A hearty counterpart that enriches flavor, lending a comforting warmth and texture to your meal. -
Crisp Vegetable Salad:
A crunchy medley of greens and veggies brings freshness, balancing the richness of the cheesy tacos beautifully. -
Margaritas:
The quintessential drink for taco night! The citrus notes in margaritas amplify the flavors and make the meal feel festive. -
Chocolate Churros:
End on a sweet note! Crispy churros with a chocolate dip provide a satisfying conclusion to your taco feast.
Oven-Baked Cheesy Tacos Recipe FAQs
How do I choose the right ground beef for my tacos?
Opt for lean ground beef, as it provides great flavor without excess grease. If you’re looking for a healthier alternative, ground turkey or plant-based proteins like lentils or black beans are excellent substitutes. Just ensure that whatever you select is fresh; visually, good quality meat should be bright red with minimal dark spots.
How should I store leftover Oven-Baked Cheesy Tacos?
Store any leftover tacos in an airtight container in the refrigerator for up to 3 days. To maintain crispiness, I recommend separating the taco fillings from the shells before refrigerating. This way, you can simply reassemble and reheat them for a quick meal!
Can I freeze Oven-Baked Cheesy Tacos?
Absolutely! To freeze, prepare the taco shells filled with the beef mixture (but without cheese) and place them in a single layer in a freezer-safe bag. They can be stored for up to 2-3 months. When ready to enjoy, simply bake them from frozen, adding cheese during the last 5 minutes of cooking.
What if my taco shells break while filling them?
If you find that your taco shells are fragile, try warming them briefly in the microwave or oven first to make them more pliable, reducing the chance of breaking. Additionally, a spoonful of filling rather than overstuffing can help maintain their integrity during assembly.
Are there any dietary considerations for my Oven-Baked Cheesy Tacos?
Yes! This recipe is inherently gluten-free when you choose gluten-free taco shells. Always check labeled ingredients, especially for the taco seasoning and sauces, to ensure they’re also gluten-free. If anyone has dairy allergies, consider using vegan cheese or omitting dairy toppings altogether for a delightful meal that suits everyone’s needs.
What type of toppings work best with these tacos?
The best part of tacos is the variety of toppings! Fresh toppings like shredded lettuce, diced tomatoes, red onions, and cilantro add a wonderful crunch and flavor. Feel free to mix in avocado or jalapeños for some extra spice. The more the merrier—personalize them to suit your family’s tastes!
Oven-Baked Cheesy Tacos That Will Make Taco Night Epic
Ingredients
Equipment
Method
- Preheat your oven to 400°F (200°C).
- Arrange the hard taco shells upright in a baking dish.
- In a skillet over medium heat, brown the ground beef and diced onion for 5-7 minutes.
- Add minced garlic and taco seasoning, cooking for an additional minute.
- Stir in tomato sauce or salsa and let it simmer for 5 minutes.
- Fill each taco shell with the beef mixture, leaving room for cheese.
- Top with shredded cheese.
- Bake in the oven for 10-15 minutes until cheese is melted and shells are golden brown.
- Let cool for a minute before adding toppings and serving.
Leave a Reply