
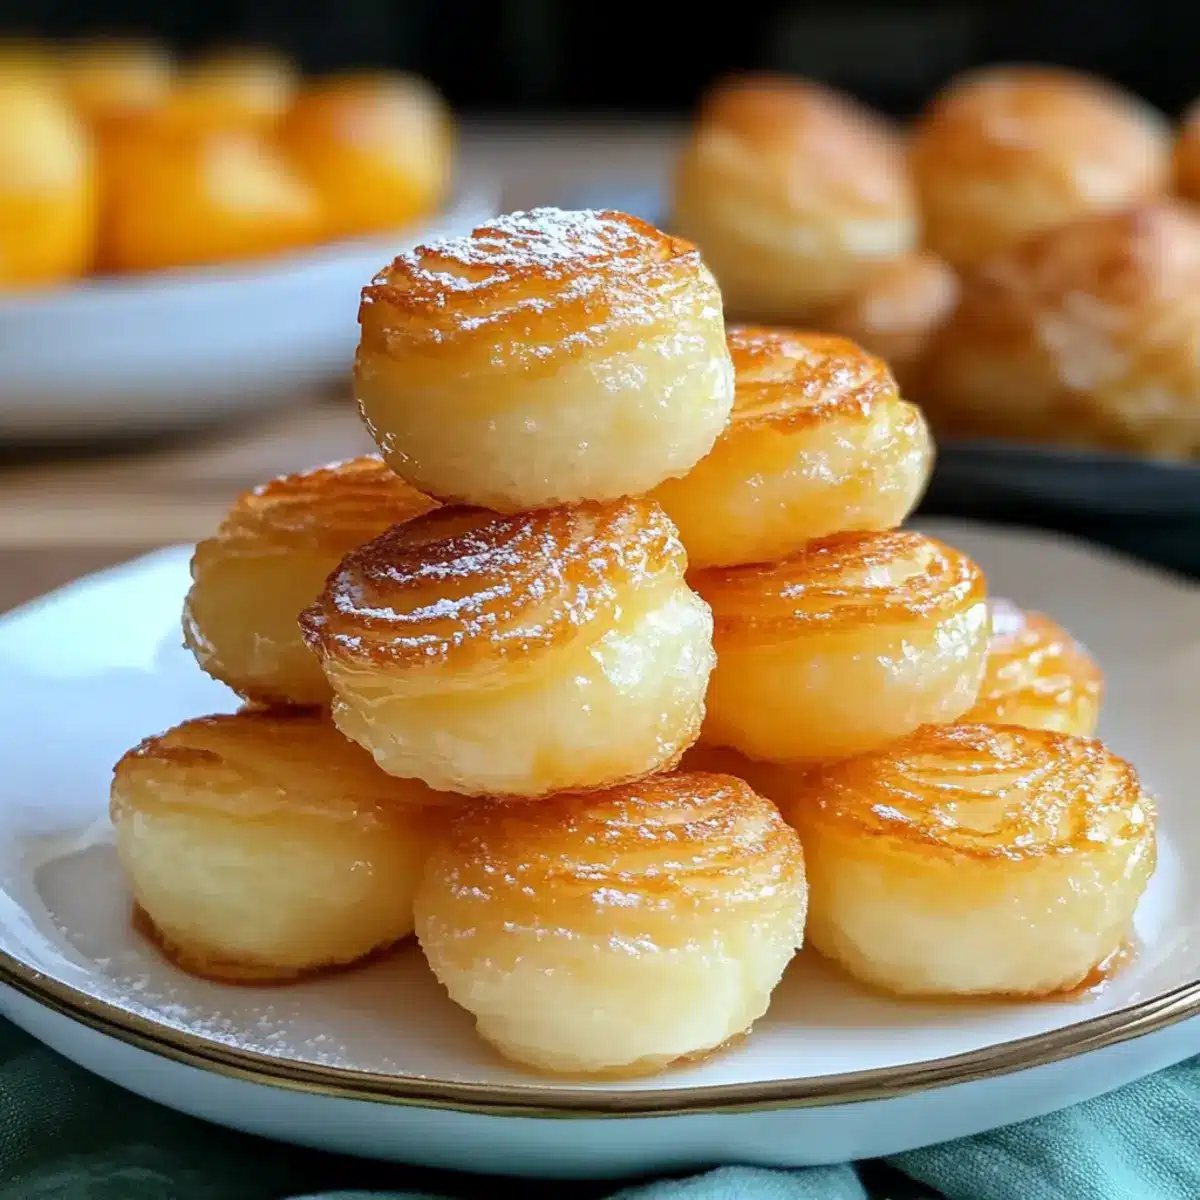
As I whisked the eggs into the warm buttery mixture, a wave of nostalgia enveloped me—this was the same ritual my grandmother performed, her laughter mingling with the scent of pastries baking. If you’re in the mood for a delightful treat that effortlessly elevates any meal, let me introduce you to the Heavenly Nun’s Puffs Recipe. These light, crispy eggy pastries are not just a feast for the senses; they make for a perfect centerpiece at brunch or an elegant accompaniment to afternoon tea. Plus, with the flexibility to customize toppings and ingredient substitutions, they can easily cater to any dietary preference. Imagine filling your kitchen with that comforting aroma while creating a dish that your family will cherish. Ready to dive into making these delectable little clouds?
Why Are Heavenly Nun’s Puffs Irresistible?
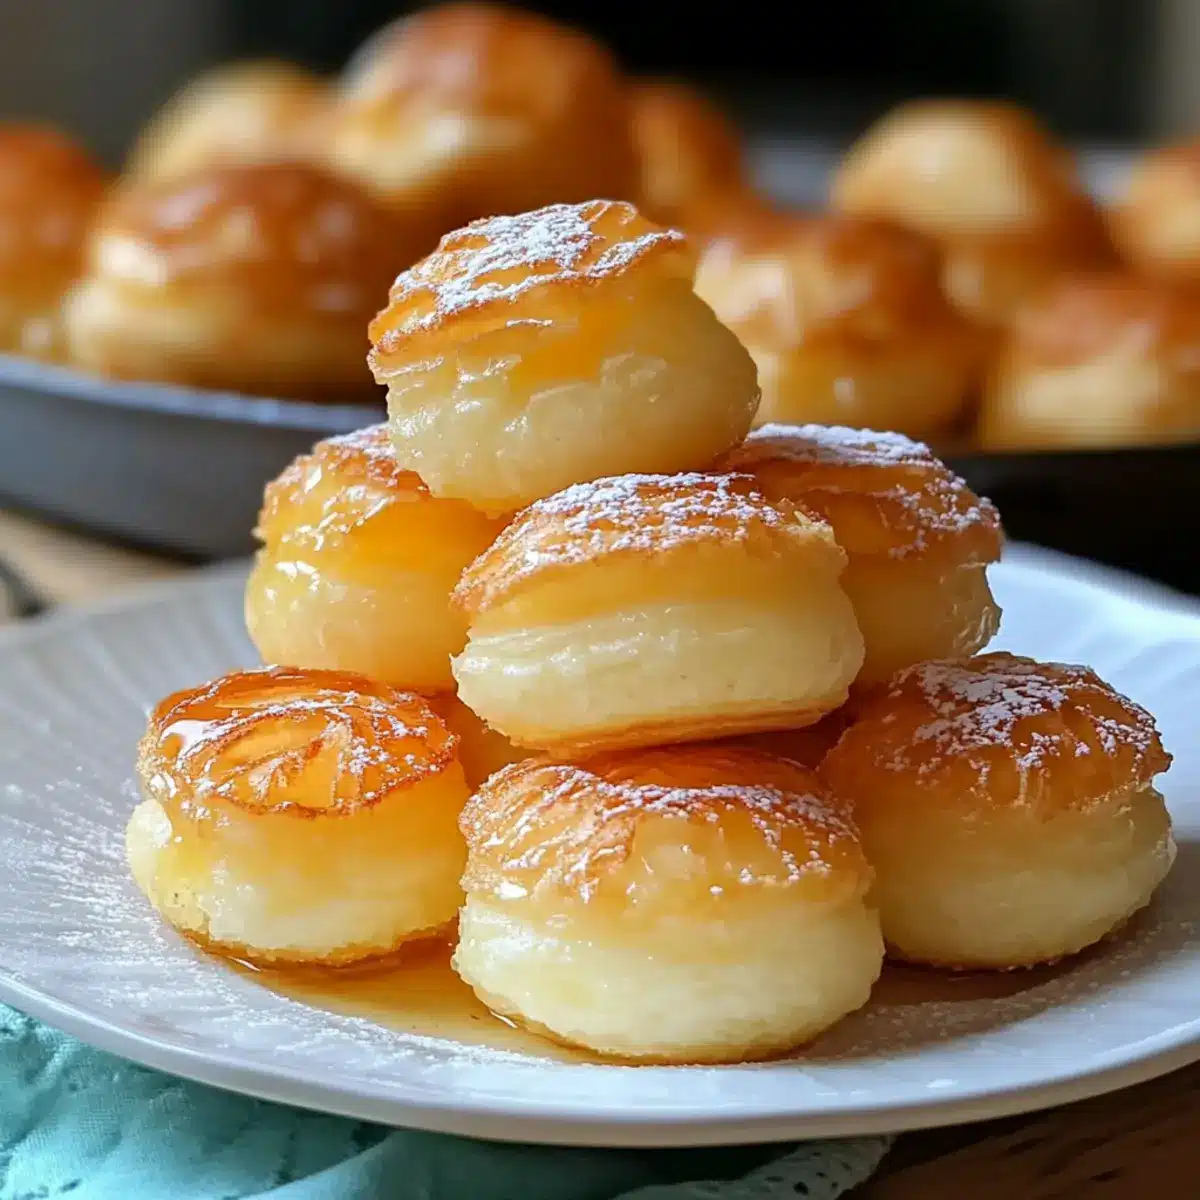
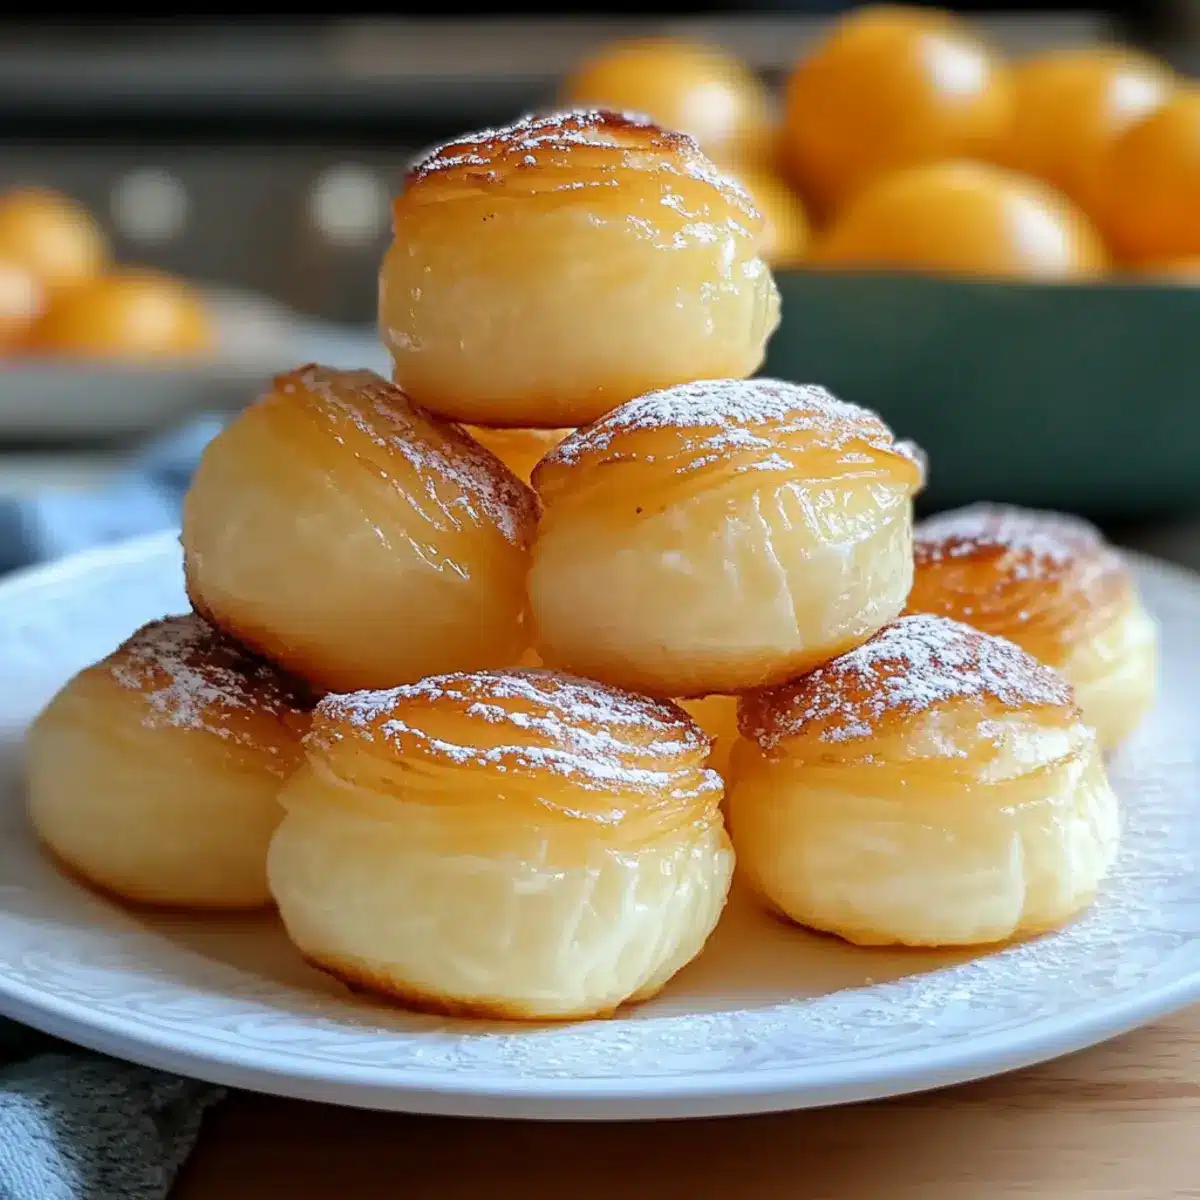
Light, Fluffy Texture: Each bite of these pastries is a delightful experience, with a crispy exterior giving way to a tender, airy center that practically melts in your mouth.
Customizable Options: You can easily swap ingredients – use almond milk for a dairy-free version or try gluten-free flour without compromising on flavor.
Brunch Perfect: These versatile puffs are an ideal addition to any brunch table and pair wonderfully with a hot cup of coffee or tea, making every gathering extra special.
Easy to Prepare: The straightforward process means you can whip them up quickly, perfect for when you want to impress without spending hours in the kitchen or explore other dishes like Baked Chicken Thighs.
Crowd-Pleasing Appeal: With their subtle sweetness and elegant appearance, Heavenly Nun’s Puffs are sure to be a hit at any celebration or casual get-together.
Heavenly Nun’s Puffs Ingredients
• Whether you’re ready to make these delightful pastries or just curious about what goes into them, here’s a handy list of everything you’ll need to recreate the Heavenly Nun’s Puffs recipe.
For the Batter
- Butter (1 stick/½ cup) – Provides richness and a crispy outer texture; you can use margarine for a non-dairy option.
- Milk (1 cup) – Adds moisture and helps create a tender pastry; almond or oat milk works great for a dairy-free twist.
- All-Purpose Flour (¾ cup) – Gives structure to the pastry; consider using a gluten-free blend for those with dietary restrictions.
- Eggs (4) – Essential for leavening, helping create the airy puff; make sure they’re at room temperature for better results.
- Sugar (½–1 tbsp, optional) – Enhances sweetness in the dough; feel free to omit if you’re watching your sugar intake.
For the Finish
- Sugar (for sprinkling) – Adds a sweet finish to the puffs after baking, making them irresistible.
- Honey (for serving, optional) – Provides an extra touch of sweetness; you can also try maple syrup for a unique flavor.
Optional Toppings
- Whipped Cream – Adds a rich, creamy element that beautifully complements the puffs.
- Fresh Fruit or Berries – Enhances the dessert appeal while providing a burst of freshness.
Now that you have everything lined up, it’s time to whisk, mix, and bake your way to these delectable Heavenly Nun’s Puffs!
Step‑by‑Step Instructions for Heavenly Nun’s Puffs Recipe
Step 1: Prepare the Base
In a medium saucepan, combine ½ cup of butter and 1 cup of milk over medium heat. Stir frequently until the mixture is steaming and the butter has completely melted, creating a fragrant, rich base that signals the start of your Heavenly Nun’s Puffs.
Step 2: Add Flour
Gradually stir in ¾ cup of all-purpose flour all at once, mixing vigorously with a wooden spoon or spatula. Continue this process until a smooth dough forms and pulls away from the sides of the pan, which should take about 2–3 minutes of consistent stirring.
Step 3: Cool Dough
Remove the pan from the heat and let the dough rest for 3–5 minutes at room temperature. This cooling step is crucial to avoid scrambling the eggs later, ensuring your Heavenly Nun’s Puffs achieve the perfect fluffy texture inside.
Step 4: Incorporate Eggs
Once the dough has cooled slightly, beat in 4 room-temperature eggs one at a time. Use an electric mixer for about 1–2 minutes after each egg to achieve a glossy, smooth mixture, as this will help your puffs rise beautifully in the oven.
Step 5: Bake
Preheat your oven to 375°F (190°C) and grease a muffin tin or a baking sheet. Using a spoon or a piping bag, drop spoonfuls of the dough into the prepared tins or directly onto the baking sheet. Bake for 25-30 minutes until they puff up and turn a deep, golden brown.
Step 6: Finish
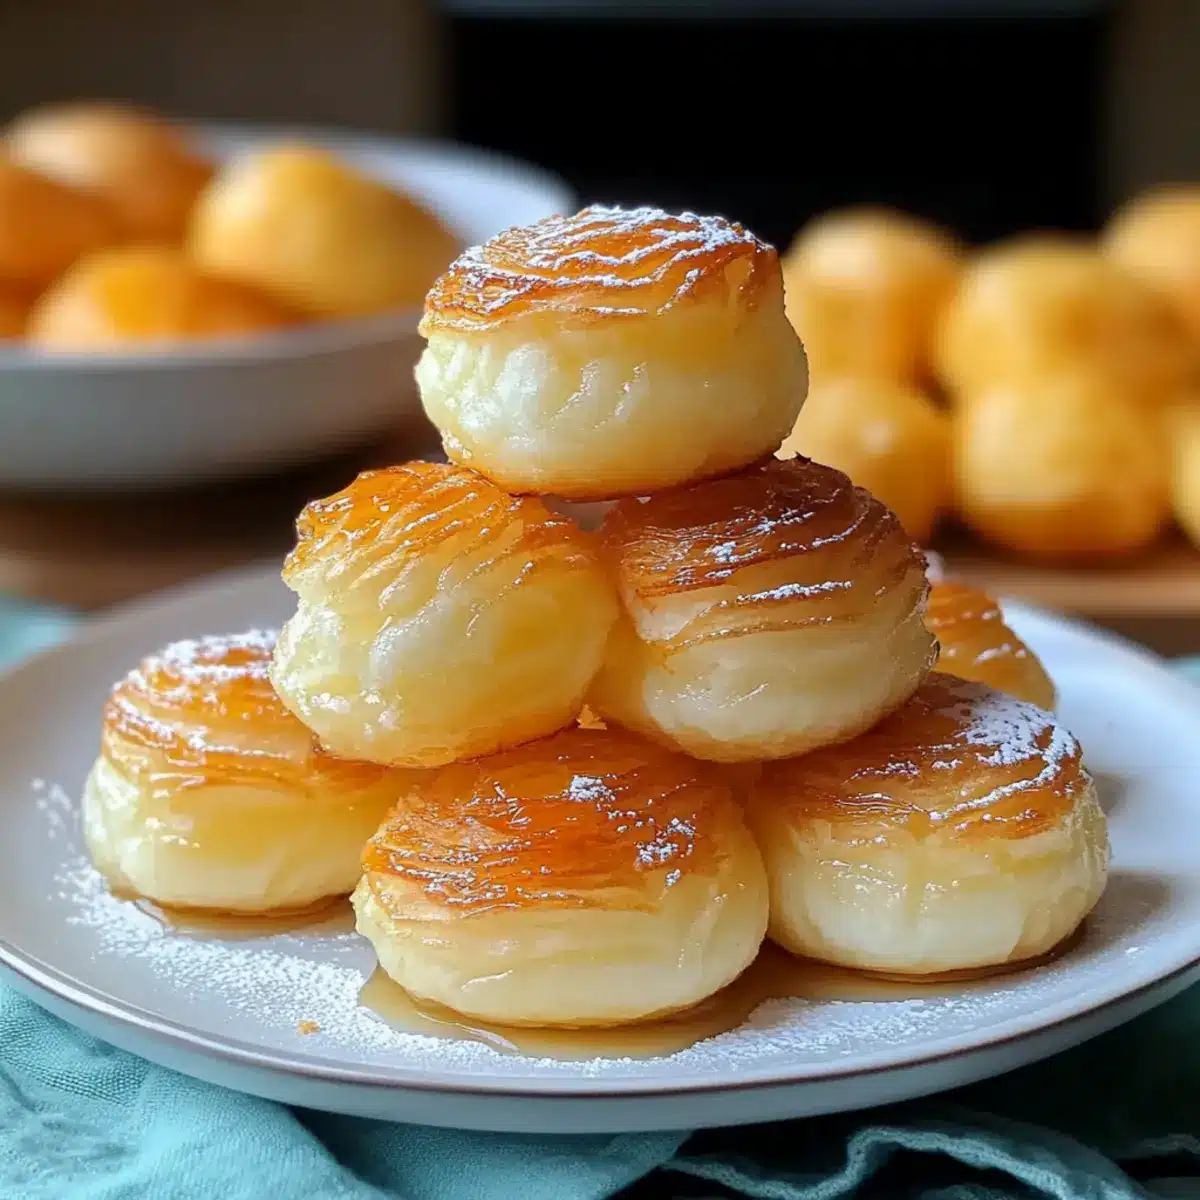
Once baked, remove the Heavenly Nun’s Puffs from the oven and immediately sprinkle them with sugar. For a delightful touch, consider drizzling honey over them before serving to enhance their sweetness, making them a perfect treat for any occasion.
Heavenly Nun’s Puffs Variations & Substitutions
Feel free to get creative in the kitchen with these delightful customization options that cater to your taste buds!
- Dairy-Free: Substitute butter with margarine and use almond or oat milk instead of regular milk for a lighter, dairy-free indulgence.
- Gluten-Free: Swap out all-purpose flour for a gluten-free flour blend that maintains the airy quality of these puffs without missing a beat.
- Fall Flavor: Replace honey with warm maple syrup for a cozy, autumn-inspired treat that pairs beautifully with spices.
- Chocolate Lover’s Delight: Serve your puffs with rich chocolate sauce for a decadent chocolatey experience—perfect for those sweet cravings!
- Cinnamon Sugar Twist: Dust your puffs with cinnamon sugar instead of regular sugar for a warm, aromatic finish that adds a delightful kick.
- Berry Bliss: Top with fresh berries or a berry compote to elevate their sweetness and bring a burst of flavor to every bite.
- Savory Option: Mix in shredded cheese or chopped herbs to create a savory variation, perfect for serving alongside soups or salads as a unique appetizer.
- Mini Puffs: Pipe smaller dollops of dough onto the baking sheet for bite-sized puffs, ideal for parties or as a delightful snack that pairs nicely with Nigerian Chicken Stew.
Whether you’re in the mood for something sweet or savory, these suggestions will help you make the Heavenly Nun’s Puffs truly your own!
Expert Tips for Heavenly Nun’s Puffs
- Cooling is Key: Allow the dough to cool for 3–5 minutes before adding eggs to prevent scrambling, ensuring the perfect fluffy texture you desire in your Heavenly Nun’s Puffs.
- Beat Well: After adding each egg, mix the dough thoroughly until glossy; this crucial step helps trap air in the mixture, allowing the puffs to rise beautifully.
- Watch the Bake: Keep an eye on them! Underbaking can lead to collapse, so aim for a deep golden brown to ensure they puff up perfectly.
- Serve Fresh: Enjoy them warm for the best flavor and texture; they truly shine when served immediately after baking, making them a standout at your brunch table.
- Experiment with Toppings: Elevate your Heavenly Nun’s Puffs by adding flavored sugars or crispy fruit toppings; get creative with finishes like whipped cream or chocolate sauce for unique flavor profiles.
What to Serve with Heavenly Nun’s Puffs
Elevate your brunch game by pairing these delightful pastries with vibrant flavors and textures that create a memorable meal experience.
- Fresh Berries: Juicy strawberries, raspberries, or blueberries add a refreshing contrast to the puffs, enhancing their sweetness and making every bite pop.
- Whipped Cream: Light and airy whipped cream offers a creamy dimension that beautifully complements the crispy exterior of the Nun’s Puffs.
- Fruit Compote: A homemade berry or citrus compote delivers a luscious, tangy element that balances the pastries’ sweetness and brings a burst of flavor.
- Savory Quiche: An egg and cheese quiche adds a hearty, savory touch, making for a balanced brunch spread that satisfies every palate.
- Hot Beverages: Pair with freshly brewed coffee or a steaming pot of herbal tea, creating a warm, inviting atmosphere perfect for leisurely gatherings.
- Yogurt Parfaits: Layered yogurt with granola and fruits adds texture and nutritional benefits, complementing the sweetness of the Nun’s Puffs beautifully.
Feel the warmth of connection as you serve these combinations, turning any ordinary meal into an extraordinary celebration!
Make Ahead Options
These Heavenly Nun’s Puffs are perfect for busy home cooks looking to save time without sacrificing flavor! You can prepare the dough up to 24 hours in advance. Simply follow steps one through four, then cover the dough tightly and refrigerate. This will help maintain its quality and prevent it from drying out. When you’re ready to bake, let the dough sit at room temperature for about 15-20 minutes. Preheat your oven to 375°F (190°C), then spoon or pipe the dough into greased tins and bake as directed. You’ll end up with just as delicious, airy pastries, ready to impress at brunch or any gathering!
How to Store and Freeze Heavenly Nun’s Puffs
Room Temperature: Store leftover Heavenly Nun’s Puffs in an airtight container at room temperature for up to 2 days to maintain their delightful texture and flavor.
Refrigerator: If you prefer to keep them longer, you can refrigerate the puffs, but note that they might lose some crispness. Consume within 3 days for the best experience.
Freezer: For longer storage, freeze unbaked dough mounds on a lined baking sheet. Once frozen, transfer to a zip-top bag and store for up to 2 months. Bake directly from frozen; simply add a few extra minutes to the baking time.
Reheating: To enjoy leftovers, reheat in a warm oven at 300°F for 5–7 minutes, ensuring they regain their fluffy, crispy goodness before serving.
Heavenly Nun’s Puffs Recipe FAQs
What type of eggs should I use for Heavenly Nun’s Puffs?
It’s best to use large eggs at room temperature for this recipe. Room temperature eggs blend more easily into the warm dough, contributing to that delightful puffiness you’re aiming for!
How can I tell if my Nun’s Puffs have finished baking?
Look for a deep golden-brown color and a puffed-up structure. They should feel firm to the touch and have a crispy exterior. If you’re unsure, you can gently touch the top; if it springs back, they are likely done!
Can I store leftover Heavenly Nun’s Puffs?
Absolutely! Store them in an airtight container at room temperature for up to 2 days. If you want to keep them longer, refrigerate them in a container, but they’ll be best consumed within 3 days. For freezing, follow these steps: freeze unbaked mounds on a lined baking sheet, transfer to a zip-top bag, and they’ll be good for up to 2 months.
Are there any dietary considerations for Heavenly Nun’s Puffs?
Yes! This recipe can easily cater to various dietary needs. You can substitute the milk with almond or oat milk for a dairy-free version, and if gluten is a concern, a gluten-free flour blend works well, too. For those watching sugar intake, simply omit the added sugar in the dough.
How do I achieve the best texture for my Nun’s Puffs?
The key is in the mixing and baking process. After the flour is added, stir vigorously until the dough pulls away from the sides of the pan—this takes about 2-3 minutes. Make sure to cool the dough for 3-5 minutes before adding the eggs to prevent them from scrambling, ensuring that airy, fluffy texture you love!
Can I add different toppings to my Heavenly Nun’s Puffs?
The more the merrier! You can enhance your Nun’s Puffs with a sprinkle of cinnamon sugar, a drizzle of chocolate sauce, or fresh fruit. Get creative and let your taste buds guide you to the perfect flavor combination for your occasion!
Heavenly Nun’s Puffs Recipe: Light, Airy Bites of Bliss
Ingredients
Equipment
Method
- In a medium saucepan, combine ½ cup of butter and 1 cup of milk over medium heat. Stir until the mixture is steaming and the butter has melted.
- Gradually stir in ¾ cup of all-purpose flour all at once, mixing vigorously until a smooth dough forms.
- Remove the pan from heat and let the dough rest for 3–5 minutes at room temperature.
- Beat in 4 room-temperature eggs one at a time using an electric mixer for 1–2 minutes after each addition.
- Preheat your oven to 375°F (190°C) and grease a muffin tin or a baking sheet. Drop spoonfuls of the dough into the prepared tins or onto the baking sheet.
- Bake for 25-30 minutes until they turn a deep, golden brown.
- Immediately sprinkle with sugar and drizzle with honey before serving.
Leave a Reply