
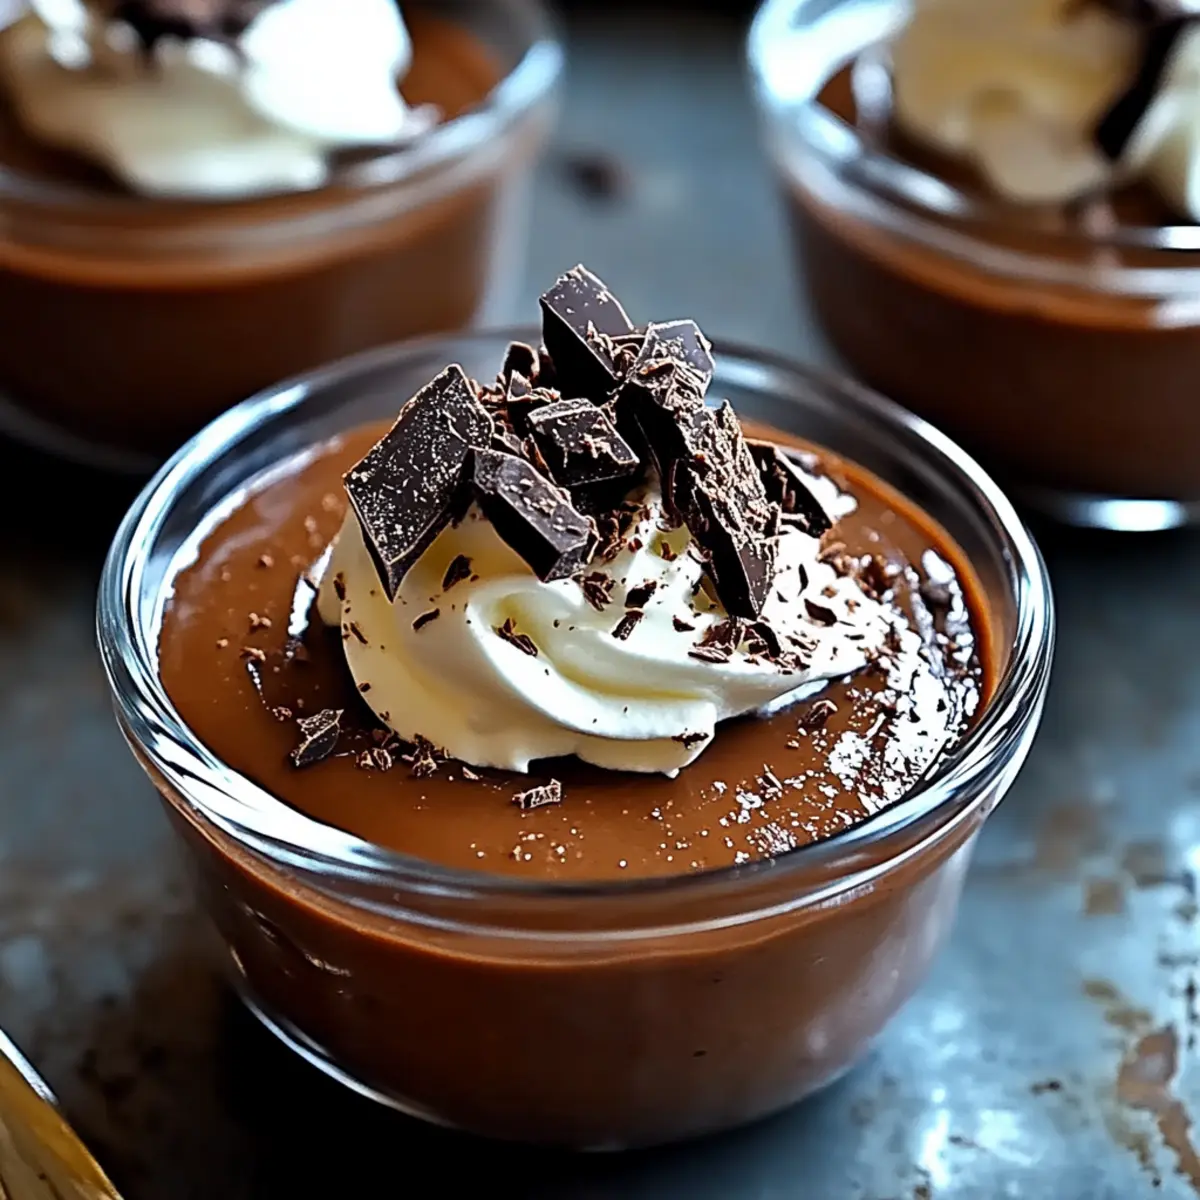
As I lifted the lid off my mixing bowl, the rich scent of melting chocolate wafted through the air, instantly whisking me away to my happiest kitchen memories. Today, we’re diving into the creation of luscious Chocolate Pudding Pots, a dessert that promises to thrill both your taste buds and your guests. In just 10 minutes of prep time, these pots transform simple ingredients into an indulgent delight that’s perfect for any occasion. Not only do they offer the comfort of homemade sweets, but they’re also easily tailored to be dairy-free or lightened for those mindful of sugar. Imagine serving these velvety treats at your next dinner party or enjoying them as a cozy night-in dessert. Are you ready to discover the secrets to this sumptuous treat?
Why are Chocolate Pudding Pots irresistible?
Indulgent, every spoonful is like a warm embrace of rich chocolate flavors that melt away your worries. Quick prep, in just 10 minutes, you can create a stunning dessert without the fuss of baking. Versatile options allow for dairy-free or lower-sugar variations, making it perfect for everyone at the table. Impressive presentation ensures that these elegant pots can wow your guests at any gathering. Pair them with a dollop of whipped cream or fresh berries for an added touch of delight. If you’re also craving something sweet, try these Chocolate Protein Pudding pots or the decadent Double Chocolate Chip Cottage Cheese Muffins. Enjoy this decadent treat any time you crave a bit of homemade bliss!
Chocolate Pudding Pots Ingredients
For the Pudding Base
- Egg Yolks – Creates a luscious, creamy base for the pudding; use fresh eggs for optimal flavor.
- Caster Sugar – Provides sweetness and balances flavors; regular white sugar can be used as a substitute.
- Vanilla Extract – Adds warmth and enhances the chocolate flavor; look for pure vanilla extract for the best taste.
- Cocoa Powder – Sifted to ensure a smooth texture; Dutch-processed cocoa can be used for a different taste profile.
- Cornflour (Cornstarch) – Acts as a thickening agent for pudding consistency; substituting with arrowroot flour is possible for a gluten-free version.
- Full-Fat Milk – Offers a rich, creamy base; can be substituted with almond milk for a dairy-free version.
- Heavy Cream – Provides ultra-creamy texture; use coconut cream for a dairy-free alternative.
- 70% Cocoa Chocolate – The main flavor component; finely chopped to melt easily; opt for high-quality chocolate for best results.
- Salt – Enhances sweetness and balances flavor.
For the Topping
- Whipped Cream Topping – Heavy cream sweetened and flavored with vanilla, ideal for topping; whip just until soft peaks form for an airy texture.
- Chopped Chocolate for Garnish – Adds elegance and a textural contrast; can substitute with chocolate shavings or crushed nuts.
These Chocolate Pudding Pots ingredients combine to create a dreamy dessert that’s not only indulgent but also easy to make!
Step‑by‑Step Instructions for Indulgent Chocolate Pudding Pots
Step 1: Whisk Egg Yolks and Sugar
In a medium saucepan, use a whisk to combine the egg yolks and caster sugar until the mixture is smooth and pale, about 2 minutes. This will create a creamy base for your Chocolate Pudding Pots, ensuring sweetness throughout.
Step 2: Combine Dry Ingredients
Add the vanilla extract, sifted cocoa powder, and cornflour to the egg and sugar mixture. Pour in just a splash of milk to help blend the dry ingredients smoothly. Mix well until everything is thoroughly incorporated, avoiding any lumps for an exquisite pudding texture.
Step 3: Incorporate Milk and Cream
Slowly stir in the remaining full-fat milk and heavy cream, adding a pinch of salt to balance flavors. Continuously mix until the pudding base is velvety and free of lumps. This creamy mixture will form the heart of your indulgent dessert, rich and inviting.
Step 4: Heat Mixture
Place the saucepan over medium heat and cook, whisking frequently to avoid sticking, until the mixture starts to bubble gently. Once you see bubbles, stir constantly for an additional 15 seconds before removing it from heat. This step thickens the pudding and enhances its luscious consistency.
Step 5: Melt Chocolate
Immediately add the finely chopped 70% cocoa chocolate to the hot pudding mixture, stirring continuously until the chocolate completely melts and the mixture becomes glossy and smooth. This rich chocolate infusion is what makes the Chocolate Pudding Pots truly irresistible.
Step 6: Portion Pudding
Quickly pour the warm pudding into individual ramekins or serving pots, making sure to leave a little space at the top as it will thicken upon cooling. This step is crucial for the presentation of your Chocolate Pudding Pots, ensuring they look delightful when served.
Step 7: Cool and Chill
Allow the filled ramekins to cool at room temperature for about 15 minutes. Afterward, cover with plastic wrap and refrigerate for at least 3 hours until set. Cooling is essential for achieving that perfect, creamy pudding texture.
Step 8: Whip the Cream
Just before serving, take some chilled heavy cream, and whip it with a bit of sugar and vanilla extract until soft peaks form. This light and airy cream will be the perfect topping for your decadent Chocolate Pudding Pots, enhancing both texture and flavor.
Step 9: Garnish and Serve
Finally, dollop the whipped cream atop each pudding pot and sprinkle with chopped chocolate for an elegant touch. This finishing step not only elevates the visual appeal but also adds a delightful contrast in texture, making your dessert a showstopper!
How to Store and Freeze Chocolate Pudding Pots
Fridge: Store your Chocolate Pudding Pots in the refrigerator, covered tightly with plastic wrap or in an airtight container, for up to 3 days for optimal freshness.
Freezer: If you want to enjoy these indulgent desserts later, freeze the pudding for up to 2 months. Make sure they are in airtight containers to prevent freezer burn.
Thawing: When you’re ready to enjoy, simply thaw the frozen Chocolate Pudding Pots in the refrigerator overnight for a smooth texture.
Reheating: If desired, you can gently reheat leftover pudding in the microwave at a low setting, stirring frequently to maintain creaminess, but it’s best served chilled.
Expert Tips for Chocolate Pudding Pots
- Ingredient Quality: Use the freshest eggs and high-quality chocolate for the deepest flavor. Substituting with lower-quality chocolate can compromise the indulgence of the pudding.
- Prevent Lumps: Always sift your cocoa powder before mixing; this ensures a smooth texture in your Chocolate Pudding Pots. Whisk well to combine thoroughly.
- Cool It Down: Let your pudding cool at room temperature before refrigerating. This helps set the texture and prevents condensation from forming inside your pots.
- Perfect Whip: When whipping cream, stop as soon as soft peaks form—over-whipping can make it grainy, ruining the silky topping for your pudding.
- Chilling Is Key: Allow at least 3 hours in the refrigerator for the perfect consistency—the longer, the better for that sumptuous mouthfeel you crave!
Make Ahead Options
These Indulgent Chocolate Pudding Pots are perfect for meal prep, making busy weeknights a breeze! You can prepare the pudding base up to 24 hours in advance. To do so, follow the recipe up to step 6—pour the warm mixture into ramekins, then allow them to cool at room temperature. Once cooled, cover them tightly with plastic wrap and refrigerate to maintain freshness. When you’re ready to serve, simply allow the pots to sit at room temperature for about 10 minutes, whip the cream (which can also be prepared up to 3 days in advance), and finish by garnishing with whipped cream and chopped chocolate. This allows you to enjoy a rich dessert with minimal effort while ensuring they remain just as delicious!
What to Serve with Indulgent Chocolate Pudding Pots
Elevate your dessert experience by pairing these rich chocolate pots with delightful accompaniments that satisfy every craving.
- Fresh Berries: The tartness of strawberries or raspberries cuts through the heavy chocolate, adding a refreshing balance to your dessert.
- Whipped Cream: A dollop of airy whipped cream not only complements the silky texture but adds a lightness that contrasts wonderfully with the richness of the pudding.
- Espresso or Coffee: The bold flavors of coffee enhance the chocolate, creating a delicious mocha experience that coffee lovers will adore.
- Chocolate Mousse: For the true chocolate enthusiasts, layer the pudding pots with chocolate mousse for an indulgent, double chocolate dessert offering incredible textures.
- Spicy Hot Chocolate: Pairing with a cup of spicy hot chocolate will warm your soul and complement the dessert’s decadence on chilly evenings.
- Caramel Sauce: Drizzling a warm caramel sauce over the pudding adds an unexpected sweetness that perfectly harmonizes with the chocolate.
- Ice Cream: Since every pudding benefits from ice cream, try a scoop of vanilla or salted caramel ice cream for creamy contrast.
- Shortbread Cookies: Serve with buttery shortbread cookies for a delightful crunch, perfect for dipping into the velvety pudding.
- Mint Tea: A refreshing cup of mint tea provides a light end to your meal and cleanses the palate beautifully after indulgence.
Chocolate Pudding Pots Variations
Feel free to get creative with these delightful Chocolate Pudding Pots, making them your very own!
-
Dairy-Free: Substitute milk and heavy cream with coconut milk and coconut cream for a creamy, non-dairy delight. This will bring a tropical twist to your velvety dessert!
-
Lower Sugar: Swap out traditional sugar for stevia or erythritol to create a lighter version without sacrificing sweetness. Your guests won’t even notice the difference!
-
Flavored Chocolate: Experiment with other chocolate types like milk or white chocolate to completely transform the flavor profile. Each variation yields a unique taste experience that’s sure to impress.
-
Mocha Twist: Add a teaspoon of instant coffee or espresso powder to elevate your pudding with a bold coffee flavor. This oh-so-satisfying twist will appeal to coffee lovers everywhere!
-
Nutty Addition: Stir in a splash of almond or hazelnut extract for a warm, nutty flavor that complements the chocolate beautifully. Imagine each bite bursting with luscious flavors!
-
Spicy Chocolate: A pinch of cayenne or cinnamon can introduce a fun, spicy note to your pudding. Perfect for adventurous palates, it adds a surprising kick that will delight your taste buds!
-
Fruit Topping: Instead of traditional whipped cream, add fresh berries or caramelized bananas for a fruity finish. The vibrant colors and textures will make your dessert even more enticing.
For more dessert inspirations, check out these indulgent treats like the rich Chocolate Protein Pudding pots or the luscious Double Chocolate Chip Cottage Cheese Muffins. Enjoy these variations and embrace your inner chef!
Chocolate Pudding Pots Recipe FAQs
What type of eggs should I use for the pudding?
Absolutely! For the best flavor and creamy texture, use fresh eggs. They create a luscious base for the pudding that elevates the overall taste. If you’re unsure, look for eggs that are free-range or pasture-raised for a richer flavor.
How should I store leftover Chocolate Pudding Pots?
I recommend storing your Chocolate Pudding Pots in the refrigerator in airtight containers or tightly covered with plastic wrap for up to 3 days. This keeps them fresh and ready for indulgence whenever sweet cravings strike!
Can I freeze Chocolate Pudding Pots, and how do I do it?
Yes, you can freeze these delightful treats! To freeze, allow the pudding to cool completely, then transfer it to airtight containers or freezer-safe bags. They can be frozen for up to 2 months. To thaw, simply place them in the refrigerator overnight before serving. For a perfect texture, avoid refreezing after thawing.
What should I do if my pudding is too lumpy?
If you find that your pudding has lumps, don’t worry! Simply pour the mixture through a fine-mesh sieve into another bowl to remove the lumps. This will leave you with a silky smooth pudding. Always sift your cocoa powder and whisk thoroughly when combining ingredients to prevent this issue, next time!
Are there any dietary considerations I should be aware of?
Very! If you’re making these for friends or family with dietary restrictions, you can easily customize the recipe. For a dairy-free version, swap the full-fat milk and heavy cream for coconut milk and cream, respectively. Additionally, you can lower the sugar by using alternatives like stevia or erythritol, making them even more accessible for different dietary needs.
How long do Chocolate Pudding Pots need to chill?
To achieve that delightful creamy consistency, I recommend chilling your pudding pots for at least 3 hours in the refrigerator. This waiting period is crucial; it allows the flavors to meld beautifully and the pudding to set perfectly. Don’t rush this step if you want to savor that indulgent experience!
Decadent Chocolate Pudding Pots for Your Sweet Cravings
Ingredients
Equipment
Method
- Whisk egg yolks and sugar until smooth and pale, about 2 minutes.
- Combine dry ingredients: vanilla extract, sifted cocoa powder, and cornflour with egg and sugar.
- Slowly stir in milk and cream, adding salt, until mixture is velvety.
- Heat mixture over medium heat, whisking frequently until it bubbles. Stir for an additional 15 seconds.
- Add finely chopped chocolate to hot pudding, stirring until melted and glossy.
- Pour warm pudding into ramekins, leaving space at the top.
- Cool filled ramekins at room temperature for 15 minutes before refrigerating for at least 3 hours.
- Whip cream with sugar and vanilla until soft peaks form.
- Dollop whipped cream on each pudding pot and sprinkle with chopped chocolate.
Leave a Reply