
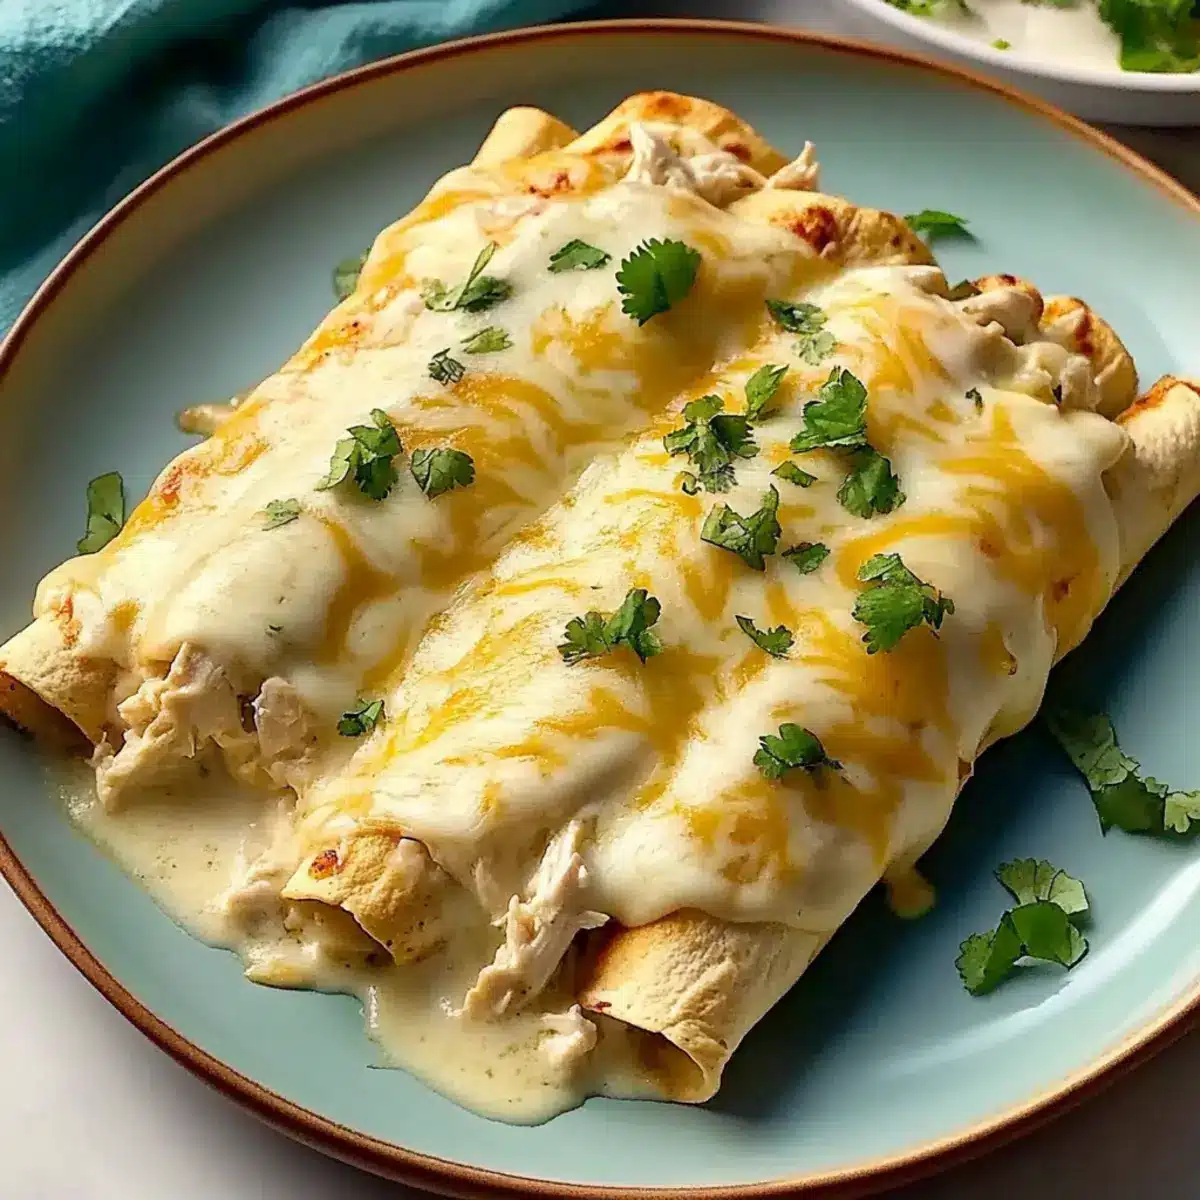
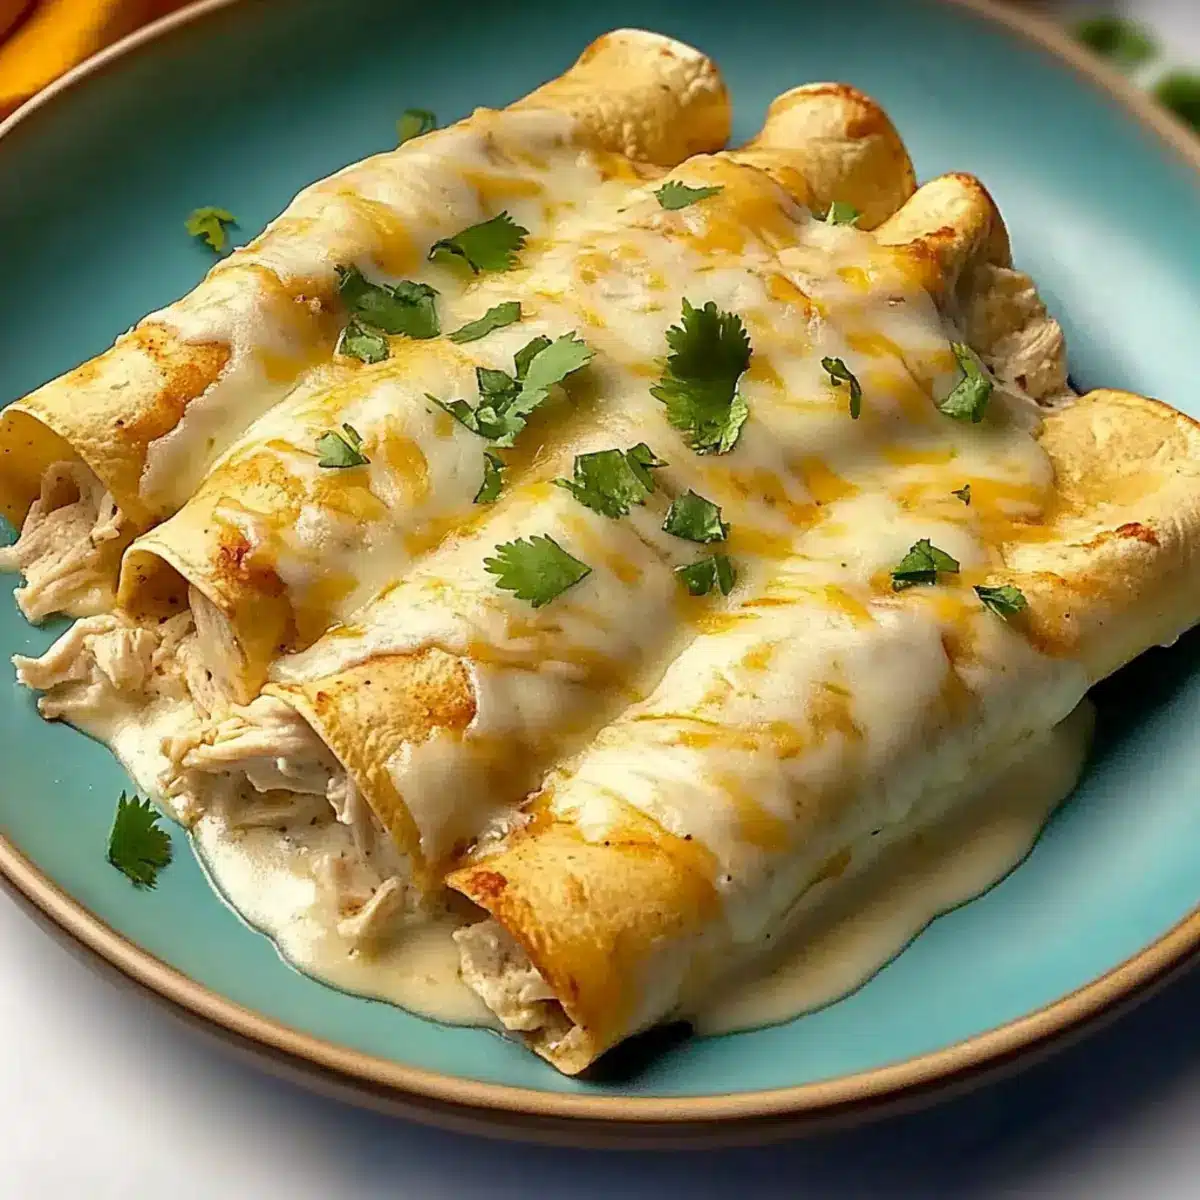
As the aroma of freshly baked enchiladas fills the kitchen, I can’t help but feel a wave of nostalgia wash over me. The creamy white rotisserie chicken enchiladas are not just a dish; they’re a warm embrace, a comforting meal that brings family and friends together on busy weeknights. With the convenience of store-bought rotisserie chicken, these enchiladas are a quick and easy option that doesn’t skimp on flavor. The rich, velvety sauce, made with tangy sour cream and bubbling Monterey Jack cheese, transforms a simple recipe into a delightful celebration of taste. They’re not just comforting; they’re family-friendly, perfect for those evenings when you want to gather everyone around the table without spending hours in the kitchen. Ready to create a dish that will have everyone asking for seconds? Let’s dive into the magic of these creamy white chicken enchiladas!
Why Choose White Rotisserie Chicken Enchiladas?
Comforting, Rich Flavor: These enchiladas are a delicious twist on a classic, offering a creamy white sauce that elevates every bite.
Quick & Easy Preparation: Using rotisserie chicken means minimal prep time—just shred, mix, and roll!
Family-Friendly Delight: Everyone will love the cheesy goodness, making it a sure-fire hit for family dinners.
Versatile Ingredients: Feeling adventurous? Try adding black beans or corn for added taste and nutrition.
Perfect for Meal Prep: Enjoy leftovers or freeze before baking, ensuring you always have a comforting meal ready to go.
Crowd-Pleasing Appeal: Serve alongside Mexican rice or a fresh salad for a complete meal that impresses everyone!
White Rotisserie Chicken Enchiladas Ingredients
Let’s gather everything you need to create these dreamy enchiladas!
For the Enchiladas
• Flour Tortillas – Medium-sized tortillas are perfect for holding the creamy filling without tearing; warm them up briefly to keep pliable.
• Rotisserie Chicken – This convenient ingredient provides flavor and saves time; simply shred it before use.
• Cream Cheese – Choose softened cream cheese for easy mixing, enhancing the creamy texture of your sauce.
• Garlic Powder – Use this for a subtle flavor kick; fresh garlic can amplify the taste even further.
• Onion Powder – It adds depth to the filling; substitute with finely chopped onions for a fresher touch if desired.
• Monterey Jack Cheese – A must for that gooey, melt-in-your-mouth experience; freshly shredded cheese works best.
For the Creamy Sauce
• Butter – Essential to create a roux for thickening the sauce; unsalted is recommended for better control over seasoning.
• Flour – Use this for the roux; gluten-free flour can be swapped in for those with dietary restrictions.
• Taco Seasoning – Adds a delightful spice and depth; feel free to use your homemade mix for a personalized touch.
• Chicken Broth – A low-sodium broth is ideal for controlling the saltiness of your sauce.
• Sour Cream – This adds creaminess and a tangy flavor, crucial for the sauce’s delightful texture.
• Green Chiles – Introduce a mild kick and flavor; for a fresh twist, swap with diced fresh chilies, or omit for a milder dish.
Get ready to create these comforting white rotisserie chicken enchiladas that will surely become a family favorite!
Step‑by‑Step Instructions for Creamy White Rotisserie Chicken Enchiladas
Step 1: Preheat and Prepare Baking Dish
Preheat your oven to 350°F (175°C) and generously grease a 9×13 inch baking dish with cooking spray or butter. This will ensure your enchiladas don’t stick to the bottom as they bake. While the oven is warming up, gather your ingredients so you can easily assemble the creamy white rotisserie chicken enchiladas.
Step 2: Mix the Filling
In a large mixing bowl, combine the shredded rotisserie chicken, softened cream cheese, garlic powder, onion powder, and 1 cup of the Monterey Jack cheese. Use a spatula to blend these ingredients together until smooth and well incorporated. This creamy filling will form the flavorful heart of your enchiladas.
Step 3: Create the Sauce Base
In a medium saucepan over medium heat, melt 4 tablespoons of butter. Once melted, whisk in 4 tablespoons of flour, stirring continuously for 1-2 minutes to create a light roux; it should turn a pale golden color. This roux will form the base of your creamy sauce for the enchiladas.
Step 4: Thicken the Sauce
Next, sprinkle in your taco seasoning while whisking to combine, then slowly pour in 2 cups of chicken broth, whisking constantly to prevent any lumps. Continue to cook, stirring frequently, until the sauce thickens—about 5–8 minutes. It should coat the back of a spoon like a gradual wave, signaling it’s ready for the next step.
Step 5: Add Cheese to Sauce
Once your sauce has thickened, remove it from the heat and stir in ½ cup of shredded Monterey Jack cheese until it melts and creates a velvety texture. This addition enhances the creaminess of your sauce, complementing the flavors in your creamy white rotisserie chicken enchiladas. Set aside for assembly.
Step 6: Fill the Tortillas
On a clean surface, lay out a warm flour tortilla and spoon about 1/3 cup of the chicken filling onto the center. Roll the tortilla tightly around the filling, ensuring the seam is tucked in neatly. Place the rolled tortilla seam-side down into the greased baking dish. Continue until all tortillas are filled and snugly arranged in the dish.
Step 7: Pour the Sauce Over Enchiladas
After all the tortillas are rolled and placed in the baking dish, whisk the sour cream into the reserved sauce, avoiding any lumps. Gently fold in the green chiles if using, and then pour the creamy sauce evenly over the enchiladas, ensuring every piece is generously coated in delight.
Step 8: Top with Cheese and Bake
Sprinkle the remaining cheese over the top of the enchiladas, creating a gooey layer that will melt beautifully. Bake uncovered in the preheated oven for 22-25 minutes, or until the cheese is bubbly and slightly golden, signaling that your creamy white rotisserie chicken enchiladas are nearly ready.
Step 9: Broil for a Perfect Finish
For an extra touch of perfection, switch your oven to broil and cook for an additional 2-3 minutes. Keep a close eye on the enchiladas to ensure the cheese doesn’t burn; it should turn a lovely golden color. This step creates a delightful contrast to the soft tortillas.
Step 10: Rest Before Serving
Finally, remove the enchiladas from the oven and let them rest for about 2-3 minutes to allow the filling to settle. This brief pause will help you serve these creamy white rotisserie chicken enchiladas with all their delicious flavors locked in, ready to be enjoyed!

Expert Tips for White Rotisserie Chicken Enchiladas
- Sour Cream Caution: Add the sour cream off the heat to avoid curdling, ensuring a creamy sauce texture.
- Tortilla Warming: Warm tortillas before filling to maintain flexibility and prevent cracking when rolling.
- Correct Filling Amount: Use no more than 1/3 cup of filling per tortilla to prevent spills and maintain shape while baking your enchiladas.
- Cheese Selection: For the best melting experience, opt for freshly shredded Monterey Jack cheese rather than pre-shredded versions.
- Careful Broiling: Watch closely during the broiling stage; cover with foil if the cheese browns too quickly to avoid burning.
Make Ahead Options
These creamy white rotisserie chicken enchiladas are ideal for meal prep devotees! You can prepare the filling (shredded chicken, cream cheese, and seasonings) up to 24 hours in advance; simply store it in an airtight container in the refrigerator until you’re ready to roll. You can also assemble the entire dish, covering it tightly in foil, and refrigerate for up to 3 days. Just be sure not to pour the sauce over the enchiladas until you’re ready to bake, to maintain the tortillas’ texture. When it’s time to bake, remove from the fridge, pour your creamy sauce over, and bake as instructed. This way, you’ll enjoy the same delicious flavors with minimal effort on busy weeknights!
Storage Tips for White Rotisserie Chicken Enchiladas
Fridge: Store any leftovers in an airtight container for up to 4 days, ensuring that they stay fresh and ready to enjoy for lunch or dinner.
Freezer: For long-term storage, freeze unbaked enchiladas in a tightly sealed container or freezer-safe bag for up to 3 months. Thaw in the fridge before baking.
Reheating: To reheat, place in a preheated oven at 350°F (175°C) for 20-25 minutes, or until heated through. Cover with foil to prevent the cheese from burning.
Assembly Hint: It’s best to assemble your white rotisserie chicken enchiladas and freeze before baking to keep all flavors intact until you’re ready to enjoy them.
White Rotisserie Chicken Enchiladas Variations
Feel free to customize these enchiladas to suit your taste buds and dietary needs, making them uniquely yours!
- Turkey Swap: Substitute rotisserie chicken with diced cooked turkey for a delicious twist perfect for post-holiday meals.
- Vegetarian Option: Replace chicken with tofu or a mix of sautéed vegetables for a hearty vegetarian experience everyone will enjoy.
- Green Sauce Delight: Use green enchilada sauce instead of the creamy white sauce for a zesty flavor change that brightens the dish.
- Nutty Flavor: Incorporate chopped nuts, such as walnuts or pecans, into the filling for a delightful crunch that enhances texture.
- Extra Cheese: Mix in a blend of cheeses, such as cheddar or pepper jack, for an irresistible cheesy goodness that’s sure to please.
- Spicy Variation: Add diced jalapeños or hot sauce to the filling for an extra kick, catering to those who love a little heat.
- Corn and Black Beans: Toss in some black beans or corn into the filling for added nutrition and a burst of color in every bite.
- Fresh Herbs: Mix in fresh cilantro or parsley into the filling for a bright, herbaceous flavor that elevates the dish.
For more delicious variations, check out my recipes for Sticky Garlic Chicken Noodles or Honey Lime Chicken to inspire your culinary creativity!
What to Serve with Creamy White Rotisserie Chicken Enchiladas?
A warm embrace of flavors awaits with every bite, making it easy to envision the perfect pairing for your enchiladas.
- Mexican Rice: This fluffy side dish complements the creamy enchiladas with its mild spiciness, offering a delightful contrast.
- Refried Beans: Creamy and rich, refried beans add a hearty element to your meal, enhancing the overall texture experience.
- Cilantro Lime Salad: Brighten the plate with a fresh salad featuring zesty lime and aromatic cilantro; it’s a refreshing palate cleanser.
- Guacamole: Creamy avocado with lime juice adds a cool finish, beautifully balancing the rich flavors of the enchiladas.
- Tortilla Chips & Salsa: Crunchy tortilla chips paired with vibrant salsa provide a delightful crunch and additional flavor to your spread.
- Pico de Gallo: This fresh, chunky salsa brings a zesty freshness to every bite, making it a vibrant topping for the enchiladas.
- Sour Cream Drizzle: A dollop of sour cream on top ties all the layers of flavor together and adds extra creaminess.
- Fresh Avocado Slices: Offering a buttery texture, fresh avocado slices enhance the dish and introduce another layer of flavor.
- Margaritas: For an adult twist, serve with refreshing margaritas that perfectly complement the zesty flavors of your enchiladas.
- Churros: End the meal on a sweet note with cinnamon-sugar churros; they provide a delightful contrast to the savory mains.
White Rotisserie Chicken Enchiladas Recipe FAQs
What type of rotisserie chicken should I use?
Absolutely! A store-bought rotisserie chicken is ideal for this recipe, as it saves time and adds rich flavor. Look for a chicken that is golden brown with no dark spots, indicating it’s fresh and juicy.
How long can I store leftovers, and how should I do it?
Very! Leftovers can be stored in an airtight container in the fridge for up to 4 days. Make sure they are cooled before sealing to prevent moisture buildup. For longer storage, you can freeze unbaked enchiladas.
Can I freeze white rotisserie chicken enchiladas? If so, how?
Absolutely! To freeze, assemble the enchiladas without baking them. Place them in a tightly sealed freezer-safe container or wrap them with plastic wrap and foil for up to 3 months. Thaw in the fridge overnight before baking, and they should still taste delicious!
What should I do if my sauce is lumpy?
No worries! If your sauce has lumps, don’t panic. Simply whisk it vigorously while cooking; if it’s still not smooth, you can blend it with an immersion blender or transfer it to a regular blender in batches until it’s velvety and creamy again.
Are these enchiladas suitable for people with dairy allergies?
Great question! This recipe contains dairy, so if you are looking for a dairy-free option, you could substitute cream cheese and sour cream with dairy-free alternatives. Just ensure the chicken broth is also free from dairy products.
Can I use corn tortillas instead of flour tortillas?
Yes, the more the merrier! If you prefer corn tortillas, feel free to use them. Just warm them up first to make them pliable, as they can crack easily when rolling. Keep in mind that the flavor profile may slightly change, but they will still be delicious!

Creamy White Rotisserie Chicken Enchiladas You’ll Love
Ingredients
Equipment
Method
- Preheat your oven to 350°F (175°C) and grease a 9x13 inch baking dish.
- In a large mixing bowl, combine the shredded rotisserie chicken, cream cheese, garlic powder, onion powder, and 1 cup of Monterey Jack cheese until smooth.
- In a medium saucepan, melt 4 tablespoons of butter over medium heat. Whisk in 4 tablespoons of flour for 1-2 minutes to create a roux.
- Sprinkle in taco seasoning and slowly add chicken broth, whisking until thickened, about 5-8 minutes.
- Remove from heat and stir in ½ cup of Monterey Jack cheese until melted.
- Lay out a warm tortilla and spoon about 1/3 cup of filling in the center. Roll tightly and place seam-side down in the baking dish.
- Mix sour cream into the sauce and pour over the enchiladas, coating them evenly.
- Top with remaining cheese and bake uncovered for 22-25 minutes until bubbly.
- Broil for an extra 2-3 minutes until golden brown, watching carefully.
- Let rest for 2-3 minutes before serving.
Leave a Reply