
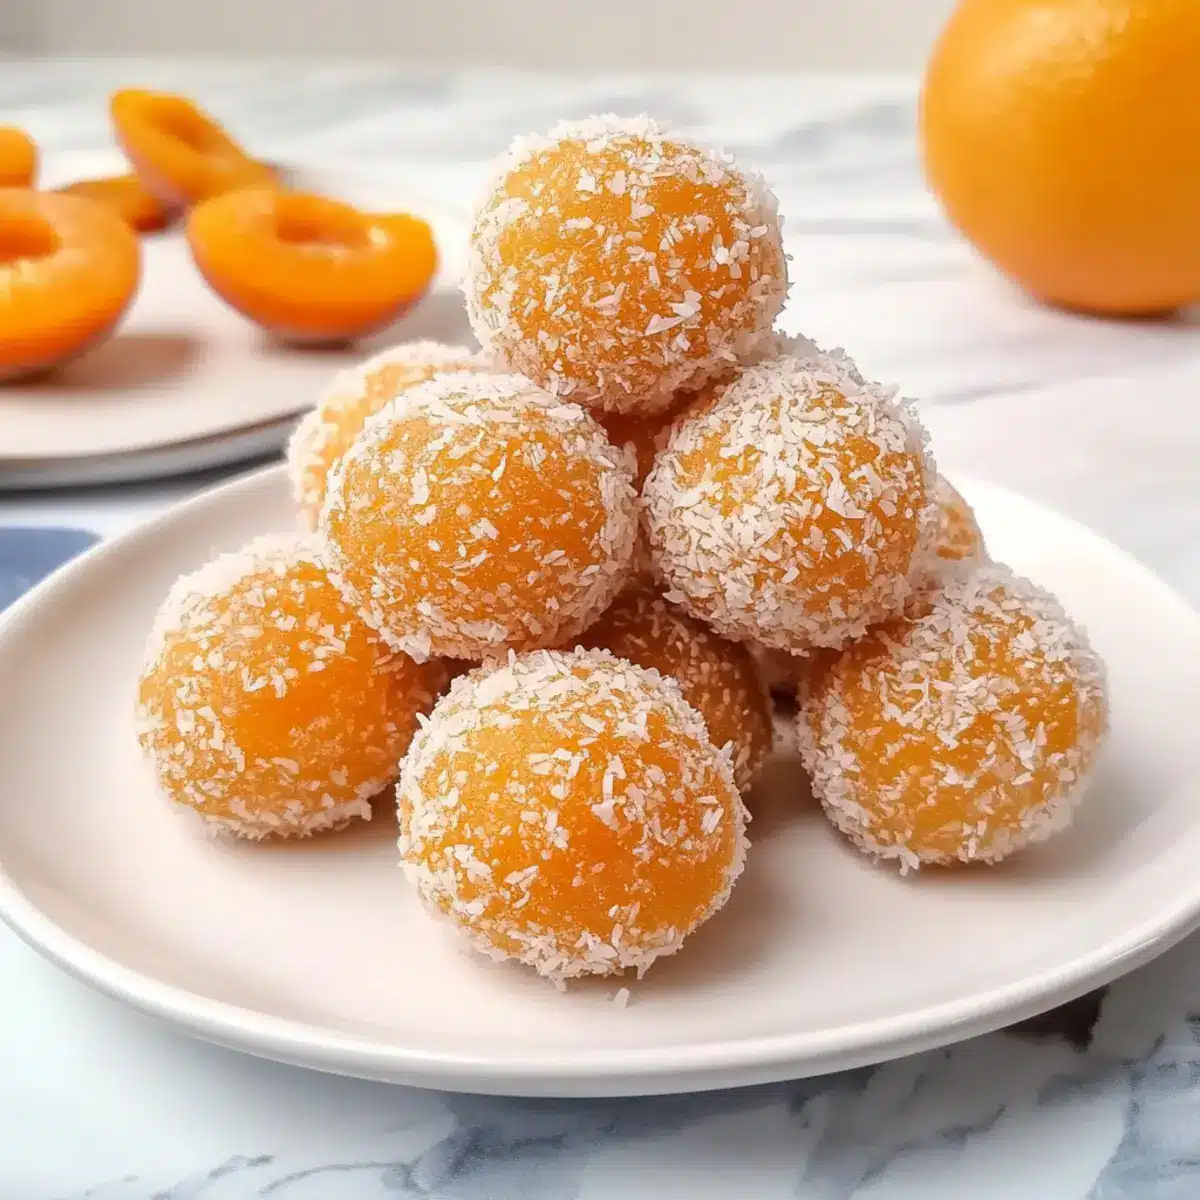
As the sun dips below the horizon, I often find myself craving something sweet yet wholesome—a snack that can satisfy my sweet tooth without the guilt. That’s when I whip up my favorite treat: Healthy No-Bake Apricot Bliss Balls. These delightful little bites bring together the tangy goodness of dried apricots and the creamy richness of coconut, making them not only a delicious choice but also a fantastic gluten-free, vegan snack. With their simple preparation and zero refined sugars, they serve as the ideal energy booster for my busy days or a kid-friendly lunchbox surprise. Curious about how to make these nutritious bites that’ll have everyone asking for seconds? Let’s dive in!
Why Are Apricot Bliss Balls Perfect?
Deliciously Simple: These bliss balls are incredibly easy to whip up with just a few ingredients, making them a go-to snack for busy days.
Nutritious Powerhouses: Packed with healthy fats from cashews and the natural sweetness of apricots, they serve as both a nutritious pick-me-up and a satisfying dessert.
Kid-Friendly Delight: Kids love these tasty bites, and you’ll love how simple they are to prepare—perfect for lunchboxes or after-school snacks!
Versatile Flavor Options: Switch up the nuts or add in cocoa powder for a chocolate twist, keeping snack time exciting.
No-Bake Convenience: Save time in the kitchen while still indulging in a guilt-free treat—perfect for warm days when no one wants to turn on the oven!
Give these Cinnamon Roll Pancakes a try for another delightful way to satisfy your sweet cravings!
Apricot Bliss Balls Ingredients
For the Base
• Dried Apricots – Sweetness and a chewy texture; ensure they are seedless for easy blending.
• Desiccated Coconut – Adds a chewy texture and natural sweetness; almond flour can be used for a nut-free twist.
• Cashews (or Nuts/Seeds of choice) – They contribute creaminess and healthy fats; sunflower seeds are a great nut-free alternative.
For Crunch and Sweetness
• Sesame Seeds – Provides a delightful crunch and nutrition; always check for freshness to avoid bitterness.
• Honey (or Sweetener of choice) – Offers natural sweetness; consider maple syrup for a fantastic vegan option.
For Extra Flavor
• Cinnamon Powder or Vanilla Extract – Enhances the overall flavor profile; both are optional but highly recommended for warmth and depth.
Embrace the delightful taste of Apricot Bliss Balls that will satisfy your sweet cravings without the guilt!
Step‑by‑Step Instructions for Apricot Bliss Balls
Step 1: Roasting the Nuts
In a pan over medium-low heat, roast the cashews for 2-3 minutes, stirring continuously until they’re slightly golden and aromatic. Next, add the sesame seeds and continue roasting for another minute, just until they release a nutty fragrance. Remove from heat and stir in the desiccated coconut, allowing the mixture to cool down to room temperature.
Step 2: Grinding the Mixture
Once cooled, transfer the nut and coconut mix into a food processor. Pulse the mixture until it reaches a fine powder consistency, which should take about 30 seconds. This will form the base for your delicious Apricot Bliss Balls, ensuring a smooth texture for easy blending in the next steps.
Step 3: Chopping the Apricots
While the nut mixture is being ground, take your dried apricots and roughly chop them into smaller pieces. This step is essential for easier blending in the food processor. Aim for pieces about the size of a small marble to ensure they mix well and integrate smoothly into the overall blend of your bliss balls.
Step 4: Blending the Ingredients
In the same food processor, add the chopped apricots to the ground nut and coconut mixture. Pulse until the apricots are finely integrated and the mixture is combined, about 30 seconds. You’ll know it’s ready when it holds together when pressed, forming a dough-like consistency for your Apricot Bliss Balls.
Step 5: Mixing in Sweetness
Transfer the blended mixture into a medium-sized bowl, then drizzle in the honey (or your chosen sweetener) alongside the cinnamon or vanilla extract if using. Stir well to combine, using a spatula or your hands until everything is fully incorporated and forms a sticky dough that holds its shape beautifully.
Step 6: Forming the Bliss Balls
Using a tablespoon, scoop out portions of the mixture and roll them between your palms to form smooth, bite-sized balls. Each ball should be about 1-2 tablespoons in size. Once rolled, coat the balls in extra desiccated coconut for a delightful finishing touch, repeating this process until you’ve used all the mixture, which should yield around 10-12 bliss balls.
Expert Tips for Apricot Bliss Balls
-
Check Seed Freshness: Always taste sesame seeds before using; rancid seeds can spoil the flavor of your bliss balls.
-
Proper Consistency: Ensure the mixture isn’t too wet. If it feels sticky, add a little more desiccated coconut to achieve the perfect blend for Apricot Bliss Balls.
-
Sweetener Flexibility: Adjust the sweetness according to your taste preferences before rolling the balls; this ensures you achieve the flavor profile you love.
-
Nut Alternatives: Feel free to swap out cashews for your favorite nuts or seeds for a different flavor while keeping these Apricot Bliss Balls healthy.
-
Storage Solutions: Store your bliss balls in an airtight container in the fridge for freshness, or freeze some for a later indulgence!
What to Serve with Healthy No-Bake Apricot Bliss Balls?
These delightful bites can be the star of your snack time, complemented perfectly by other flavors and textures.
-
Creamy Yogurt Dip: A tangy yogurt dip balances the sweetness of the bliss balls, adding a delightful creaminess to each bite. Serve it alongside for a refreshing contrast that kids and adults alike will love.
-
Fresh Fruit Salad: A vibrant mix of juicy fruits like berries and citrus offers a refreshing, juicy note that pairs beautifully with the chewy apricot bliss balls. This colorful addition will not only enhance flavors but also make your meal visually appealing.
-
Nutty Granola: Crunchy granola adds a satisfying texture and extra nutrients, creating a delightful blend when paired with the bliss balls. Sprinkle some on top or serve it on the side for a wholesome snack experience.
-
Green Smoothie: A vibrant green smoothie made with spinach, banana, and almond milk makes for a nutritious drink that complements the sweetness of the bliss balls perfectly. This pairing creates a healthy combination that energizes and satisfies.
-
Herbal Tea: A warm cup of herbal tea, like chamomile or mint, can elevate your snack to a cozy treat, balancing the sweetness of the bliss balls with soothing herbal notes. Picture snuggling up with a cup, making every bite even more enjoyable.
-
Chocolate Drizzle: Get indulgent with a light drizzle of dark chocolate over your bliss balls for a luscious touch that marries beautifully with their natural sweetness. It’s a treat that will surely impress everyone around!
Make Ahead Options
These Apricot Bliss Balls are perfect for meal prep enthusiasts! You can make the mixture up to 24 hours in advance, storing it in an airtight container in the refrigerator to keep the flavors fresh and vibrant. If you prefer, you can roll the bliss balls and refrigerate them for 3 days before enjoying; just remember to keep them coated in desiccated coconut for a delightful texture. When you’re ready to serve or snack, simply take them out of the fridge and they’ll be just as delicious! This strategy not only saves time on busy weeknights but ensures you always have a healthy treat at hand.
How to Store and Freeze Apricot Bliss Balls
Fridge: Keep the apricot bliss balls in an airtight container for up to 1 month in the fridge, maintaining their deliciousness and texture.
Freezer: For longer storage, freeze the bliss balls in a single layer on a baking sheet, then transfer to a freezer-safe bag for up to 3 months.
Thawing: When you’re ready to enjoy, thaw them in the fridge overnight or at room temperature for a few hours.
Reheating: These bliss balls are best enjoyed cold or at room temperature; avoid reheating to maintain their delightful texture.
Apricot Bliss Balls Variations & Substitutions
Feel free to get creative with these bliss balls and make them truly your own!
-
Nut-Free: Substitute cashews with sunflower seeds for a nut-free version that still packs a flavorful punch. They lend a similar crunch and richness!
-
Vegan Sweetener: Use agave nectar instead of honey to keep these bliss balls fully vegan while adding that sweet richness you crave.
-
Extra Chewy: Add a few tablespoons of rolled oats for an extra chewy texture, making them even heartier and enjoyable as a snack!
-
Chocolate Lovers: Incorporate two tablespoons of cocoa powder into the mix for a delightful chocolate twist sure to satisfy your sweet cravings.
-
Spiced Up: Add a pinch of nutmeg or ginger along with cinnamon for an extra layer of flavor that echoes the warmth of your favorite comfort dishes.
-
Fun Sprinkles: Roll the finished bliss balls in a mixture of chopped nuts and seeds for added crunch, or use crushed freeze-dried fruit for a pop of color and taste.
-
Fruity Addition: Mix in dried cranberries or blueberries for a fruity explosion and to elevate the health benefits of your bliss balls.
-
Superfood Boost: Toss in some chia seeds or hemp seeds for an additional nutritional boost, enhancing the health profile of these delightful bites.
These delicious morsels are versatile—just like my Baked Chicken Thighs or a sweet morning treat like Spanish Churro Pancakes. Enjoy mixing and matching to find your favorite combination!

Apricot Bliss Balls Recipe FAQs
What type of dried apricots should I use?
It’s best to use seedless dried apricots for this recipe. Look for ones that are vibrant in color and free from dark spots; this indicates freshness. Avoid any that feel overly dry or tough, as they won’t blend well into the bliss balls.
How should I store the apricot bliss balls?
Store the apricot bliss balls in an airtight container in the refrigerator for up to 1 month. This keeps them fresh and preserves their delightful texture. If you prefer to keep some for later, you can freeze them for up to 3 months.
Can I freeze apricot bliss balls? If so, how?
Absolutely! To freeze your apricot bliss balls, first lay them out in a single layer on a baking sheet and flash freeze for about 1-2 hours until firm. Once frozen, transfer them to a freezer-safe bag or container. Make sure to label with the date—these can last up to 3 months in the freezer!
What if my mixture is too wet?
If your mixture feels too sticky while preparing the bliss balls, don’t worry. Just add a bit more desiccated coconut, a tablespoon at a time, until you achieve that perfect dough-like consistency. It should hold together nicely without being overly wet.
Are these bliss balls safe for kids and those with nut allergies?
These apricot bliss balls are indeed kid-friendly but be cautious of nut allergies! For a nut-free version, simply substitute the cashews with sunflower seeds or pumpkin seeds. Additionally, use a suitable sweetener like maple syrup to keep them vegan.
How can I adjust the sweetness of the bliss balls?
Feel free to adjust the sweetness to your taste! Before rolling the bliss balls, take a small portion of the mixture and taste it. Add more honey or your preferred sweetener gradually until you reach your desired level of sweetness.
Delicious Apricot Bliss Balls - A Guilt-Free Snack Treat
Ingredients
Equipment
Method
- In a pan over medium-low heat, roast the cashews for 2-3 minutes, stirring continuously until they're slightly golden and aromatic. Add the sesame seeds and roast for another minute before removing from heat. Stir in the desiccated coconut and let cool.
- Once cooled, transfer the nut and coconut mix into a food processor and pulse until it reaches a fine powder consistency in about 30 seconds.
- Roughly chop the dried apricots into smaller pieces for easier blending.
- In the food processor, add the chopped apricots to the ground nut and coconut mixture. Pulse until combined and forming a dough-like consistency.
- Transfer the blended mixture into a bowl, drizzle in honey and add cinnamon or vanilla if using. Stir until fully incorporated.
- Using a tablespoon, scoop out portions of the mixture and roll into bite-sized balls. Coat in extra desiccated coconut and repeat until all mixture is used.
Leave a Reply