
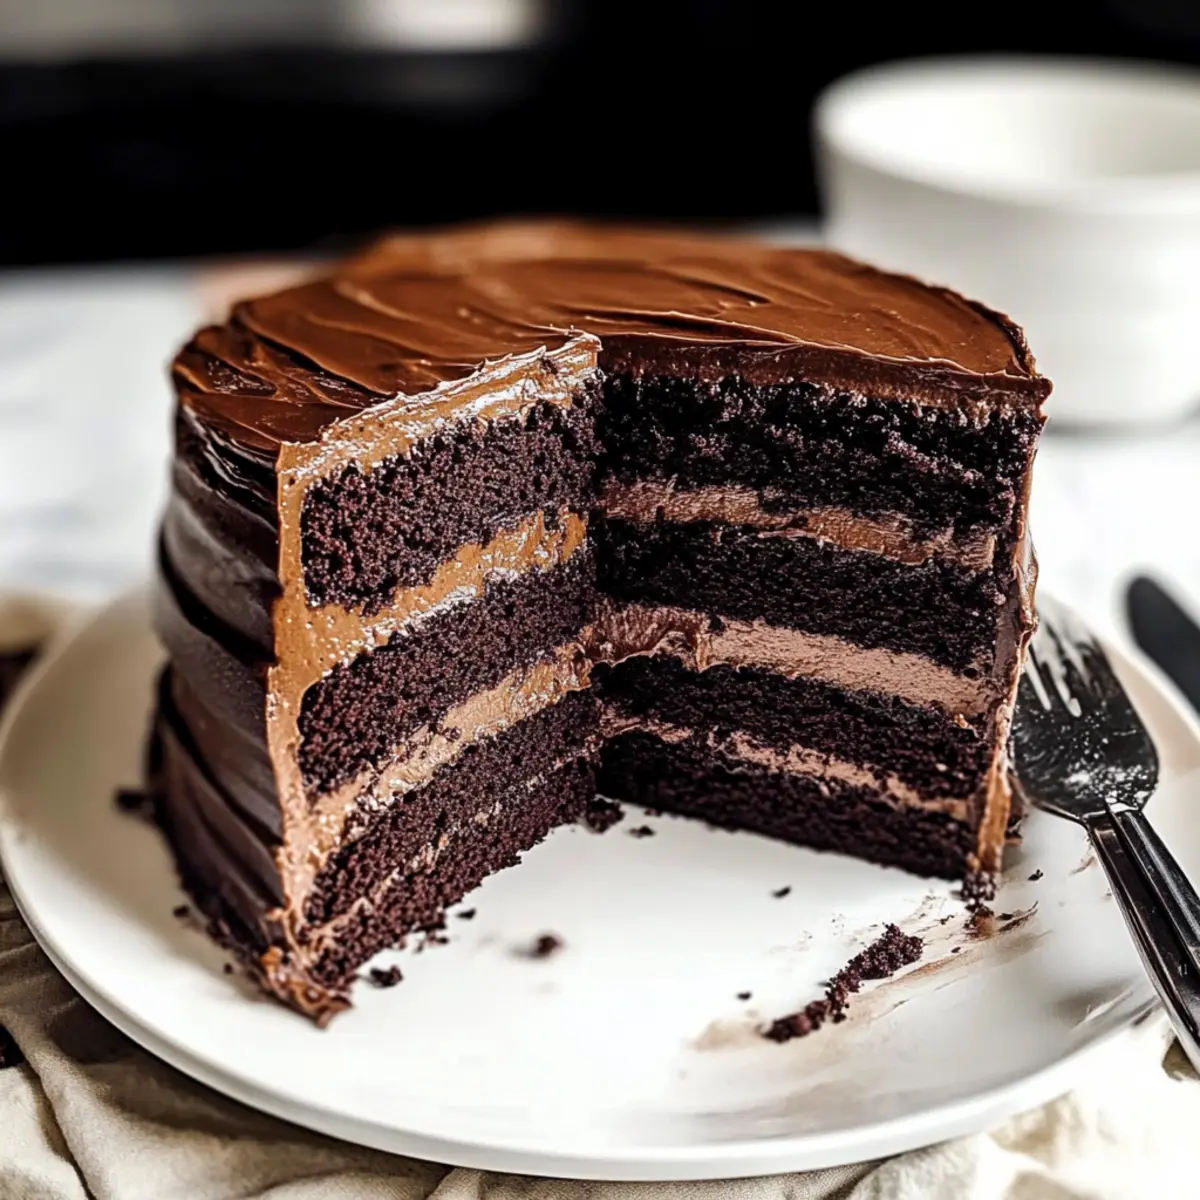
In a quaint little café, I overheard two friends raving about the most indulgent chocolate espresso cake they had ever tasted. It sparked a memory of my own adventures in the kitchen, where I managed to whip up a delightfully rich and fudgy Chocolate Espresso Cake that would knock any mocha lover’s socks off! This cake is not only a showstopper for special occasions, but it also packs the magic of coffee and chocolate in every bite, making it an ideal pick-me-up dessert. Plus, you’ll love how surprisingly easy it is to prepare, leaving you with more time to savor that luxurious slice. Ready to dive into this decadent journey and impress your friends? Let’s get baking!
Why is this cake a must-try?
Indulgent Flavor: Each bite bursts with rich chocolate and deep coffee notes, satisfying every mocha lover’s dream.
Effortless Preparation: You’ll be amazed at how simple it is to create such a luxurious dessert, no expert skills required!
Perfectly Moist: Thanks to the combination of high-quality ingredients, this cake stays incredibly moist and fudgy for days.
Versatile Delight: Dress it up for special occasions or enjoy it as an everyday treat — it’s sure to impress your guests.
Make-Ahead Friendly: Prepare the frosting in advance and store it for quick assembly, giving you more time to chill and enjoy. Trust me, with this Chocolate Espresso Cake, you’ll make dessert the highlight of any gathering!
Chocolate Espresso Cake Ingredients
• Rich, chocolatey delight awaits!
For the Cake Batter
- Dark Chocolate – provides a rich chocolate flavor and moisture; select high-quality bars for the best results.
- Semi-Sweet Chocolate – balances the sweetness of the frosting; can be substituted with dark chocolate for a deeper flavor.
- Unsweetened Cocoa Powder – adds a deep chocolate taste; ensure it’s unsweetened for proper balance in flavor.
- All-Purpose Flour – the primary structure builder of the cake; no direct substitutions recommended unless needed for gluten-free.
- Granulated Sugar – sweetens the cake; can be swapped with light brown sugar for added moisture.
- Dark Brown Sugar – enhances moisture and flavor; light brown sugar or granulated sugar can also be used as alternatives.
- Eggs – bind ingredients and provide structure; make sure they are at room temperature for the best mixing.
- Baking Powder & Baking Soda – leavening agents for a light texture; ensure they are fresh for maximum effectiveness.
- Salt – enhances the flavor of the cake; an essential ingredient in baking.
- Coffee – intensifies the chocolate flavor; instant coffee is preferred for easy and quick dissolution.
For the Frosting
- Heavy Cream – creates a creamy texture in the frosting; substitute with coconut cream for a dairy-free option.
Get ready to whip up an unforgettable Chocolate Espresso Cake that transforms your dessert game!
Step‑by‑Step Instructions for Chocolate Espresso Cake
Step 1: Prepare the Frosting
In a mixing bowl, combine the dark chocolate, semi-sweet chocolate, cocoa powder, and salt. In a small saucepan, heat the heavy cream and granulated sugar over medium heat until sugar is dissolved, about 3-5 minutes. Once melted, pour the hot cream mixture over the chocolate mixture and whisk until smooth. Refrigerate for at least 1 hour, allowing it to thicken while you prepare the Chocolate Espresso Cake batter.
Step 2: Make the Cake Batter
In a large mixing bowl, whisk together the all-purpose flour, granulated sugar, dark brown sugar, baking powder, baking soda, and salt. In another bowl, blend the eggs, hot coffee, and melted dark chocolate until smooth. Gradually add the wet mixture to the dry ingredients, stirring gently until just combined. The batter should be thick and glossy, reflecting the rich decadence of the Chocolate Espresso Cake.
Step 3: Bake the Cake
Preheat your oven to 350°F (175°C). Grease and flour two 9-inch round cake pans to prevent sticking. Divide the batter evenly between the prepared pans. Bake in the preheated oven for about 30-35 minutes, or until a toothpick inserted in the center comes out clean. Remove the pans from the oven and allow them to cool for 10 minutes before transferring the cakes to a wire rack to cool completely.
Step 4: Cool the Cakes
Once the cakes are out of the pans, let them cool completely on the wire rack for at least 1 hour. This step is crucial; frosting a warm cake can melt the frosting. While they cool, take advantage of this time to prepare the coffee soak for your Chocolate Espresso Cake, enhancing its flavor.
Step 5: Make the Coffee Soak
In a bowl, whisk together the instant coffee and boiling water until the coffee granules are fully dissolved. Allow it to cool slightly. This simple coffee soak is essential for adding moisture and deepening the chocolate flavor of the cake layers. Set the soak aside until the cakes are completely cooled.
Step 6: Layer the Cake
Once cooled, level the tops of the cakes if necessary, and slice each layer in half horizontally, giving you four layers in total. Place one layer on a serving plate or cake stand. Brush generously with the coffee soak to infuse moisture and flavor before adding a layer of frosting over the top.
Step 7: Crumb Coat the Cake
After layering your Chocolate Espresso Cake with frosting, apply a thin crumb coat around the sides and on top to seal in the crumbs. This helps create a smooth final layer of frosting. Chill the cake in the refrigerator for about 20 minutes to firm up before adding the final frosting layer.
Step 8: Final Frosting
Remove the cake from the refrigerator once the crumb coat has set. Use the remaining frosting to generously coat the top and sides of the cake, ensuring it is beautifully smooth and even. The final result should reflect the rich, indulgent nature of the Chocolate Espresso Cake, ready to be sliced and enjoyed!

Chocolate Espresso Cake Variations
Feel free to get creative and tailor this chocolate espresso cake to suit your taste preferences!
-
Dairy-Free: Substitute heavy cream with coconut cream for a rich and creamy frosting that’s totally dairy-free. Your guests will be amazed at how creamy it still is!
-
Nutty Twist: Add chopped hazelnuts or walnuts to the cake batter for a delightful crunch and extra flavor. The combination of chocolate, coffee, and nuts is simply heavenly.
-
Spicy Kick: Want to spice things up? Add a pinch of cayenne pepper to the batter for a surprising warmth that balances the sweetness wonderfully. It’s a game changer!
-
Mocha Coffee Soak: For even more coffee flavor, swap out half of the water in the coffee soak with brewed espresso. This accentuates the coffee notes and takes indulgence to a new level.
-
Extra Layer of Chocolate: Enhance the decadence by adding a rich layer of chocolate ganache between the cake layers. This luxurious addition will impress every chocolate lover.
-
Citrus Zing: Add a splash of orange or lemon zest to the batter for a fresh twist. The citrus complements the chocolate and coffee perfectly, adding a unique brightness.
-
Gluten-Free Option: Swap all-purpose flour for a 1:1 gluten-free flour blend. Your cake will still come out moist and delicious without compromising on taste!
-
Double the Beans: For intense flavor, blend in some espresso powder right into the frosting. It gives an extra punch without needing to brew additional coffee.
Whichever variation you choose, don’t forget to enjoy every mouthwatering moment. If you’re looking for more delicious chocolate treats, you might want to check out my Double Chocolate Chip muffins or indulge in some Chocolate Protein Pudding for a healthier option. Happy baking!
How to Store and Freeze Chocolate Espresso Cake
Fridge: Store the cake in an airtight container in the refrigerator for up to 1 week. This keeps it moist and fresh for your next indulgent slice.
Freezer: If you’d like to save some for later, wrap the cooled cake layers tightly in plastic wrap and aluminum foil. It can be frozen for up to 3 months to preserve that fudgy goodness.
Thawing: When you’re ready to enjoy your frozen Chocolate Espresso Cake, transfer it to the fridge and let it thaw overnight. For a timeless delight, serve it chilled or allow it to sit at room temperature for 30 minutes for a softer texture.
Reheating: If you prefer a warm slice, gently warm individual pieces in the microwave for 10-15 seconds. This will enhance the chocolate and coffee flavors beautifully!
Make Ahead Options
These Chocolate Espresso Cake preparations are perfect for busy home cooks! You can prepare the frosting up to 3 days in advance; simply store it in an airtight container in the refrigerator, and let it come to room temperature before spreading. Additionally, you can bake the cake layers up to 24 hours ahead; allow the cakes to cool completely, then wrap them tightly in plastic wrap and refrigerate. This ensures they stay moist and fresh. When you’re ready to serve, just layer the cakes with the coffee soak and frosting, and you’ll have a stunning dessert ready to impress, saving you time and effort on your busy days!
Expert Tips for Chocolate Espresso Cake
-
Quality Matters: Use high-quality chocolate for the best flavor. Avoid using standard chocolate chips, as they may not melt smoothly and can affect your cake’s richness.
-
Instant Coffee Essential: Always use instant coffee for the batter and soak. Regular coffee granules won’t dissolve properly and can lead to undesirable texture in your Chocolate Espresso Cake.
-
Room Temperature Eggs: Ensure your eggs are at room temperature before mixing. This helps them blend more smoothly into your batter, creating a uniform texture.
-
Proper Cooling: Allow your cakes to cool completely before frosting. Frosting warm cake can cause the frosting to melt, resulting in a messy finish and less impressive presentation.
-
Crumb Coating Success: Don’t rush the crumb coat! A thin layer of frosting before chilling helps seal in crumbs, creating a perfect base for the final layer.
-
Storage Tips: Store your Chocolate Espresso Cake in the refrigerator to keep it moist. It remains soft and spongy due to its oil-based recipe. Enjoy it within a week for optimal freshness!
What to Serve with Ultimate Chocolate Espresso Cake
Experience the joy of creating a delightful meal that complements the rich decadence of this cake—perfect for any gathering!
- Fresh Berries: The tartness of strawberries, raspberries, or blueberries beautifully contrasts the fudginess, adding a pop of freshness to your dessert.
- Classic Vanilla Ice Cream: A scoop of creamy vanilla ice cream melts into the warm, chocolatey layers, creating a blissful, indulgent experience with every bite.
- Whipped Cream: Light and airy, a dollop of freshly whipped cream balances the cake’s richness while providing a delightful textural contrast.
- Espresso: Serving a shot of espresso alongside the cake enhances the mocha flavors, making each bite even more satisfying and aromatic.
- Chocolate Ganache: For an extra layer of luxury, pour a drizzle of warm chocolate ganache over the cake, enhancing its deep chocolate flavor.
- Hazelnut Praline: The crunchy nuttiness of hazelnut praline adds a delightful texture and a hint of flavor that perfectly complements the cake’s richness.
- Dark Chocolate Shavings: Garnish with finely grated dark chocolate shavings, offering an elegant presentation and an extra chocolatey indulgence.
- Coconut Milk Latte: A creamy, lightly sweet coconut milk latte pairs beautifully, providing a rich yet balanced beverage that complements the cake’s flavors.
- Honey Caramel Sauce: Drizzling a warm honey caramel sauce can enhance the overall sweetness while providing a lovely, sticky richness.
- Mint Tea: A refreshing cup of mint tea cleanses the palate after indulging in the cake, making it a great choice for dessert lovers!
Chocolate Espresso Cake Recipe FAQs
What type of chocolate should I use for the best flavor?
Absolutely! For the richest and most decadent flavor, always opt for high-quality dark chocolate labeled as “Baker’s” or “couverture.” Standard chocolate chips often don’t melt smoothly, leaving your cake lacking the desired richness.
How should I store the Chocolate Espresso Cake?
To keep your Chocolate Espresso Cake fresh, store it in an airtight container in the refrigerator for up to 1 week. This will help maintain its moist, fudgy texture, ensuring you can enjoy that delicious slice whenever you crave it!
Can I freeze the Chocolate Espresso Cake?
Very! If you want to save some for later, wrap the cooled cake layers tightly in plastic wrap and then in aluminum foil. It can be stored in the freezer for up to 3 months. Just remember to let it thaw in the fridge overnight before serving for the best taste.
What if my frosting is too thick after chilling?
No worries! If your frosting seems too thick, simply let it sit at room temperature for about 10-15 minutes to soften. Then, you can re-whip it briefly if needed to achieve that perfect spreadable consistency before applying it to the cake.
Are there any dietary considerations I should keep in mind?
Certainly! This Chocolate Espresso Cake contains eggs and heavy cream, so those with allergies should take care. For a dairy-free version, substitute heavy cream with coconut cream, which will still provide that creamy texture without the dairy.
Decadent Chocolate Espresso Cake for Pure Indulgence
Ingredients
Equipment
Method
- In a mixing bowl, combine the dark chocolate, semi-sweet chocolate, cocoa powder, and salt. In a small saucepan, heat the heavy cream and granulated sugar over medium heat until sugar is dissolved, about 3-5 minutes. Once melted, pour the hot cream mixture over the chocolate mixture and whisk until smooth. Refrigerate for at least 1 hour.
- In a large mixing bowl, whisk together the all-purpose flour, granulated sugar, dark brown sugar, baking powder, baking soda, and salt. In another bowl, blend the eggs, hot coffee, and melted dark chocolate until smooth. Gradually add the wet mixture to the dry ingredients, stirring gently until just combined.
- Preheat your oven to 350°F (175°C). Grease and flour two 9-inch round cake pans. Divide the batter evenly between the prepared pans. Bake for about 30-35 minutes, or until a toothpick inserted in the center comes out clean.
- Once the cakes are out of the pans, let them cool completely on the wire rack for at least 1 hour.
- In a bowl, whisk together the instant coffee and boiling water until dissolved. Allow it to cool slightly.
- Once cooled, level the tops of the cakes if necessary, and slice each layer in half horizontally. Place one layer on a serving plate, brush generously with the coffee soak, and add a layer of frosting on top.
- Apply a thin crumb coat around the sides and on top of the layered cake. Chill in the refrigerator for about 20 minutes.
- Once the crumb coat has set, coat the top and sides of the cake with remaining frosting to create a smooth finish.
Leave a Reply