
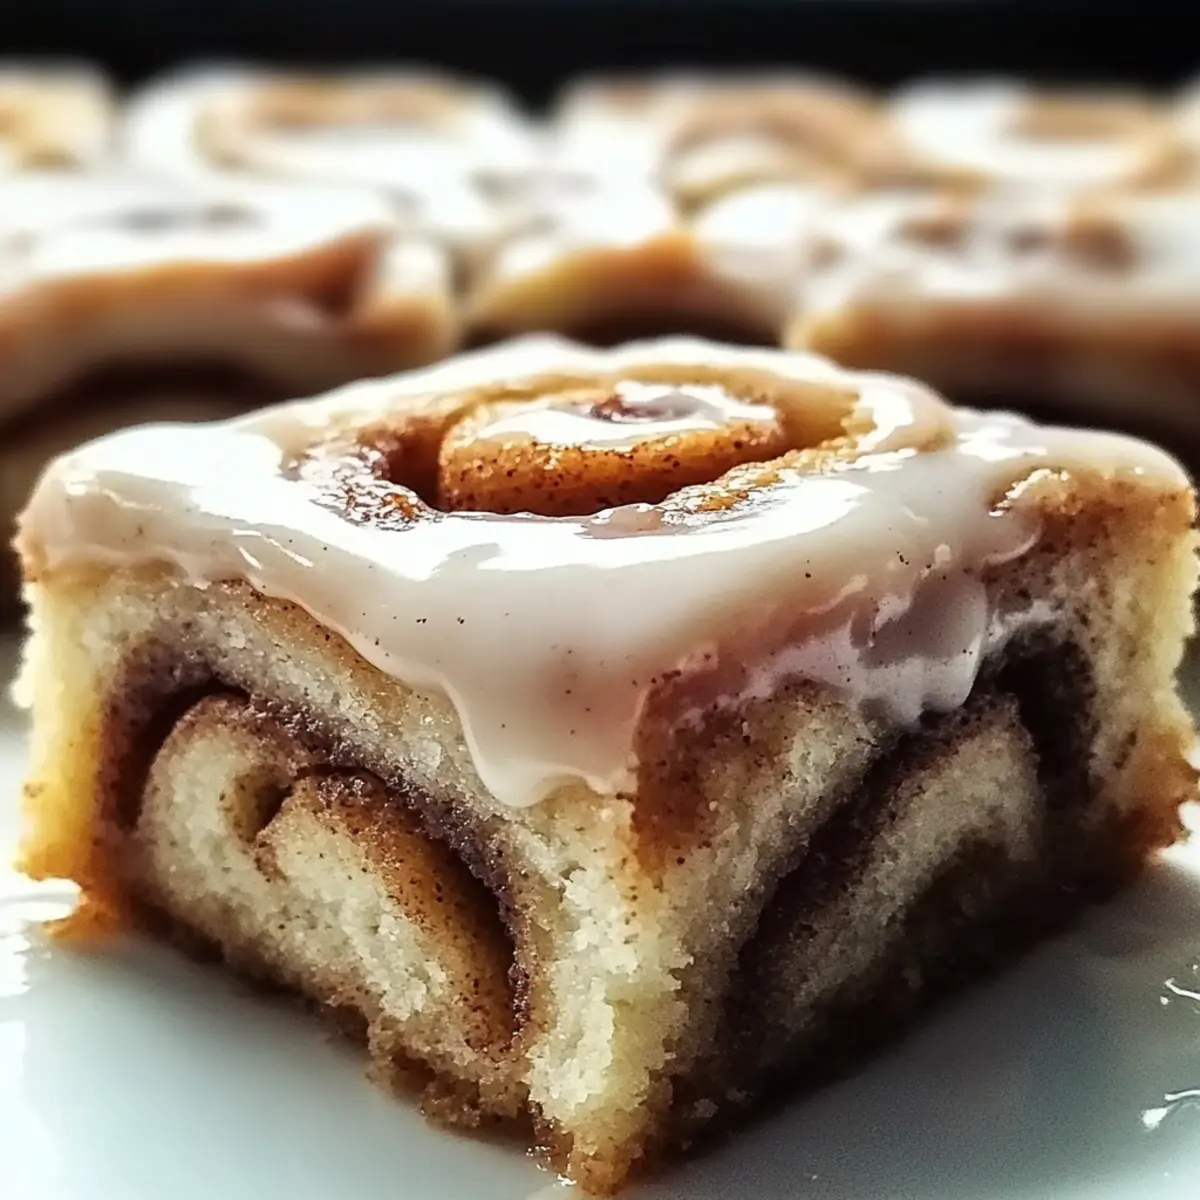
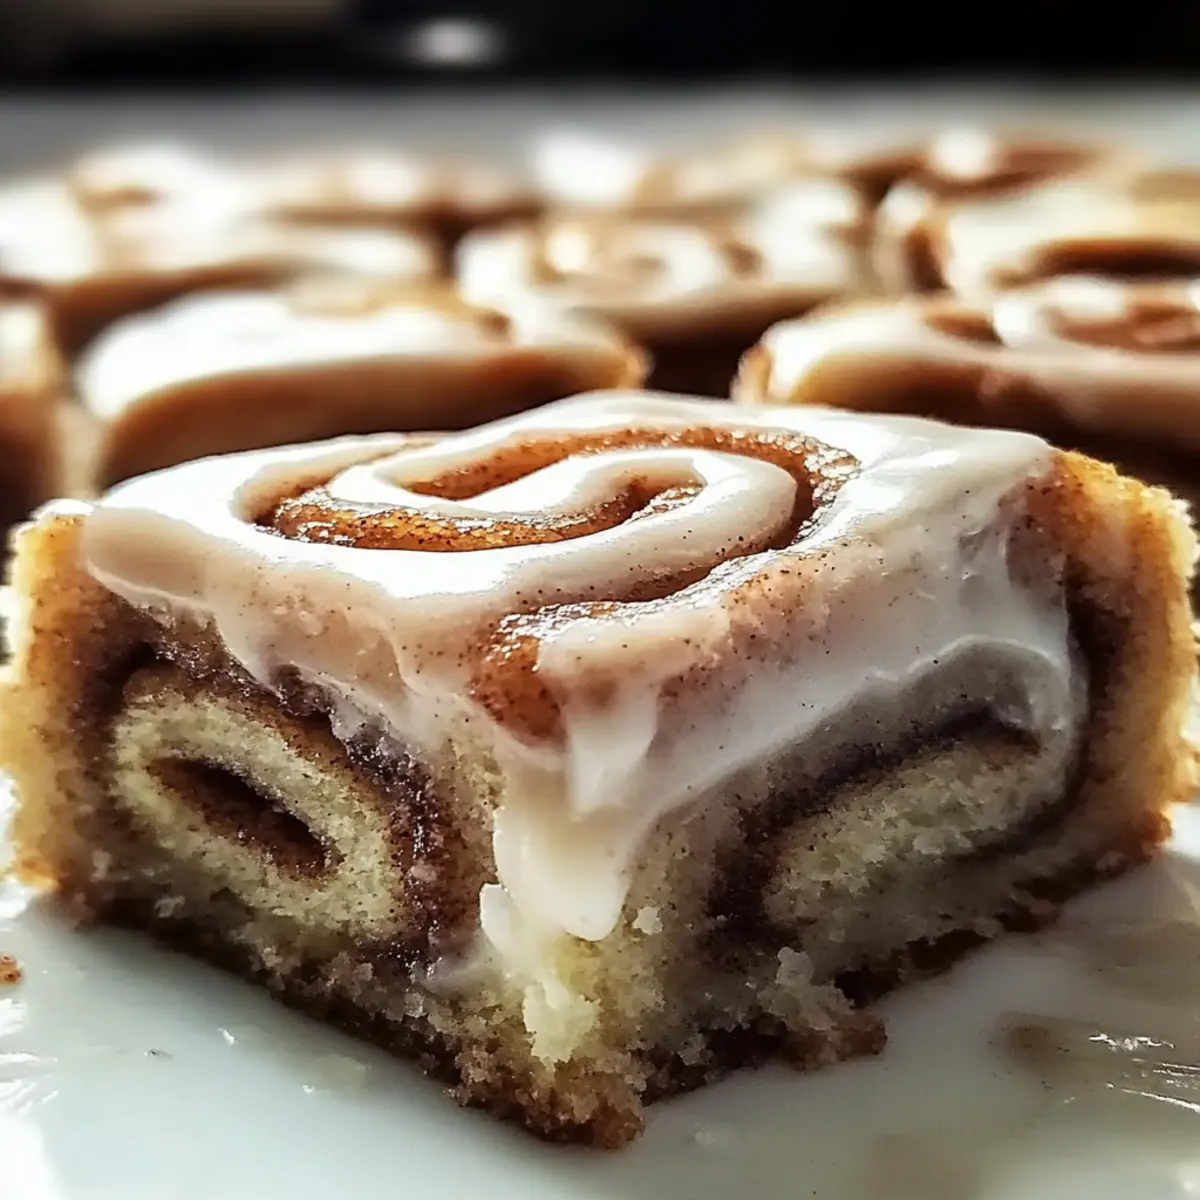
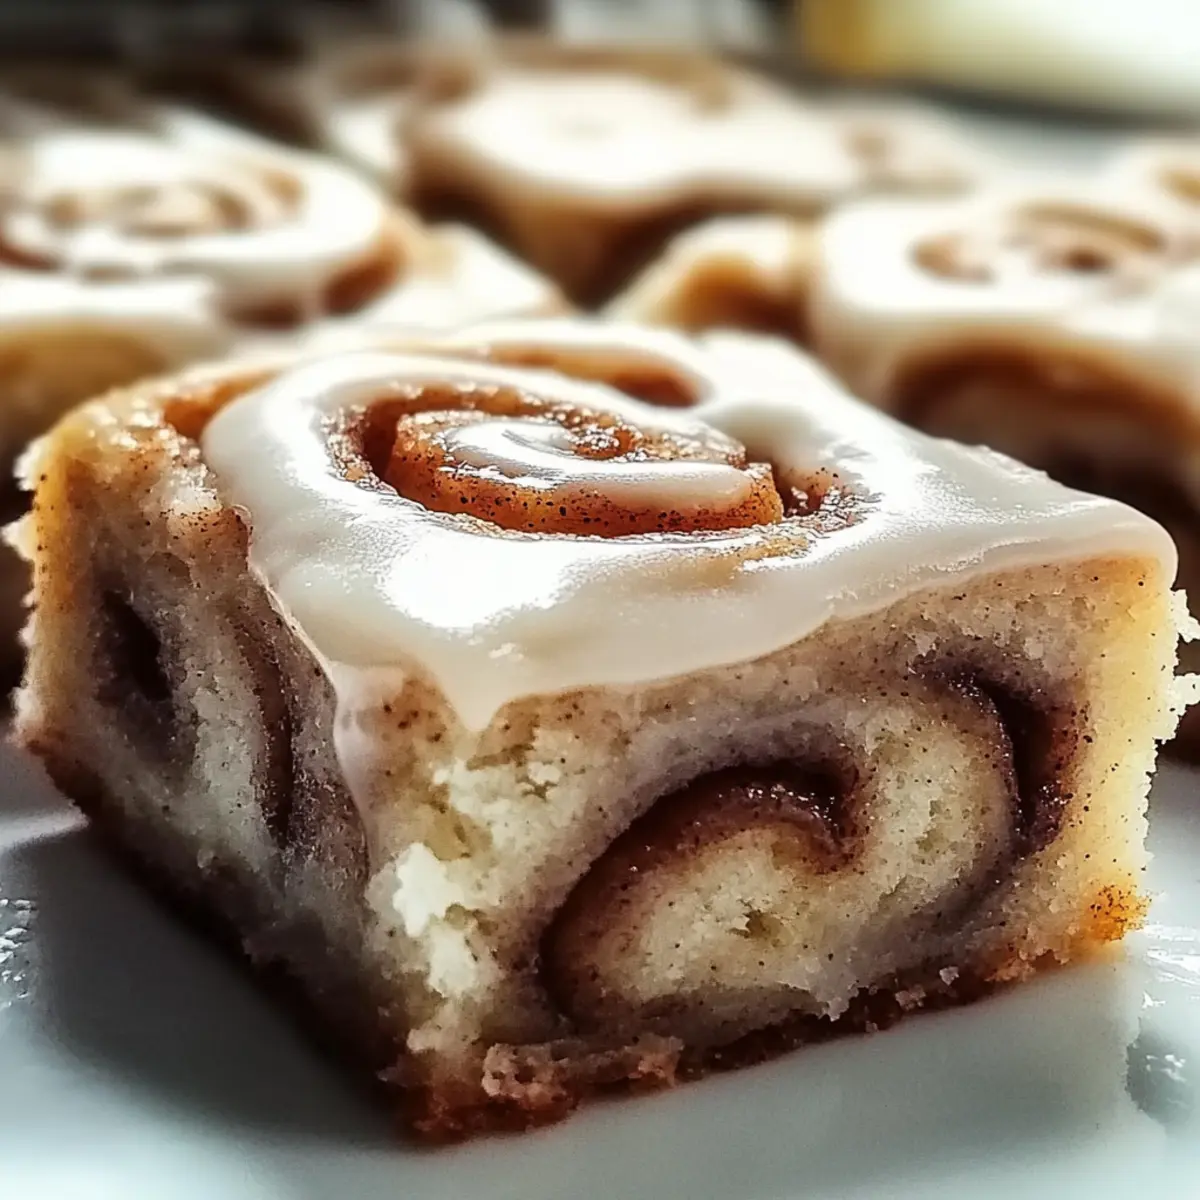
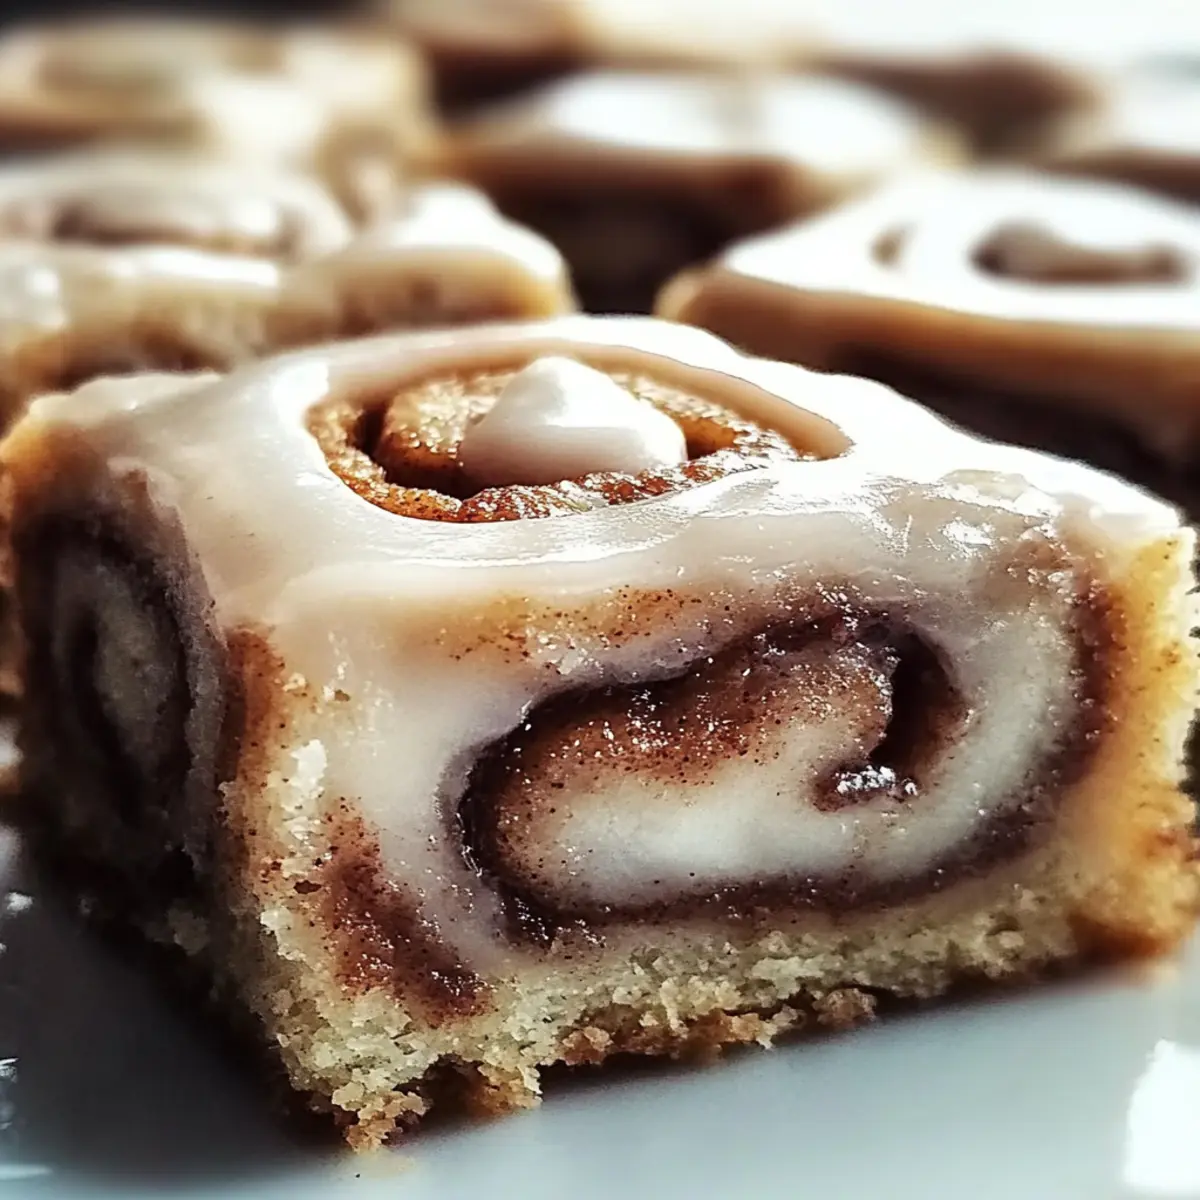
There’s something magical about the aroma of cinnamon wafting through your home, isn’t there? The moment you bite into a soft, warm Cinnamon Roll Bliss Bar, you’re transported, feeling the enchanting comfort of baking done right. This delightful dessert combines the classic flavors of beloved cinnamon rolls with the ease of bar form, making them an absolute crowd-pleaser for brunches or cozy afternoons. With a gooey center and sweet frosting, these bars promise quick prep and delightful indulgence without hours of fuss in the kitchen. Plus, they’re a perfect treat for anyone looking to escape the fast-food rut and bring a little homemade love back into their lives. Are you ready to reveal your inner pastry chef with these luscious treats? Let’s dive in!
Why are Cinnamon Roll Bliss Bars irresistible?
Sweet, gooey goodness: Indulge in the warm, comforting flavors of cinnamon rolls without the hassle of rolling dough.
Quick Prep Time: These bars come together in just a few simple steps, perfect for busy home chefs.
Crowd-Pleasing Delight: Serve them at brunch or an afternoon gathering, and watch your guests rave about their rich flavors.
Versatile Enjoyment: Pair them with coffee or tea for a delightful experience, or savor them as a snack any time of day.
Make-Ahead Magic: Prep them in advance, letting the flavors meld overnight for an even more delicious treat! Feel free to try variations like adding chocolate chips or nuts. For more delightful inspiration, check out my delicious Cinnamon Roll Pancakes for a breakfast twist!
Cinnamon Roll Bliss Bars Ingredients
For the Bars
• All-Purpose Flour – Provides structure for the bars; you can substitute with a gluten-free blend for a gluten-free option.
• Baking Powder – Helps the bars rise, creating a fluffy texture.
• Ground Cinnamon – Adds warm spice flavor, essential for the cinnamon roll taste.
• Brown Sugar – Provides sweetness and moisture, enhancing the overall flavor.
• Granulated Sugar – Adds sweetness and balances the rich flavors.
• Unsalted Butter – Contributes richness and helps bind ingredients together.
• Eggs – Acts as a binder, giving the bars their light, soft texture.
• Vanilla Extract – Adds depth of flavor; substitute with almond extract for a different twist.
For the Icing
• Powdered Sugar – Sweetens and provides a creamy texture for the frosting.
• Milk – Adjusts the consistency of the frosting; use non-dairy milk for a vegan version.
Step‑by‑Step Instructions for Cinnamon Roll Bliss Bars
Step 1: Preheat and Prepare
Begin by preheating your oven to 350°F (175°C). While the oven warms up, take a 9×13 inch baking dish and grease it generously with butter or non-stick spray, ensuring that the edges are covered. This will help your Cinnamon Roll Bliss Bars release easily once baked, giving you that perfect, gooey texture.
Step 2: Mix Dry Ingredients
In a large mixing bowl, whisk together 2 cups of all-purpose flour, 1 tablespoon of baking powder, 1 tablespoon of ground cinnamon, ½ cup of brown sugar, and ½ cup of granulated sugar until thoroughly combined. The mixture should look fluffy and uniform. This step is key, as it creates the base of your Cinnamon Roll Bliss Bars, contributing to their soft and delightful consistency.
Step 3: Combine Wet Ingredients
In a separate bowl, melt ½ cup of unsalted butter and let it cool slightly. Whisk in 2 eggs and 2 teaspoons of vanilla extract until the mixture is smooth and well-blended. The melted butter adds richness and flavor, while the eggs help bind everything together, ensuring your bars turn out soft and gooey—just like classic cinnamon rolls!
Step 4: Merge Mixtures
Gently fold the wet ingredients into the dry ingredients using a spatula, mixing until just combined. Be careful not to overmix, as this can lead to dense bars. The mixture should be slightly lumpy, resembling a thick batter; this is what will give your Cinnamon Roll Bliss Bars that tender and gooey bite with each piece.
Step 5: Bake
Pour the batter into your prepared baking dish, spreading it evenly with a spatula. Place it in your preheated oven and bake for 25-30 minutes. Keep an eye on them! When they are golden brown on top and a toothpick inserted into the center comes out clean, they are ready to be taken out. The smell of cinnamon should fill your kitchen by now!
Step 6: Icing
While the bars are cooling, prepare the icing. In a small bowl, mix 1 cup of powdered sugar with 2 tablespoons of milk until the mixture is smooth and fluid. If you prefer a thicker consistency, add more powdered sugar; if you want it thinner, adjust with more milk. This luscious icing will complement your Cinnamon Roll Bliss Bars perfectly, giving them an irresistible finish.
Step 7: Drizzle and Serve
Once the Cinnamon Roll Bliss Bars have cooled for about 10-15 minutes, drizzle the icing over the top using a spoon. Allow the icing to set for a few minutes before cutting into squares. These delicious bars are now ready to be served! Enjoy them warm, or let them cool completely for an easy dessert that will satisfy your sweet cravings.
Storage Tips for Cinnamon Roll Bliss Bars
Room Temperature: Store in an airtight container at room temperature for up to 3 days to maintain their gooey texture and sweet flavor.
Fridge: If you prefer, refrigerate them for up to a week. Just be sure to seal them tightly to prevent drying out.
Freezer: For long-term storage, wrap individual bars in plastic wrap and place them in a freezer bag. They can be frozen for up to 3 months, ready to enjoy anytime!
Reheating: To enjoy warm, simply microwave a bar for about 10-15 seconds until heated through, bringing back that delicious gooeyness in your Cinnamon Roll Bliss Bars.
Expert Tips for Cinnamon Roll Bliss Bars
- Avoid Overmixing: Gentle folding is key to maintaining a soft, gooey texture in your bars. Overmixing can lead to a dense result.
- Perfect Toothpick Test: Use a toothpick to check for doneness; it should come out clean from the center. If it’s wet, give it a few more minutes in the oven.
- Chill Before Icing: Allow the bars to cool slightly before drizzling with icing for a cleaner, more appealing presentation.
- Add a Flavor Twist: For extra excitement, consider folding in chocolate chips or nuts into the batter for added texture and flavor in your Cinnamon Roll Bliss Bars.
- Storage Simplified: Store leftovers in an airtight container at room temperature for up to three days, ensuring they’re always ready for a sweet snack!
Cinnamon Roll Bliss Bars Variations
Feel free to make these Cinnamon Roll Bliss Bars your own with delightful twists and substitutions!
-
Gluten-Free: Swap all-purpose flour with a gluten-free blend for a deliciously accommodating treat! Many blends work well, ensuring everyone can enjoy these bars.
-
Pumpkin Spice: Replace ground cinnamon with pumpkin spice for a seasonal flavor boost that adds warmth and coziness for fall gatherings.
-
Chocolatey Delight: Fold in chocolate chips into the batter for a decadent twist. The melty chocolate pairs perfectly with the cinnamon, elevating every bite!
-
Nuts Galore: Add chopped pecans or walnuts for a delightful crunch. The nuts balance the soft texture and add richness, making these bars even more irresistible.
-
Vegan Version: Use non-dairy milk and replace eggs with flax eggs or applesauce for a delightful vegan alternative that stays true to the comfort of Cinnamon Roll Bliss Bars.
-
Almond Extract: Swap out vanilla for almond extract in the bars or the icing for a lovely earthy flavor that elevates the sweetness.
As you explore these options, don’t be afraid to mix and match! Whether you want to try a vegan version or add some crunch with nuts, each variation will tell its delicious story. Also, if you’re in the mood for more cozy recipes, be sure to check out my Honey Cinnamon Dessert or indulge in the fluffy goodness of Cinnamon Roll Pancakes for a lovely breakfast idea!
Make Ahead Options
These Cinnamon Roll Bliss Bars are perfect for meal prep, making it easy to enjoy their gooey goodness any time! You can prepare the batter up to 24 hours in advance by mixing the dry and wet ingredients separately, then cover and refrigerate until you’re ready to bake. If you prefer, you can also bake the bars ahead of time, allowing them to cool completely before storing in an airtight container. This way, they’ll stay fresh and delicious for up to 3 days at room temperature or 1 week in the refrigerator. When you’re ready to indulge, simply drizzle with icing and allow it to set before serving. Enjoy the time-saving benefits and delightful flavors with minimal effort!
What to Serve with Cinnamon Roll Bliss Bars
Indulging in the sweet warmth of these delightful bars opens up a world of pairing possibilities that enhance their gooey goodness.
- Fresh Fruit Salad: Brighten up your meal with a bowl of fresh berries and citrus fruits. The acidity cuts through the sweetness beautifully.
- Creamy Vanilla Yogurt: Serve a dollop of vanilla yogurt alongside the bars for a refreshing contrast and added tanginess.
- Maple Syrup Drizzle: A light drizzle of maple syrup elevates the sweetness and adds a hint of earthy flavor that’s irresistible with cinnamon.
- Coffee or Tea: Brew a warm cup of your favorite coffee or tea. The cozy pairing complements the spice in the bars with a homey touch.
With each bite, you’re not just enjoying a treat but creating a memorable experience. - Toasted Pecans: Crushed toasted pecans add a delightful crunch and nutty flavor, harmonizing with the soft texture of the bars.
- Cinnamon Ice Cream: For an indulgent dessert, top your bliss bars with a scoop of cinnamon or vanilla ice cream, making every bite a creamy delight!
- Chocolate Sauce: A drizzle of warm chocolate sauce adds an irresistible touch of decadence that pairs wonderfully with the cinnamon flavor.
- Milk: A classic glass of cold milk balances the sweetness and makes these bars feel like a cozy childhood treat!
Cinnamon Roll Bliss Bars Recipe FAQs
What type of cinnamon is best for Cinnamon Roll Bliss Bars?
Absolutely! For the best flavor, opt for Ceylon cinnamon, often referred to as “true” cinnamon, as it has a sweeter and milder profile compared to Cassia cinnamon. If you can’t find it, Cassia will still work well, so use what you have on hand!
How should I store leftover Cinnamon Roll Bliss Bars?
You can store your Cinnamon Roll Bliss Bars in an airtight container at room temperature for up to 3 days. If you want to keep them a bit longer, refrigerate them for up to a week. Just remember to seal them tightly to prevent any drying!
Can I freeze Cinnamon Roll Bliss Bars?
Very! To freeze, wrap each bar individually in plastic wrap and then place them in a freezer bag. They can last for up to 3 months in the freezer. When you’re ready to enjoy, just microwave them for 10-15 seconds for the perfect gooey treat!
What if my Cinnamon Roll Bliss Bars are too dense?
If your bars end up a bit dense, it may be due to overmixing the batter or using too much flour. Next time, measure flour by spooning it into the cup and leveling it off with a knife. Remember, the batter should be lumpy, which will help keep them soft.
Are Cinnamon Roll Bliss Bars safe for pets?
No, it’s best to keep these bars away from pets. The ingredients like sugar and butter are not suitable for them and could cause digestive issues. Always ensure that desserts are kept out of reach of your furry friends!
Cinnamon Roll Bliss Bars: Easy Gooey Delight for Home Chefs
Ingredients
Equipment
Method
- Preheat your oven to 350°F (175°C). Grease a 9x13 inch baking dish with butter or non-stick spray.
- In a large mixing bowl, whisk together the flour, baking powder, ground cinnamon, brown sugar, and granulated sugar.
- In a separate bowl, melt the unsalted butter and then whisk in the eggs and vanilla extract until smooth.
- Gently fold the wet ingredients into the dry ingredients until just combined, avoiding overmixing.
- Pour the batter into the prepared baking dish and bake for 25-30 minutes until golden brown and a toothpick comes out clean.
- Mix the powdered sugar and milk in a small bowl until smooth to prepare the icing.
- Once the bars have cooled for 10-15 minutes, drizzle the icing on top and let it set before cutting into squares.
Leave a Reply