
The sizzling sound of dough meeting the hot surface of a Blackstone griddle is music to my ears, signaling the start of something delicious. If you’re ready to elevate your pizza-making game, then this Crispy Grilled Pizza on the Blackstone Griddle recipe is just what you need. With an approach that combines fun and ease, this method not only delivers a perfectly charred crust but also allows for quick prep, making it ideal for those busy weeknights or spontaneous backyard parties. Plus, you can customize it to your heart’s content with your favorite toppings, turning each pizza into a unique masterpiece. Curious how to master this delightful griddle pizza? Let’s dive into the details!
Why Is This Blackstone Pizza So Irresistible?
Sizzling Flavor: The hot griddle creates an unbeatable char on the crust that you can’t achieve in a traditional oven.
Quick Cooking: In just about 10 minutes, you can have a delectable pizza ready, perfect for busy weeknights or last-minute gatherings.
Customizable: With endless topping options, everyone can create their own personal masterpiece. Check out how to make Air Fryer Pizza for even more pizza inspiration!
Crowd-Pleaser: Whether you’re grilling for family or friends, this recipe is sure to impress!
Easy Technique: Simplifying the pizza-making process, you can master this cooking method with minimal fuss and maximum flavor.
Pizza on the Blackstone Griddle Ingredients
Get ready to gather all the ingredients for a delicious pizza experience!
For the Dough
• Pizza Dough – Use room-temperature dough for easier stretching and a perfect chewy bite.
For the Toppings
• Olive Oil – Adds richness and aids in browning; keep below its smoke point for best results.
• Pizza Sauce – Enhances flavor and moisture; spread a thin layer to prevent a soggy crust.
• Cheese (e.g., Mozzarella) – Provides that gooey, melty goodness; feel free to substitute with provolone for a sharper edge.
• Toppings (e.g., vegetables, meats) – Customize your pizza to your heart’s content; avoid overly wet toppings to maintain the perfect crust.
With these ingredients, your pizza on the Blackstone griddle will turn into a canvas for creativity!
Step‑by‑Step Instructions for Crispy Grilled Pizza on the Blackstone Griddle
Step 1: Preheat the Griddle
Begin by preheating your Blackstone griddle to a medium heat, aiming for a surface temperature between 325–375°F. Allow it to warm for about 5–10 minutes. You can test the heat by carefully sprinkling a few drops of water; they should sizzle and evaporate almost immediately, indicating the griddle is ready for your pizza.
Step 2: Prepare the Dough
While the griddle heats, take your pizza dough and place it on a floured surface. Use a rolling pin or your hands to stretch and shape the dough into your desired thickness, dusting with flour to prevent sticking. Ensure it’s not too thick to cook evenly; you can add a bit of extra flour as needed for easier handling.
Step 3: Grease the Griddle
Once your dough is ready, lightly drizzle some olive oil onto the hot griddle surface. Use a spatula or brush to spread the oil evenly, ensuring it covers enough area for the dough. The oil helps achieve that crispy, golden crust while preventing sticking, creating the perfect foundation for your pizza on the Blackstone griddle.
Step 4: Cook the Dough
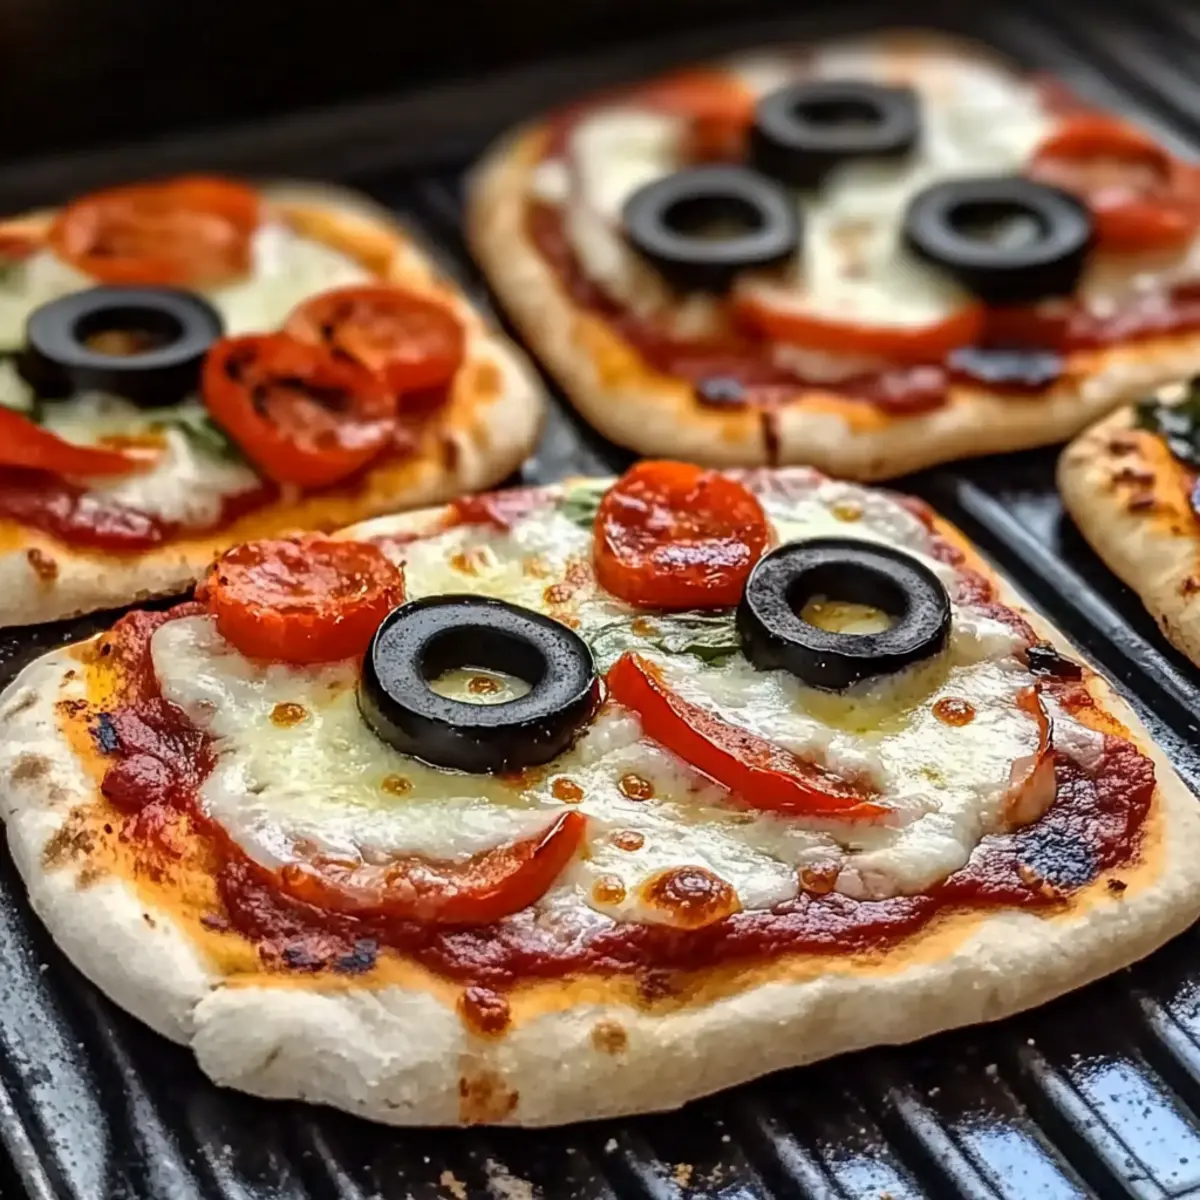
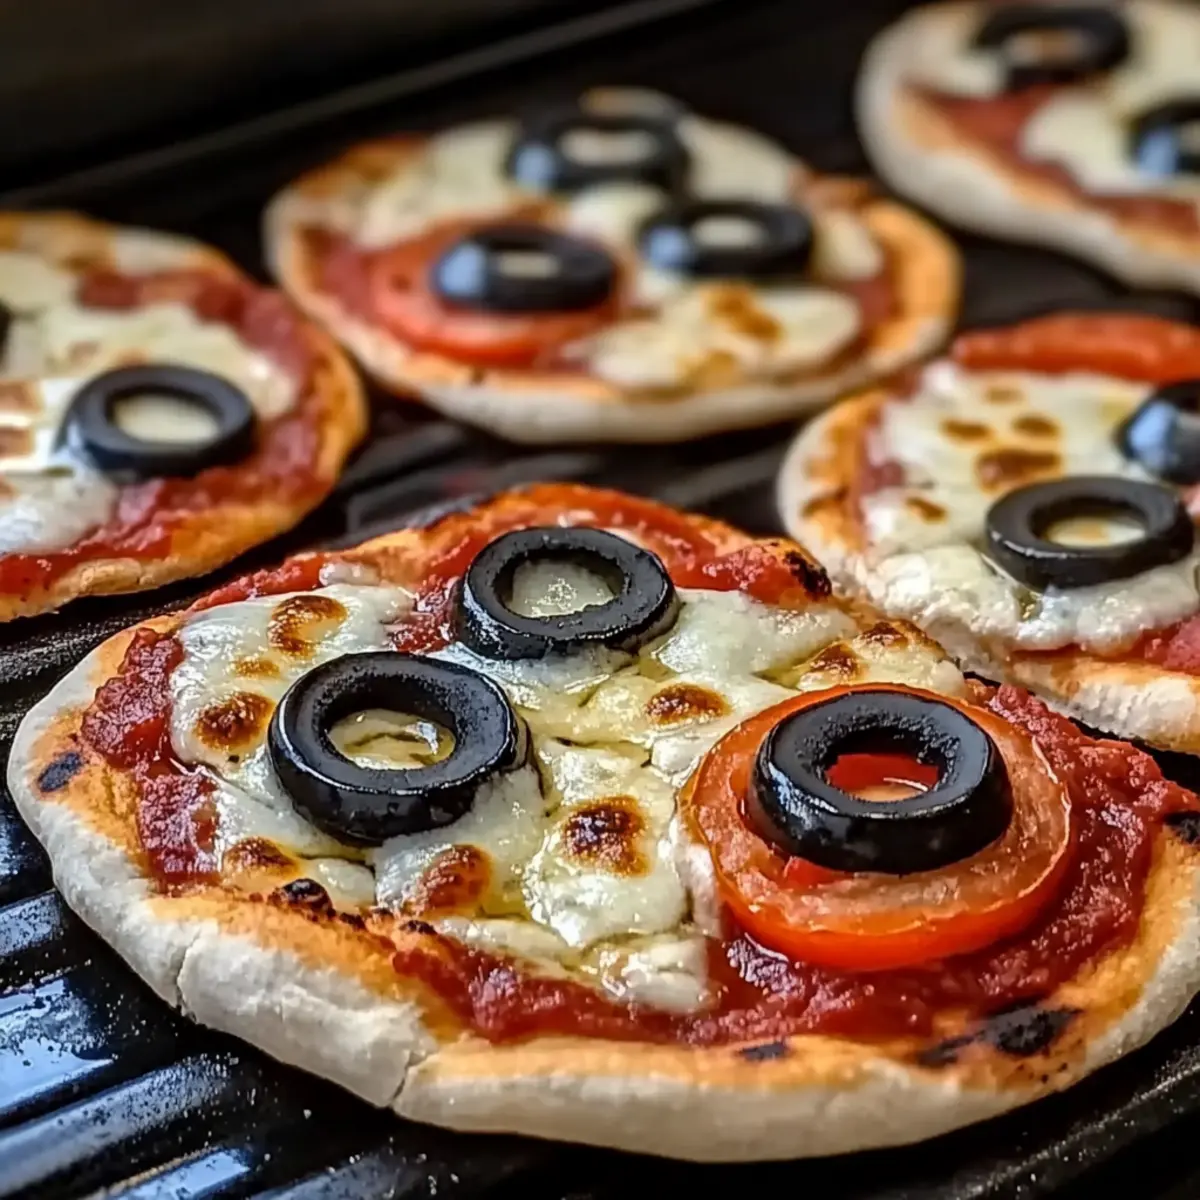
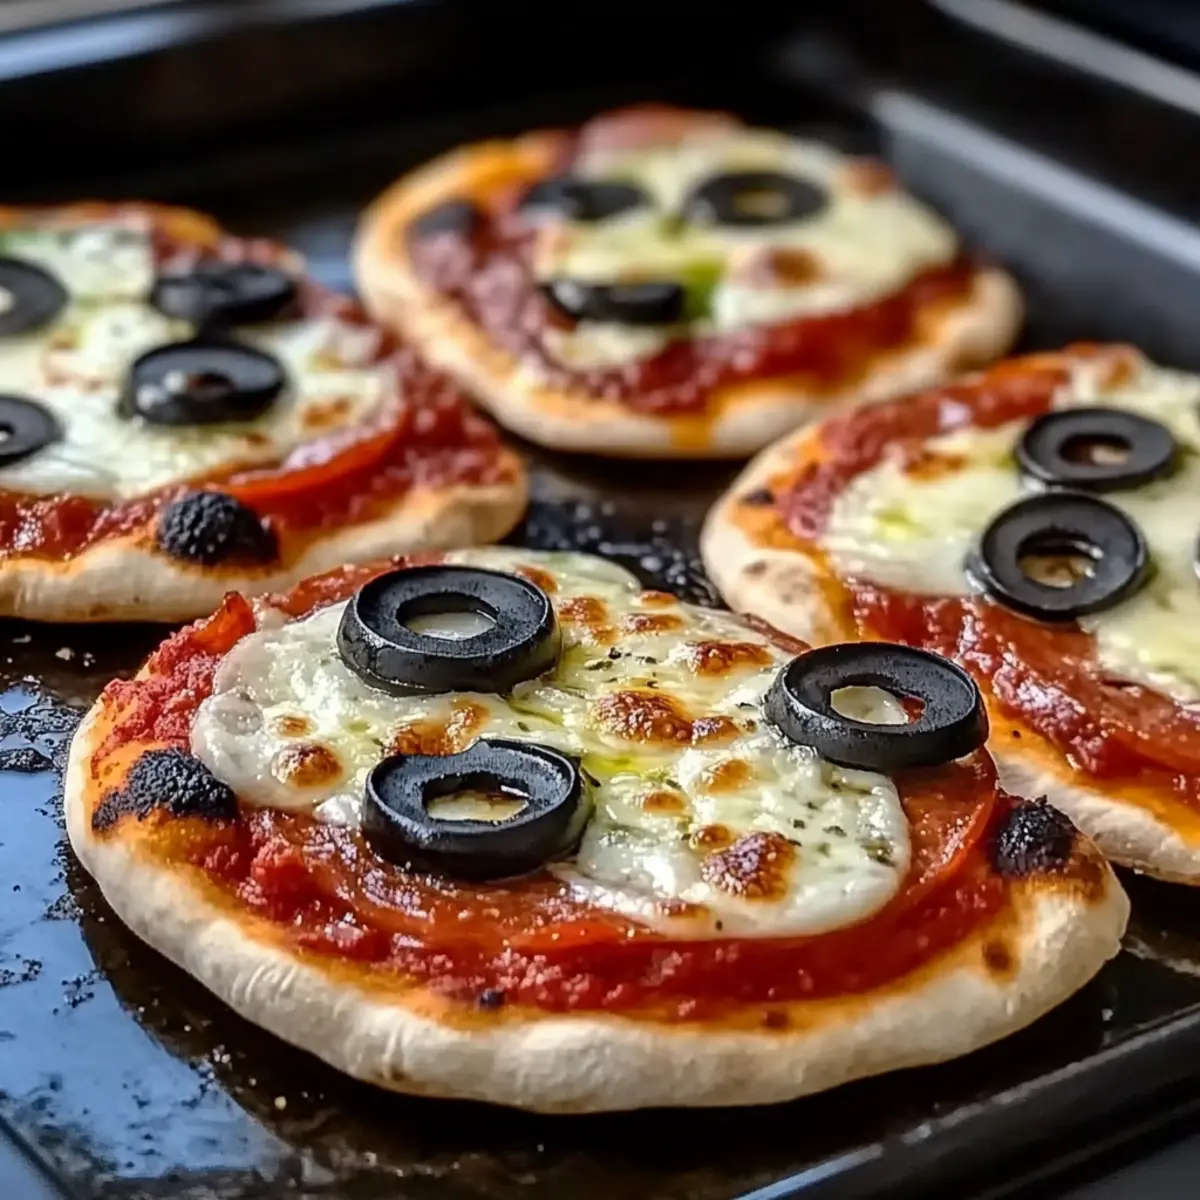
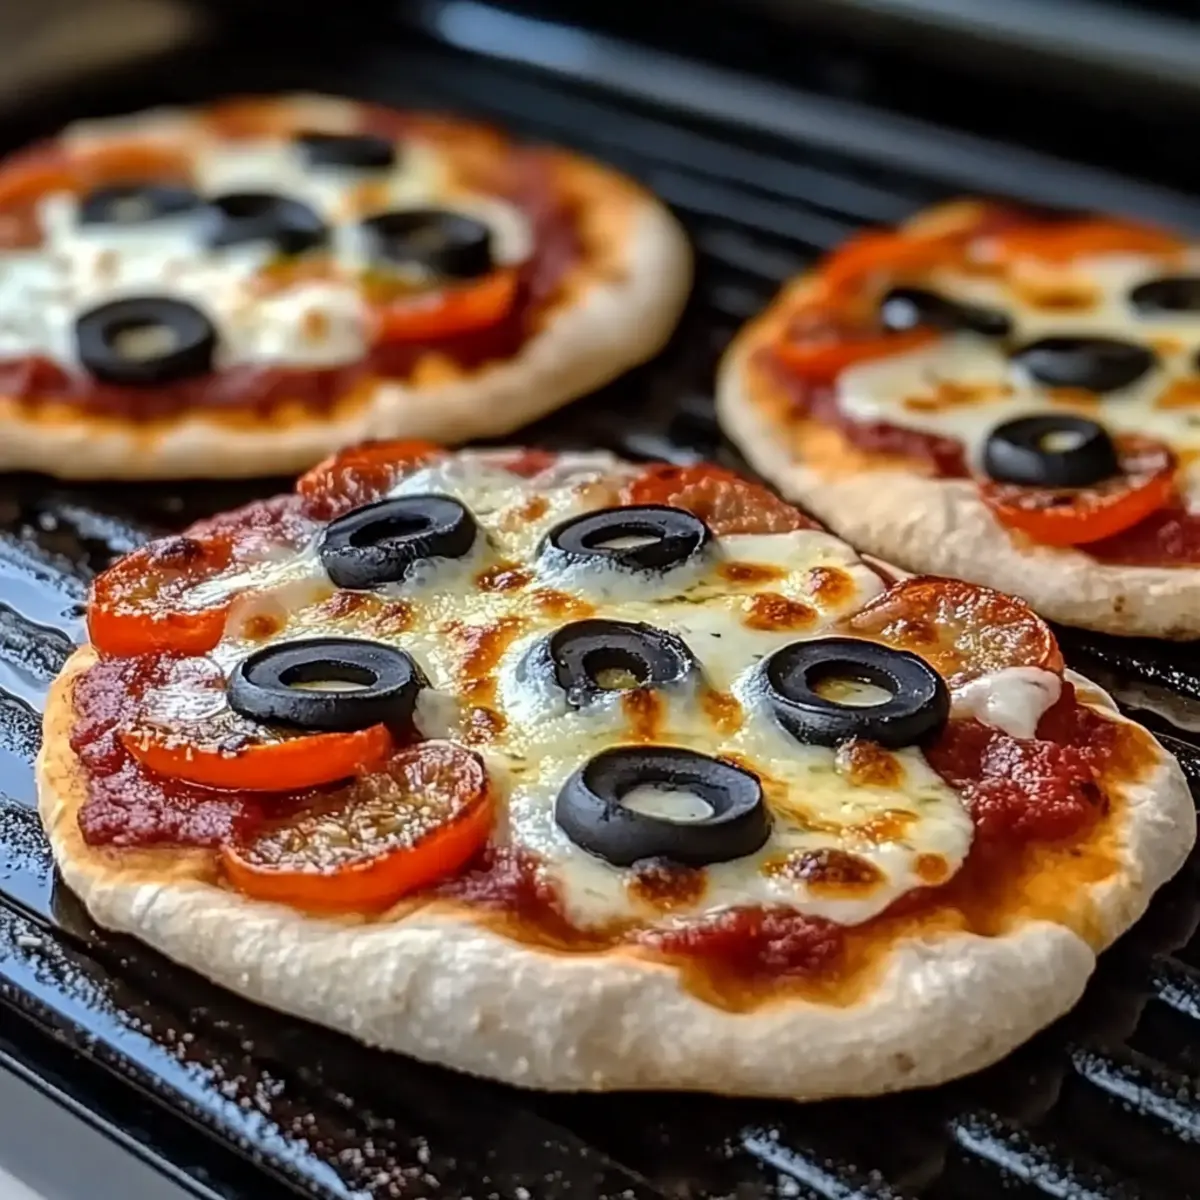
Place the stretched dough onto the oiled griddle, cooking for about 2–3 minutes. Keep a close eye on it as it cooks; the bottom should turn a beautiful golden brown. You might see some bubbles forming on the surface, indicating it’s cooking through nicely. Flip it once ready for the next tasty step.
Step 5: Flip and Top
After the first side of the dough has browned, carefully flip it over using a large spatula. Now, it’s time to add your pizza sauce—spread a thin layer across the browned side to keep the crust crisp. Next, sprinkle your choice of cheese and any favorite toppings on top, ensuring they’re distributed evenly for optimal flavor.
Step 6: Cover and Cook
With all toppings in place, cover the griddle with a lid to trap heat and promote even melting of the cheese. Let your pizza cook for approximately 5–7 minutes. Keep an eye on it, and once the cheese is bubbling and melted, you’ll know it’s time to move to the next step for your pizza on the Blackstone griddle.
Step 7: Slice and Serve
Once the cheese is perfectly melted and the toppings are heated through, carefully transfer your pizza from the griddle to a cutting board. Allow it to cool for a minute before slicing it into wedges. Serve your delicious crispy pizza hot, perhaps with a drizzle of olive oil or a sprinkle of fresh basil for that gourmet touch!
Pizza on the Blackstone Griddle Variations
Feel free to unleash your creativity and make this pizza recipe your own with these delightful twists!
- Dairy-Free: Substitute cheese with vegan cheese or nutritional yeast for a cheesy flavor without dairy.
- Gluten-Free Dough: Use a gluten-free pizza crust mix to make the recipe accessible for gluten-sensitive family members.
- Spicy Kick: Add jalapeños or crushed red pepper flakes to your sauce or toppings for a delicious spice infusion.
- Herb-Infused Olive Oil: Enhance flavor by infusing your olive oil with garlic or fresh herbs before drizzling onto the griddle.
- Sweet & Savory Combo: Incorporate fresh fruits like figs or peaches as toppings for a sweet contrast with savory ingredients.
- Mini Pizzas: Create a fun pizza bar by preparing smaller dough rounds, allowing guests to personalize their own pizzas with various toppings.
- BBQ Chicken Style: Swap pizza sauce for BBQ sauce, and pile on shredded chicken and red onions for a smoky twist.
- Mediterranean Delight: Use feta, olives, and a sprinkle of oregano as toppings for a refreshing Mediterranean-inspired pizza.
For quick, mouthwatering pizza ideas, check out how to make Air Fryer Pizza or explore the delicious flavors of Griddled Cheesesteak.
Expert Tips for Pizza on the Blackstone Griddle
-
Sauce Wisely: Use a thin layer of pizza sauce to prevent a soggy crust. Less is more for the perfect pizza on the Blackstone griddle!
-
Moisture Matters: Avoid wet toppings like watery vegetables or excess cheese, as they can lead to a soggy base. Keep it dry for a crispy finish.
-
Rotate Regularly: Move or rotate the pizza on the griddle halfway through cooking to ensure even browning and that delicious char on all sides.
-
Watch the Heat: Keep an eye on your griddle’s temperature. If the oil starts to smoke, lower the heat to avoid burning your delicious pizza on the Blackstone griddle.
-
Dough Thickness: Experiment with different dough thicknesses. Bring it to personal preference—thicker dough means longer cooking time for perfect texture!
Make Ahead Options
Preparing your pizza on the Blackstone griddle ahead of time can make weeknight cooking a breeze! You can prepare the dough up to 24 hours in advance—just store it in an airtight container in the refrigerator to maintain its freshness. Additionally, you can chop your favorite toppings and store them in separate containers for up to 3 days. To ensure the best quality, avoid adding wet toppings too early; instead, keep them separate until you’re ready to cook. When it’s time to eat, simply preheat your griddle, stretch the dough, and load it with sauce, cheese, and toppings right before grilling. Enjoy a delightful, homemade pizza with minimal effort!
What to Serve with Crispy Grilled Pizza on the Blackstone Griddle?
Elevate your pizza night by pairing it with delicious sides that bring out the best in your homemade creation.
-
Simple Green Salad: A refreshing mix of leafy greens, cherry tomatoes, and a light vinaigrette perfectly complements the rich flavors of pizza.
-
Garlic Breadsticks: These warm, buttery sticks are ideal for soaking up extra sauce and adding a delightful crunch to your meal.
-
Roasted Vegetables: Savory roasted veggies, like bell peppers and zucchini, enhance the pizza’s fresh toppings while adding a pop of color.
-
Pasta Salad: A chilled pasta salad with olives, sun-dried tomatoes, and feta cheese creates a delightful contrast in temperature and texture.
-
Caprese Salad: Juicy tomatoes, fresh mozzarella, and fragrant basil create a vibrant, refreshing side that pairs beautifully with the charred pizza.
-
Craft Beer: A hoppy IPA or crisp lager brings out the flavors of the grilled pizza while keeping the vibe casual and fun.
-
Red Wine: A glass of Chianti or Sangiovese adds a sophisticated touch, enhancing the Italian essence of your meal while complementing the cheese and toppings.
-
Chocolate Chip Cookies: For dessert, warm cookies offer a sweet ending, balancing the savory pizza with gooey, chocolatey goodness.
Storage Tips for Pizza on the Blackstone Griddle
Fridge: Store leftovers in an airtight container in the refrigerator for up to 3-4 days to keep them fresh and delicious.
Freezer: For longer storage, freeze cooled pizza slices individually, wrapped tightly, for up to one month. This method preserves flavor and texture.
Reheating: To enjoy your leftover pizza, reheat it on the Blackstone griddle for a few minutes or in the oven at 350°F until warmed through and crispy.
Quality Check: Before consuming leftovers, check for any unusual smell or appearance to ensure your pizza on the Blackstone griddle is still good to eat!
Crispy Grilled Pizza on the Blackstone Griddle Recipe FAQs
How do I choose the right pizza dough?
Absolutely! For the best results, opt for room-temperature dough, which is much easier to stretch without tearing. If you’re using store-bought dough, check the packaging; it should be pliable and smooth. Avoid any dough that appears dry or overly stiff, as this can affect your final pizza’s texture.
What’s the best way to store leftover pizza?
Store your leftover pizza in an airtight container in the refrigerator for up to 3-4 days. To keep the crust crispy, I recommend placing parchment paper between the slices. If you want to enjoy your pizza later, wrap cooled slices tightly in plastic wrap and freeze them individually for up to one month.
Can I freeze my pizza on the Blackstone griddle?
Yes! To freeze your pizza, allow it to cool completely first. Then wrap each slice tightly in plastic wrap or aluminum foil and place them in a freezer-safe bag. Be sure to label it with the date. When you’re ready to enjoy, you can reheat them directly from the freezer on your Blackstone griddle, or let them thaw in the fridge overnight before reheating.
What should I do if my crust isn’t crispy?
If you’re finding that your crust isn’t crispy, it could be due to too much sauce or wet toppings. Always opt for a thin layer of sauce and keep toppings drier to maintain that all-important crust quality. Another tip is to make sure your griddle is fully preheated before you start cooking the dough; a hot griddle seals the outside and helps form that nice crust.
Are there any dietary considerations I should keep in mind?
Very! If you’re cooking for someone with allergies, be cautious with your cheese and toppings. Common allergens like gluten, dairy, and certain meats can be swapped out easily; for instance, using gluten-free dough, vegan cheese, or selecting only fresh vegetables as toppings. Always double-check label ingredients if using pre-made items to ensure they’re allergy-friendly for your guests!
Can I make mini pizzas for a party?
The more the merrier! You can absolutely make mini pizzas by rolling out smaller portions of dough. This way, guests can choose their own toppings at a DIY toppings station, making it not just a meal but an interactive experience as well! Just keep an eye on the cooking time, as smaller pizzas will require less time on the griddle.
Crispy Pizza on the Blackstone Griddle Your New Favorite Dinner
Ingredients
Equipment
Method
- Preheat your Blackstone griddle to a medium heat, between 325–375°F, for 5–10 minutes.
- On a floured surface, stretch and shape the pizza dough into your desired thickness.
- Lightly drizzle olive oil onto the hot griddle surface and spread evenly.
- Cook the stretched dough on the oiled griddle for 2–3 minutes until golden brown.
- Flip the dough, spread a thin layer of pizza sauce, and add cheese and toppings.
- Cover the griddle with a lid and cook for 5–7 minutes until cheese is melted.
- Transfer pizza to a cutting board, cool for a minute, then slice and serve hot.
Leave a Reply