
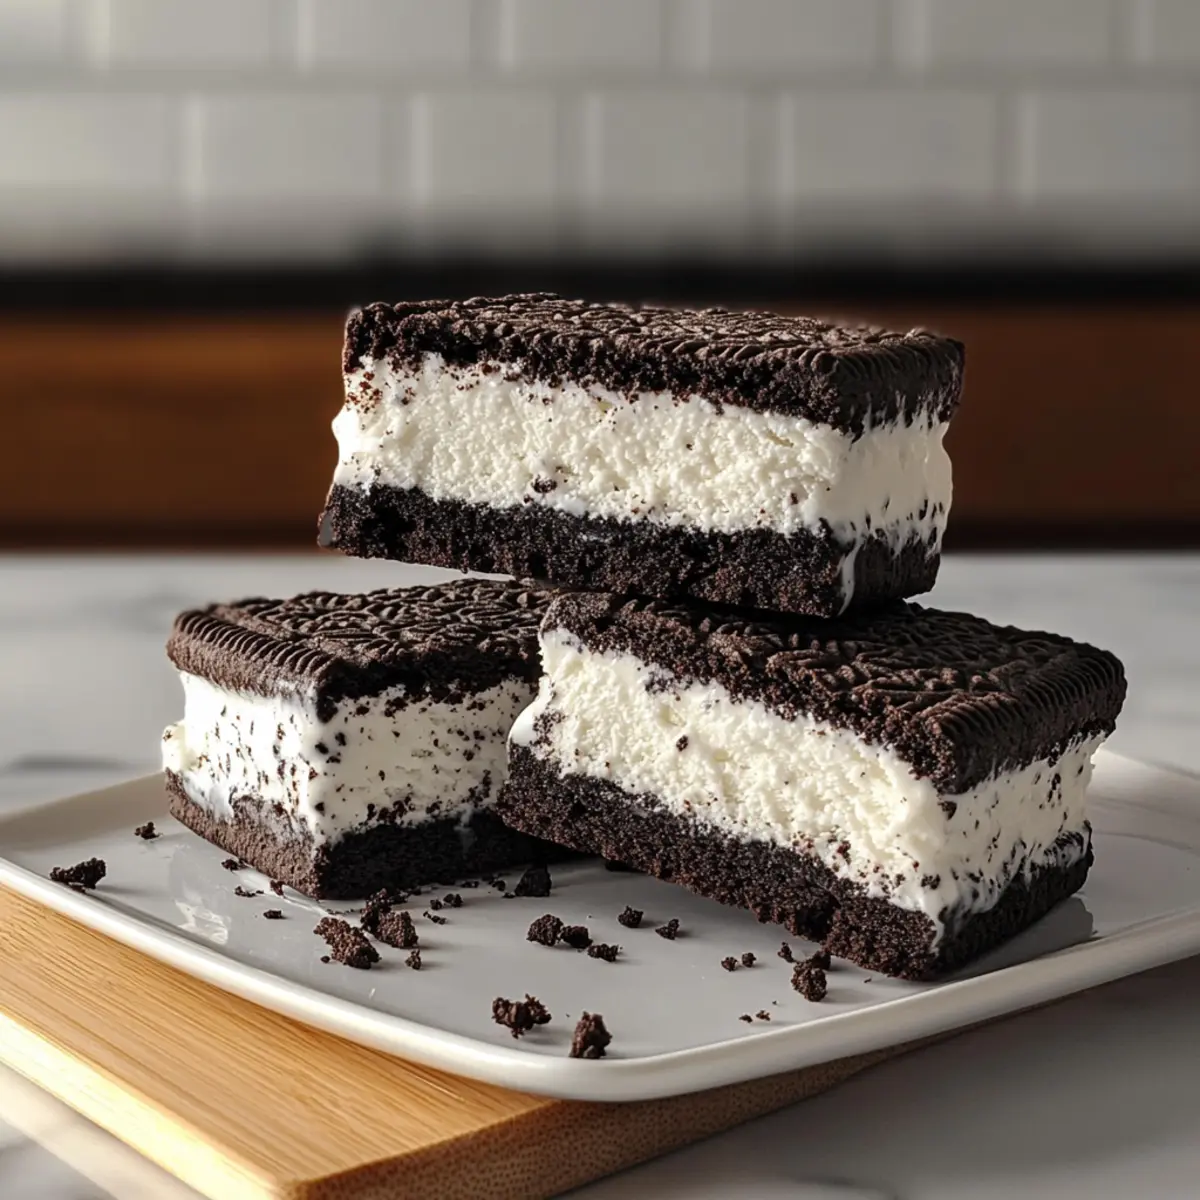
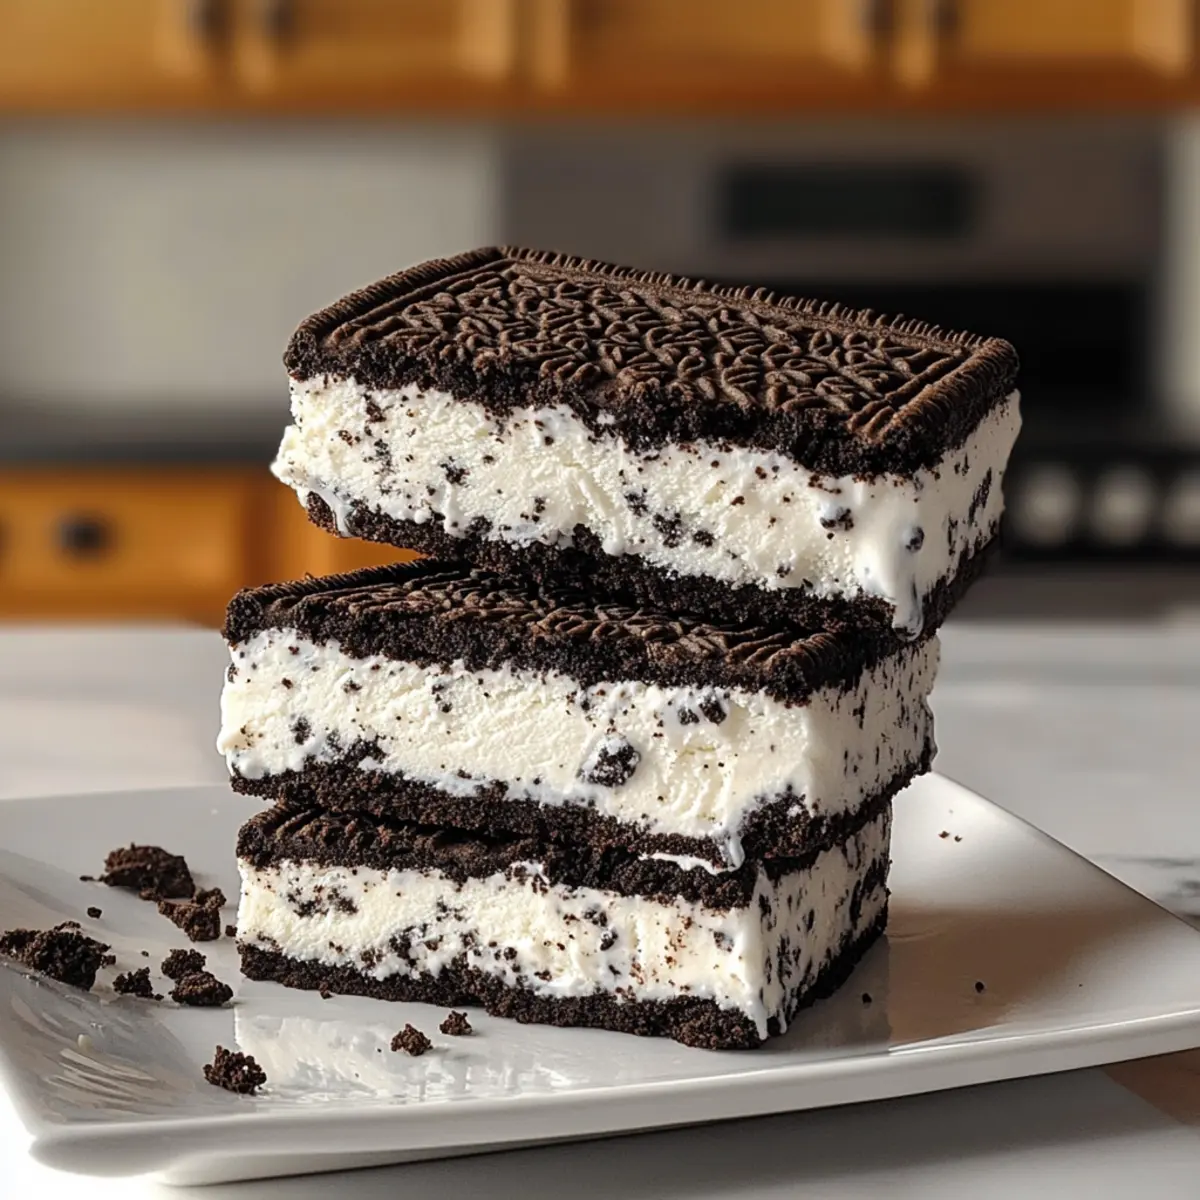
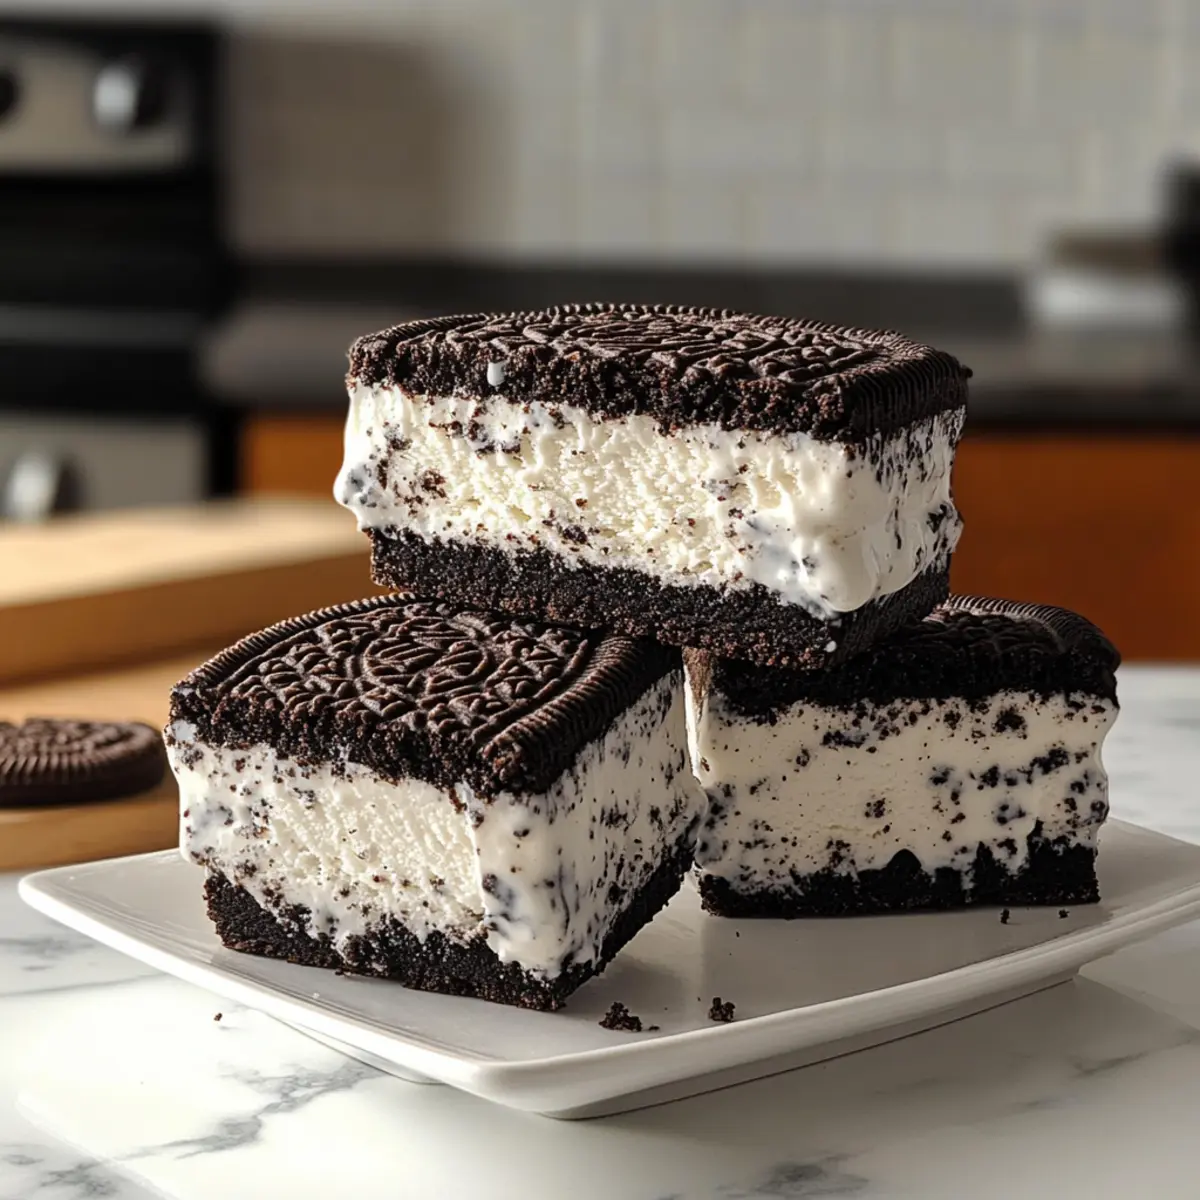
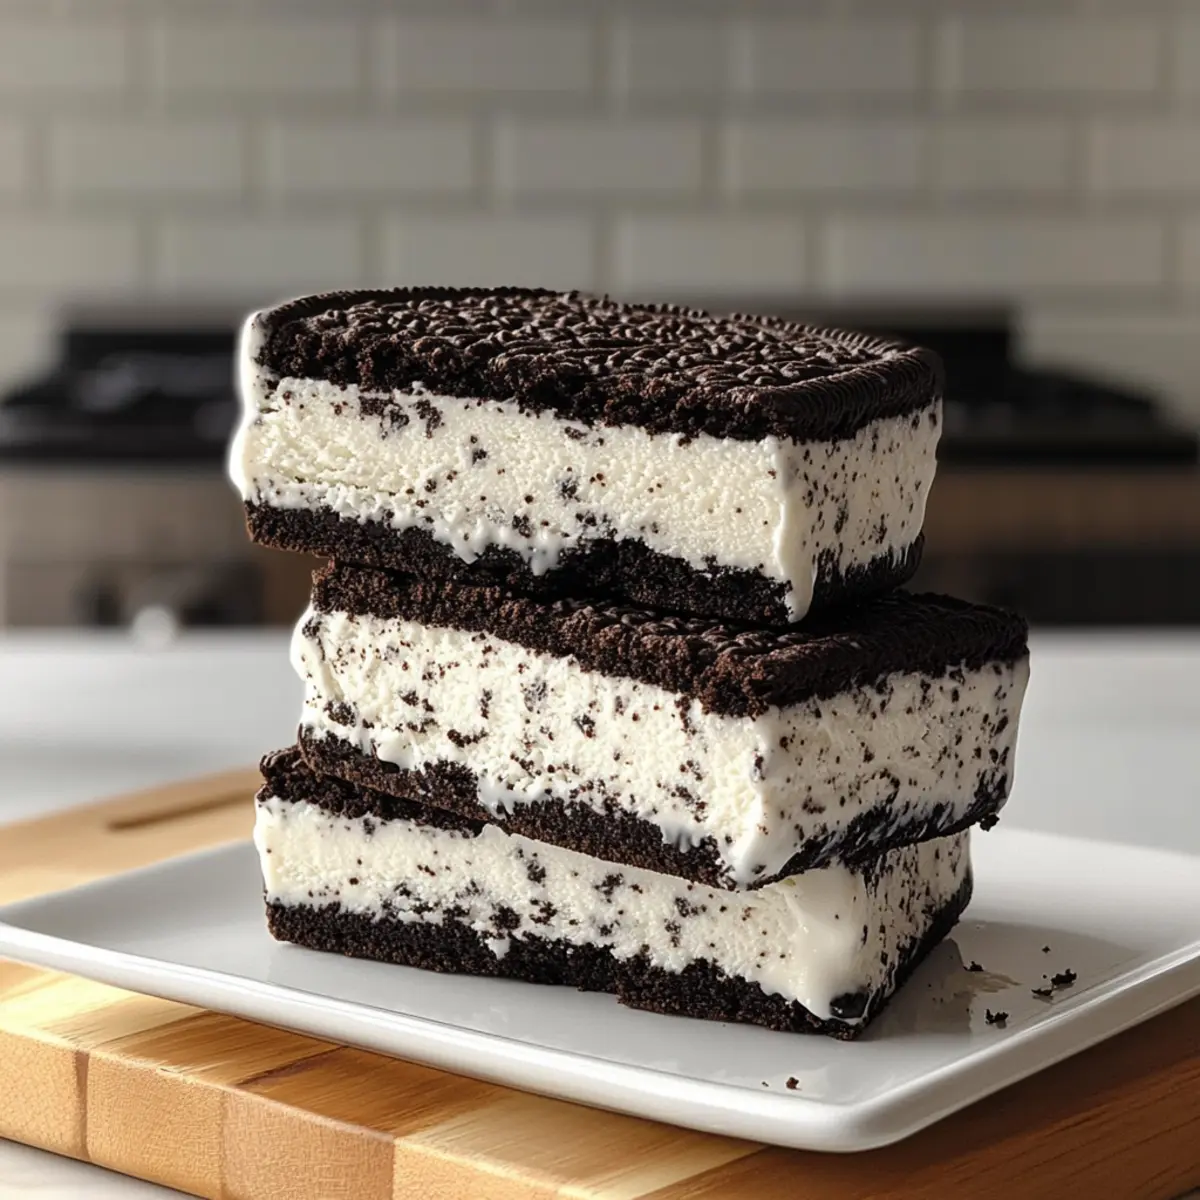
As I rummaged through my pantry, I stumbled upon a stash of Oreo cookies, and a delicious idea sparked in my mind—Homemade Oreo Ice Cream Sandwiches! Imagine biting into a crunchy exterior, giving way to a luxuriously creamy vanilla filling that dances on your taste buds. This no-bake dessert is not just a delightful treat; it’s a breeze to prepare, making it a perfect choice for those hot summer days or a last-minute dessert craving. Plus, with endless possibilities for variations—whether you swap in different cookies or add in your favorite mix-ins—this recipe promises to be a showstopper at any gathering. Curious how to make these irresistible sandwiches? Let’s dive into the creamy goodness!
Why are Oreo Ice Cream Sandwiches irresistible?
Decadent Delight: The combination of crunchy Oreos and rich vanilla filling creates a taste sensation that will leave you wanting more.
Effortless Preparation: With no baking required, this recipe is perfect for anyone looking for a quick, homemade dessert.
Kid-Friendly Fun: Gather the little ones to help make these sweet treats, turning dessert time into family bonding time.
Versatile Variations: Enjoy creativity at its best; swap in different cookies and mix-ins like mini chocolate chips or fruit for a personalized twist.
Perfect for Any Occasion: Whether it’s a summer barbecue or a movie night at home, these sandwiches will impress your guests and satisfy cravings in no time.
For an extra delightful experience, consider serving alongside fresh fruits or a scoop of fruit sorbet for a refreshing contrast!
Oreo Ice Cream Sandwiches Ingredients
For the Sandwich Base
- Oreo Cookies – A delightful crunch that forms the foundation of this dessert; feel free to use any chocolate sandwich cookie for variation.
- Butter – Binds the Oreo crumbs for the crust; substitute with coconut oil for a dairy-free option.
For the Creamy Filling
- Heavy Cream – Whipped to perfection, this creates a light and fluffy filling; alternatively, chilled coconut cream can be used for a dairy-free version.
- Vanilla Extract – Enhances the flavor of the filling; no substitutions are necessary, but you can try almond extract for a different twist.
- Condensed Milk – Adds necessary sweetness and creaminess to the filling; sweetened condensed coconut milk works well for a dairy-free alternative.
Optional Add-ins
- Mini Chocolate Chips – Add a layer of fun texture for chocolate lovers; use as desired for extra flavor.
- Cocoa Powder – Incorporate for a richer chocolate taste in your filling if desired.
Step‑by‑Step Instructions for Oreo Ice Cream Sandwiches
Step 1: Prepare Pan
Begin by lining a 9×9 inch baking pan with parchment paper, leaving some overhang on the sides for easy removal later. This will be the base for your Oreo Ice Cream Sandwiches. Make sure the parchment is smooth against the edges to prevent any sticking, giving a clean presentation when the sandwiches are done.
Step 2: Crush Cookies
Next, take your Oreo cookies and crush them until you have fine crumbs. You can do this by either blitzing them in a food processor or placing them in a sealed plastic bag and crushing with a rolling pin. Aim for a texture similar to sand, as this will help create a solid crust for your sandwiches.
Step 3: Make Crust
Reserve 100 grams of your crushed cookies for the topping. In a mixing bowl, combine the remaining crumbs with melted butter until well blended. Press half of this mixture firmly into the bottom of your lined baking pan. Freeze the crust for about 15 minutes, allowing it to set up nicely and create a firm base for your sandwiches.
Step 4: Whip Cream
While the crust sets, grab a large mixing bowl and beat the heavy cream along with vanilla extract until stiff peaks form, approximately 3-5 minutes using an electric mixer. The goal is to achieve a fluffy texture that will elevate the filling of your Oreo Ice Cream Sandwiches, ensuring a delightful contrast with the crunchy crust.
Step 5: Combine Filling
Gently fold the reserved condensed milk into the whipped cream, followed by the reserved cookie crumbs. Using a spatula, ensure that you mix just until combined, preserving the light texture of the whipped cream. This creamy mixture will serve as a luscious filling that complements the crunchy base perfectly.
Step 6: Layer Filling
Pour the creamy filling over the set crust, using a spatula to spread it evenly to the edges of the pan. Smooth the top for a nice finish. Then, cover the pan with foil and place it in the freezer, allowing it to firm up for 1 to 2 hours, or until solid enough to cut into sandwiches.
Step 7: Top with Crumbs
After the ice cream filling has set, remove the pan from the freezer. Sprinkle the remaining Oreo crumbs evenly over the top and press down gently to ensure they adhere. Return the pan to the freezer for at least 6 hours to fully freeze the sandwiches, locking in all that deliciousness.
Step 8: Cut and Serve
To cut your Oreo Ice Cream Sandwiches, lift them out of the pan using the parchment overhang. Place on a cutting board and slice with a hot knife for clean edges. Serve immediately, or store them in an airtight container in the freezer, keeping the enjoyment going for days to come!
How to Store and Freeze Oreo Ice Cream Sandwiches
Fridge: Store Oreo Ice Cream Sandwiches in an airtight container for up to 3 days if you plan to enjoy them soon; however, they’re best kept frozen.
Freezer: For longer storage, wrap each sandwich in plastic wrap or foil, then place them in a freezer-safe container. They will remain fresh for up to 2 weeks.
Reheating: When ready to serve, allow the sandwiches to sit at room temperature for about 5-10 minutes to soften before cutting, ensuring a delightful experience with each creamy bite.
Avoid Odors: Make sure to store your sandwiches in an airtight container to prevent any unwanted freezer odors from seeping in, keeping their rich flavor intact.
Expert Tips for Oreo Ice Cream Sandwiches
-
Perfect Peaks: Ensure you whip the heavy cream to stiff peaks for optimal filling texture. This is key to creamy, dreamy enjoyment!
-
Smooth Cuts: Dip your knife in hot water before slicing the sandwiches to achieve clean edges without pulling the filling.
-
Softening Trick: If the sandwiches are too hard to cut or eat, let them sit at room temperature for 5-10 minutes for easier handling.
-
Storage Solutions: Always store your Oreo Ice Cream Sandwiches in an airtight container to keep them fresh and free from freezer odors.
-
Creative Variations: Feel free to experiment with different sandwich cookies or fun mix-ins to customize your Oreo Ice Cream Sandwiches to your taste!
Oreo Ice Cream Sandwiches Variations
Feel free to get creative and personalize your Oreo Ice Cream Sandwiches for a delightful twist!
-
Dairy-Free: Substitute heavy cream with chilled coconut cream and use sweetened condensed coconut milk for a tasty dairy-free option.
You’ll still enjoy the same creamy texture while embracing a dairy-free lifestyle. -
Flavor Swap: Use different flavored sandwich cookies, like mint Oreos or peanut butter sandwiches, for a unique flavor experience.
Each choice adds a fun spin, ensuring there’s a flavor for everyone! -
Add Some Heat: Incorporate a pinch of cayenne or chili powder into the filling for a spicy kick.
This unexpected twist wakes up your taste buds and adds an adventurous element. -
Nutty Crunch: Fold in chopped nuts or nut butter into the filling for an added crunch and dimension.
Pecans or almonds infuse a delightful crunch that pairs beautifully with the creamy texture. -
Chocolate Drizzle: Drizzle melted chocolate or caramel sauce on top before freezing for a decadently sweet finish.
This added layer of flavor takes your ice cream sandwiches to a whole new level of indulgence. -
Fresh Fruit: Add mashed bananas or crushed berries into the filling for a fruity twist that lightens up the dessert.
The freshness of the fruit balances the richness, creating a joyful burst of flavor in each bite. -
Mini Chocolate Chip Extravaganza: Toss in mini chocolate chips into the filling for extra bursts of chocolate goodness.
This delightful addition enhances both texture and flavor for chocolate lovers. -
Cocoa Delight: Mix cocoa powder into the filling for a richer chocolate taste if you want a more intense chocolate experience.
This delightful addition can transform your sandwiches into a chocolate lover’s dream!
For an extra treat, consider serving your sandwich with a scoop of Lemon Cream Cheese or enjoy it alongside a refreshing bowl of Shrimp Rice Garlic for a contrasting flavor experience.
What to Serve with Homemade Oreo Ice Cream Sandwiches
Elevate your dessert experience with delicious pairings that complement the creamy goodness of these indulgent sandwiches.
-
Fresh Berries: Juicy strawberries, raspberries, or blueberries add a refreshing burst of flavor that balances the richness of the ice cream sandwiches. Their tartness cuts through the sweetness, offering a mimicking contrast that’s simply delightful.
-
Fruit Sorbet: A scoop of fruity sorbet provides a light, icy contrast. Opt for flavors like mango or lemon to awaken your taste buds, creating a harmonious balance with the rich Oreo filling.
-
Cold Milk: An ice-cold glass of milk is a classic pairing, enhancing the chocolate and creamy flavors. The nostalgic combination brings back childhood memories and delights the palate.
-
Espresso or Coffee: A shot of espresso or a warm cup of coffee complements the sweetness beautifully. The bitterness of the coffee harmonizes wonderfully with the rich flavors of the Oreo Ice Cream Sandwiches, making for a sophisticated dessert experience.
-
Chocolate Drizzle: Elevate the presentation by drizzling chocolate sauce over the sandwiches before serving. It adds a decadent touch, enhancing both flavor and aesthetic appeal in each delightful bite.
-
Nuts or Crushed Cookies: Sprinkle chopped nuts or additional crushed cookies on top for added texture and crunch. This extra layer creates a more dynamic eating experience, pleasing both the palate and the eyes.
-
Whipped Cream: A generous dollop of freshly whipped cream adds an extra layer of creaminess that pairs perfectly. The lightness of the cream contrasts brilliantly with the crunch of the Oreos, balancing flavors and textures.
-
Ice Cream Sundae: Transform your Oreo Ice Cream Sandwiches into a sundae by adding a scoop of vanilla ice cream on the side. Top with your favorite sundae toppings to create a sumptuous treat that takes dessert to the next level.
-
Caramel Sauce: Drizzling some warm caramel sauce adds a sweet, buttery flavor that complements the chocolate cookie crust beautifully. Each bite becomes a rich, indulgent experience.
Consider these accompaniments as perfect partners to your delightful Homemade Oreo Ice Cream Sandwiches, creating a memorable, multi-textured dessert experience!
Make Ahead Options
These Homemade Oreo Ice Cream Sandwiches are a perfect candidate for meal prep! You can prepare the crust and the creamy filling up to 24 hours in advance. Simply make the crust and freeze it as instructed, then whip the cream and fold in the condensed milk and Oreo crumbs just before you’re ready to use it. For an effortless process, you can assemble the entire dish and freeze the sandwiches up to 3 days prior to serving. To maintain quality, store them in an airtight container to prevent freezer odors. When it’s time to indulge, just cut them into slices after a brief thaw at room temperature, and you’ll enjoy these delightful treats just as if they were freshly made!
Oreo Ice Cream Sandwiches Recipe FAQs
What kind of cookies should I use for Oreo Ice Cream Sandwiches?
Absolutely! While Oreos are a classic choice, you can experiment with any chocolate sandwich cookie to suit your taste. Think chocolate chip cookies or even flavored varieties, like peanut butter or birthday cake! This makes the recipe fun and allows for creativity.
How long can I store Oreo Ice Cream Sandwiches in the freezer?
These delightful treats can be kept in an airtight container in the freezer for up to 2 weeks. To maintain the best quality, make sure they are well-wrapped to prevent freezer burn and unwanted odors from affecting their delicious flavor.
Can I freeze Oreo Ice Cream Sandwiches?
Definitely! To freeze them, wrap each sandwich in plastic wrap or aluminum foil, and place them in a freezer-safe container. When you’re ready to enjoy, just let them sit at room temperature for about 5-10 minutes to soften up a bit for easier eating.
What if my heavy cream doesn’t whip to stiff peaks?
Very! If you find your heavy cream is not whipping to stiff peaks as expected, make sure you’re using cold cream and a chilled mixing bowl. Whipping for a few more minutes can help, but if it still won’t whip properly, try adding a tablespoon of powdered sugar to stabilize it.
Are Oreo Ice Cream Sandwiches safe for my kids?
Absolutely! These homemade treats are generally kid-friendly. However, be mindful of allergies, particularly triggers like dairy or gluten. You can easily customize the recipe using dairy-free substitutions like coconut cream and gluten-free cookies to cater to special dietary needs.
Creamy Oreo Ice Cream Sandwiches for Your Sweet Cravings
Ingredients
Equipment
Method
- Line a 9x9 inch baking pan with parchment paper, leaving overhang for removal.
- Crush Oreo cookies into fine crumbs using a food processor or rolling pin.
- Reserve 100 grams of crumbs, and combine the rest with melted butter. Press half into the pan and freeze for 15 minutes.
- Beat heavy cream and vanilla extract until stiff peaks form, about 3-5 minutes.
- Fold condensed milk and reserved cookie crumbs into the whipped cream until just combined.
- Spread the creamy filling over the crust, smooth the top, cover, and freeze for 1 to 2 hours.
- Sprinkle remaining cookie crumbs on top and press down lightly. Freeze for at least 6 hours.
- Lift the sandwiches out using parchment overhang, cut with a hot knife, and serve.
Leave a Reply